


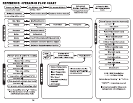
REFERENCE
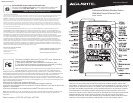
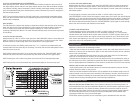
BUTTON OPERATION DESCRIPTIONS:
The main unit has 8 buttons for user operation. Please refer to the following for button
operation description:
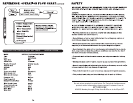
1. MIN BUTTON: Press the “MIN” button to enter the MIN MODE. The “MIN” icon on the main
unit will be displayed. Press the “EXIT” button to exit the MIN MODE. The “MIN” icon will
disappear.
2. MAX BUTTON: Press the “MAX” button to enter the MAX MODE. The “MAX” icon on the main
unit will be displayed. Press the “EXIT” button to exit the MAX MODE. The “MAX” icon will
disappear.
3. DISPLAY (DAILY RECORD) BUTTON: Press the “DISPLAY” button to toggle between the
following information in the upper right hand side of the main unit: WIND CHILL, HEAT INDEX,
DEW POINT.
4. CLEAR BUTTON: Press the “CLEAR” button to clear any settings currently stored in the main
unit.
5. PRESSURE SET-UP (ON/OFF/RECORD) BUTTON: Press the “PRESSURE SET-UP” button to view
the past 19 hours of recorded air pressure. Press and hold for 3 seconds to enter the general
set-up mode.
6. ALARM BUTTON: Press the “ALARM” button to stop any alarm for one day when the alarm
sounds. Press and hold for 3 seconds to enter the alarm set-up mode.
7. CHANNEL (EXIT) BUTTON: Press the “CHANNEL” button to view the outdoor temperature and
humidity for any additional sensors used. Additional sensors are sold separately. Additional
sensors are optional. Press and hold the “CHANNEL” button will force the main unit into signal
searching mode.
NOTE: Pressing the “EXIT” button will exit all of the MIN/MAX, SET-UP, and ALARM settings
while in these modes.
8. SNOOZE BUTTON: Press the “SNOOZE” button to enter into the snooze mode for 5 minutes
when the time alarm is activated. The ALARM icon will be displayed and blinking.
NOTE: In set-up and alarm setting mode, pressing either the “MIN” or “MAX” buttons will allow
the user to change any values. The user may press and hold the button for rapid scroll through
of values.
WIRELESS SENSOR BATTERY REPLACEMENT:
When the low battery indicator icon becomes present, it is recommended that you change the
batteries. Replace only with the same or equivalent type of fresh alkaline batteries. This
method of battery replacement ensures there will be no loss in MIN/MAX and history data.
However, if main unit or sensors have remained without batteries for an extended period of
time, the main unit will lose the MIN/MAX and all weather data recordings and will have to be
synchronized again.
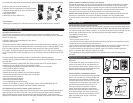
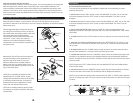
ACCESSING THE BATTERY COMPARTMENTS
Main Unit: Open the battery cover located on the back of the unit. Remove the screw set
provided for wall mount use and insert 3 fresh “AA” batteries. (Batteries not included). Replace
battery door cover.
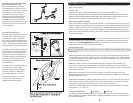
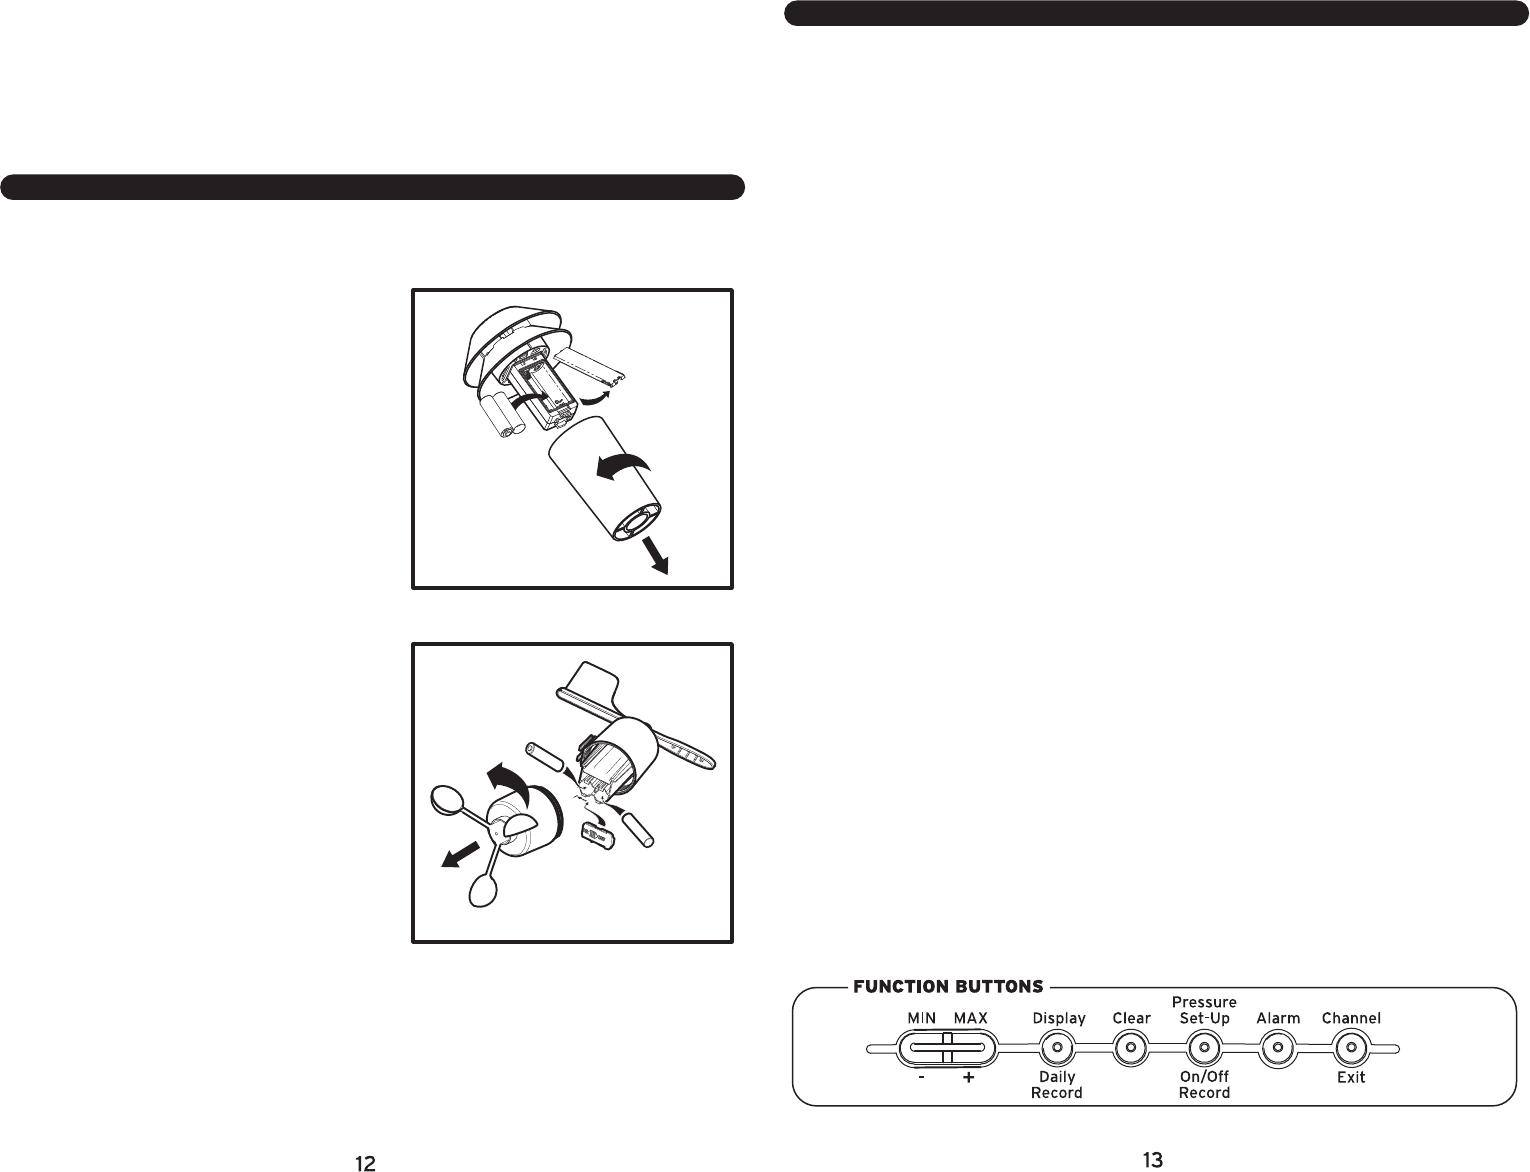
Thermo-Hygrometer Sensor: Rotate and pull the
top casing from the bottom cone by turning the
unit upside down and rotating counter-clock wise
until casing pulls apart. Slide the battery
compartment cover (located on the side of the
sensor) off. Insert 2 fresh “AA” batteries
(batteries not included). Replace the battery
compartment cover and rotate the top back into
the bottom piece.
Wind Sensor: Twist off the top from the bottom
and open the battery cover located on the
bottom of the sensor. Insert 2 fresh “AA”
batteries. (Batteries not included). Replace
battery door cover by putting battery cover on
half way and then sliding into place. Twist on the
top to the bottom piece.
NOTE: When reinstalling the batteries while
holding down the “CLEAR” button, all user
settings will be cleared and the unit will set back
to the factory default settings. If no button is
pushed during battery replacement, the last
record and user settings will be saved.
NOTE: When installing batteries, always install
according to the polarity indicated in the battery
compartment.
Battery
Door
Battery
Door
Bottom Cone
Top Casing
Top Casing
Bottom Casing
Batteries
Battery
Battery