


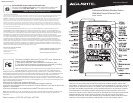

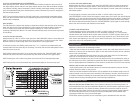
GENERAL WEATHER STATION FUNCTIONS
After the initial and general set-up, the following data will be displayed in different sections on
the main unit display.
MOON PHASE:
The moon phase indicator, found under the date display, shows the current phase of the moon
based on the yearly calendar.
CALENDAR FUNCTION: The calendar display, found under the time display shows the current
month and date with day indicator.
FORECAST ICONS: The main unit predicts weather conditions for the next 12 – 24 hours based
on the change in atmospheric pressure. The coverage area is up to 25 miles. Weather
forecasts based on atmospheric pressure changes are about 70-75% correct. As weather
conditions cannot be 100% correctly forecasted, we cannot be responsible for any loss caused
by an incorrect forecast.
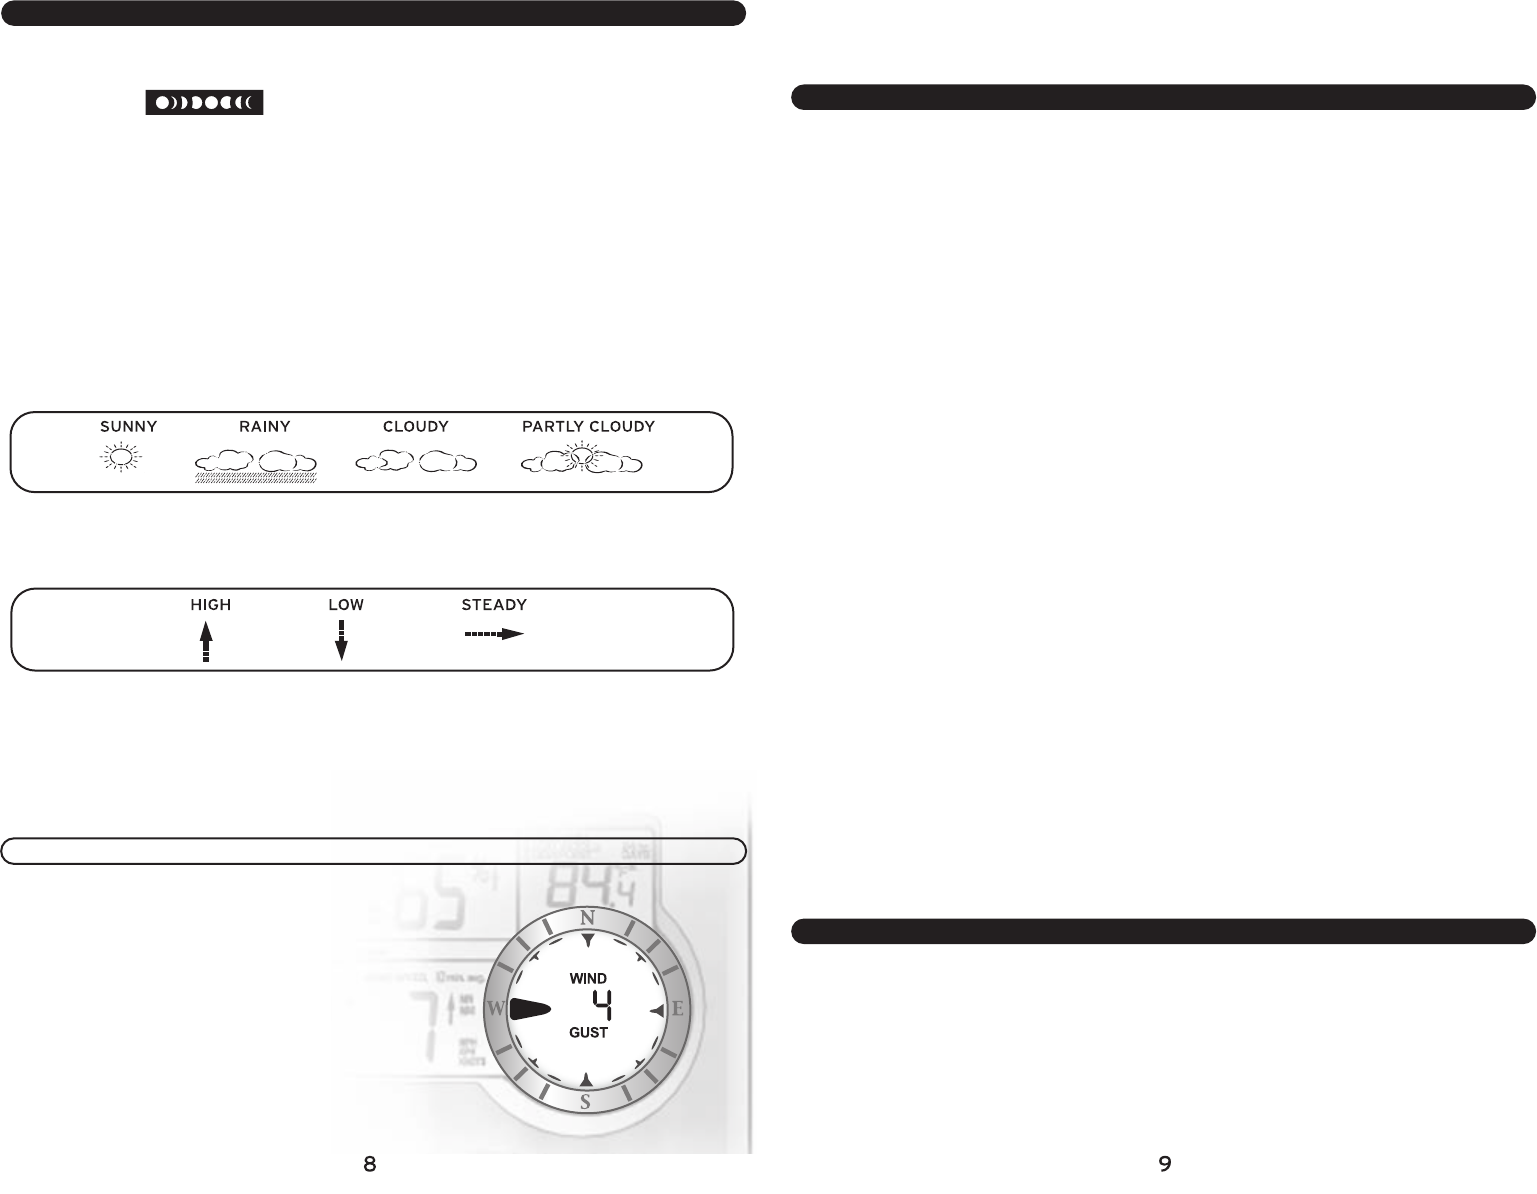
One of the following icons will represent the 24 hr. weather forecast :
TREND INDICATORS: Trend indicators for outdoor temperature and humidity and wind speed
show the trend tendency based on the past and current weather conditions.
BAROMETRIC BAR GRAPH AND PRESSURE HISTORY: The main unit shows BAROMETRIC pressure
in two forms, numerically and as a pressure history graph. The graph indicates the pressure
changes (range from +0.24inHg to -0.24inHg/ -8hPa mb to +8 hPa mb) of the current and past
1,2,3,6 and 12 hours. The numerical read out can be referenced backwards hour by hour for the
past 19 hours by pressing the “PRESSURE SET-UP” button.
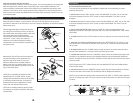
WIND FUNCTIONS:
Digital Compass: The digital compass indicates
the direction from which the wind is coming from,
marked by the arrow indicator, with 16 possible
directions. The wind direction is shown here
coming out of the WEST.
Wind Gusts: The wind gust values are located in
the center of the digital compass. The wind gusts
are transmitted from the wind sensor and are
updated approximately every minute. The wind
gust shown here is 4 (mph).
Wind Speed Average: The wind speed average is calculated by averaging the wind speed over a
period of time.
WEATHER AND TIME ALARMS
ALARM SETTING MODE: The alarm setting mode allows the user to change several alarm
settings, which is done by accessing one mode after the other, simply by pressing the
“ALARM”” button. The individual alarm can be turned on and off by using the
“ON/OFF/RECORD” button. When an alarm goes off, an audible tone will sound for one minute.
Press and hold the “ALARM” button for 3 seconds to enter the alarm setting mode. The time
display and “AL” for alarm will be blinking. This indicates the user is now in the alarm-setting
mode. In alarm setting mode, to activate or deactivate any alarm, press the “PRESSURE
SET-UP” button.
For non-time alarms, the blinking “HH.H” means the high alarm value is to be set.
For non-time alarms, the blinking “LL.L” means the low alarm value is to be set.
While in the alarm mode, use “MIN” (-) or “MAX” (+) buttons to change any of the values. Press
and hold for rapid scroll through of any values. Press the “EXIT” button to exit any of the
above alarm modes. Press the “ALARM” button to stop the alarm for one day, or press the
“SNOOZE” button to turn the alarm time off for five-minute increments.
This weather station also comes equipped with a audible storm alarm. When activated, the
storm alarm will sound if there is a sudden or extreme drop in barometric pressure or if there
is a constant progressive drop in barometric pressure. NOTE: If no button is pressed for 30
seconds, the alarm setting mode returns to the normal display mode.
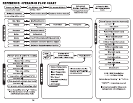
Pressing the “ALARM” button during the alarm-setting mode scrolls through the following
settings:
1. Time alarm setting (hours, minutes)
2. Indoor temperature alarm (high, low)
3. Indoor humidity alarm (high, low)
4. Outdoor temperature alarm (high, low, at the current channel)
5. Outdoor humidity alarm (high, low)
6. Wind chill alarm (low)
7. Heat index alarm (high)
8. Dew point alarm (high, low)
9. Wind speed alarm
10. Storm alarm
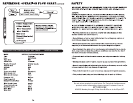
MINIMUM & MAXIMUM RECORD MODE
The “MIN/MAX” buttons provide the user with information about the minimum and maximum
values of today’s weather data. It also acts as an access mode for the daily and long-term
records, with the time and date of their recordings.
TO ACCESS THE MIN OR MAX VALUES (TODAY’S HIGH’S AND LOW’S):
Press the “MIN” or “MAX” button to display the corresponding highs or lows of the day. When
pressing the “MIN” button, the unit will show the minimum value for all the records in the
upper display window.