1312
5-in-1 Installation Guidelines
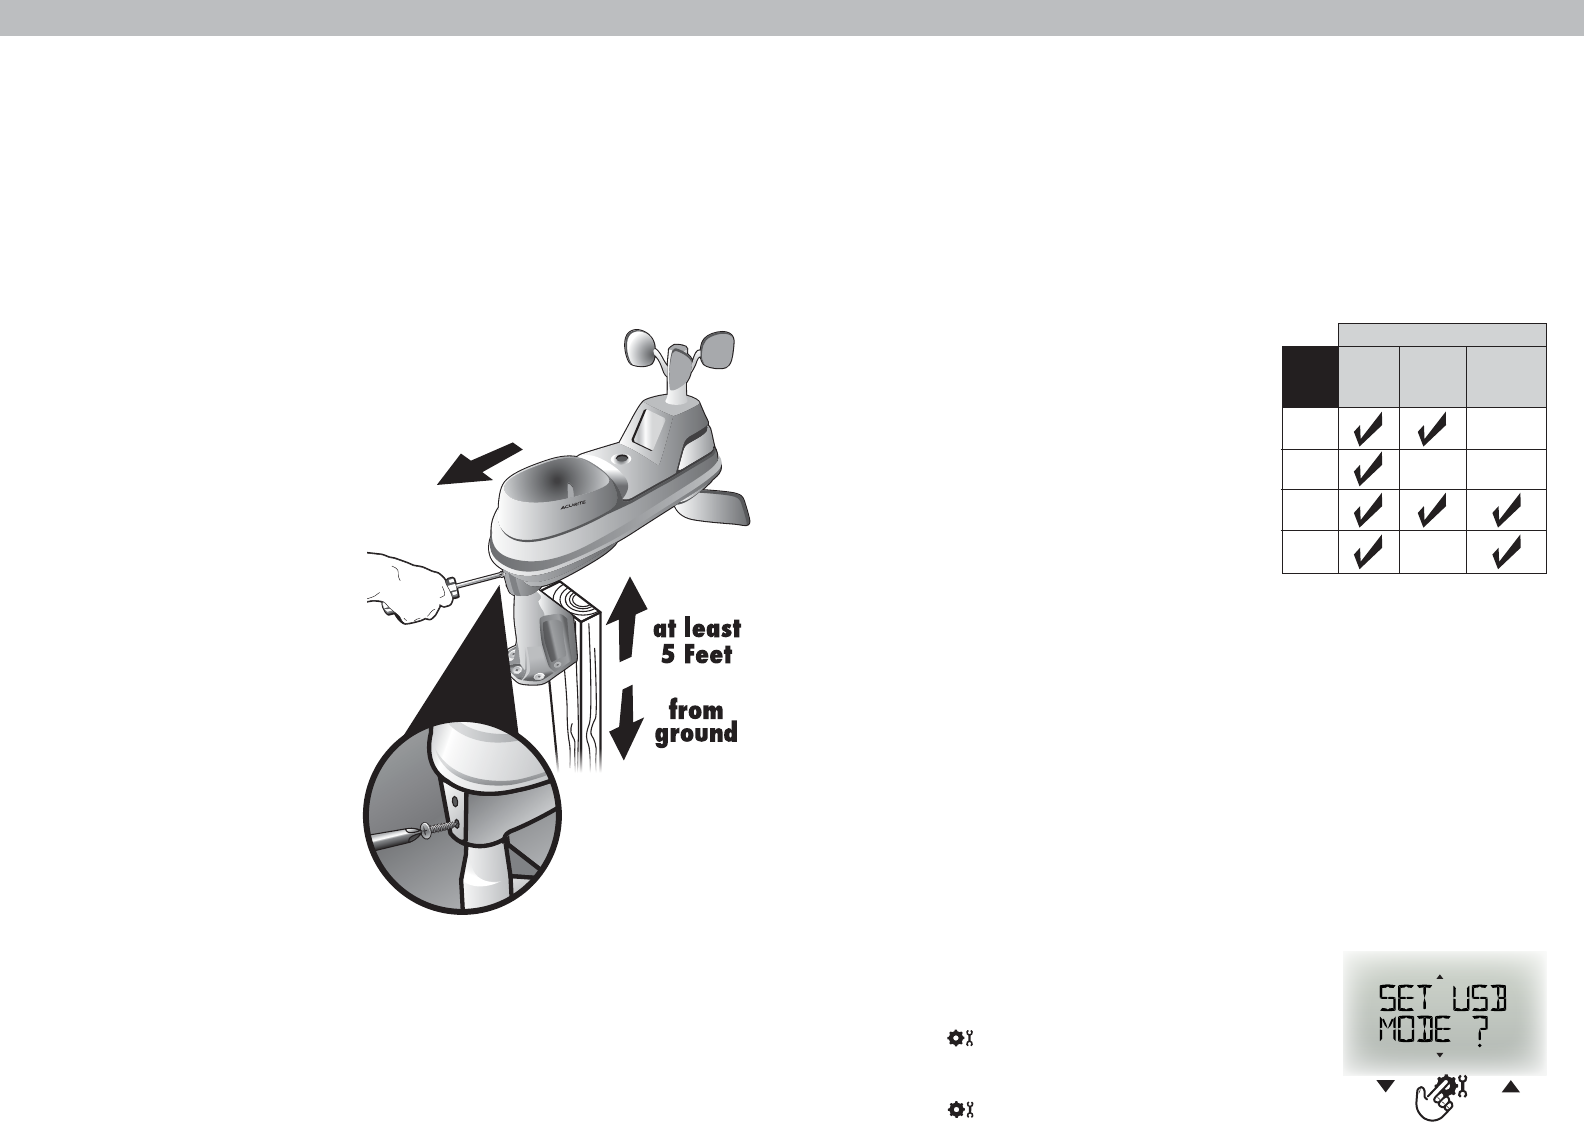
INSTALLATION HEIGHT Mount the sensor at least 5 feet (1.5 meters) off the
ground (higher is better for wind measurement) in an open area. Secure to
fence post, 2ʼx4ʼ wood, 3/4” pipe, etc. (not included)
LEVEL INSTALLATION
Use the bubble level on the top of the sensor to ensure
level installation for accurate wind and rain measurement.
SOLAR CELL ORIENTATION
Install the sensor with the
solar cell facing SOUTH
. This
ensures the cell receives as much sun as possible, and orients wind direction.
PC Connect Overview
PC Connect lets you access your Weather Center data in the following ways:
• Data File: Display unit logs (or stores) data so that you can download it to a
PC in a data file (CSV or comma-separated values file).
• PC Weather Widget: View data on your PC's screen as a widget.
• Web Browser or Smartphone: Monitor sensor data remotely using AcuRiteʼs
free Acu-Link online software, or from a mobile device using the free
Acu-Link app, available from the iPhone App Store or Android Market.
5-in-1 Sensor Installation
1. Fasten mounting base (included)
to a post or pole (not included)
using the 4 longer screws
included in the hardware bag.
2. Insert the mounting base into the
hole on the bottom of the sensor.
3. Make sure the arrows on the top
of the sensor are pointed in the
proper direction and the bubble
level is centered. The solar cell
should be facing south to
properly orient the wind
direction vane.
3. Fasten the sensor into the
mounting base using the 2
shorter screws included in the
hardware bag.
The 5-in-1 sensor is now
ready to use.
SOUTH
(1.5 meters)
NO OBSTRUCTIONS
ABOVE OR AROUND
Clear Data Collected During Installation
When installation is complete, clear erroneous data from the display unit by
pressing the “CLEAR TODAY” button, on the back of the display unit inside the
battery compartment. This button will clear data recorded since 12:00am.
Basic Setup is Complete
The 5-in-1 sensor will now synchronize with the display unit. It may take a few
minutes for synchronization to complete. If both or one of the units appear to
be functioning improperly, please refer to the troubleshooting section.
Set the PC Connect USB Mode
1. Press the up or down arrow buttons until “SET USB
MODE?” is displayed on the Selectable Category
part of the display unit.
2. Press the “ ” button to set the mode preference.
3. Press the up or down arrows to select the USB mode.
4. Press the “ ” button to confirm your selection.
PC Connect USB Mode is now set.
PC Connect USB Modes
To setup PC Connect, you must first select a
USB mode on the display unit:
USB Mode 1: Display Logging ON
•Display unit logs (stores) up to 2 weeks of
data in memory.
When memory nears
capacity, display unitʼs Weather Ticker
displays an alert to download memory soon.
•Transfer data to your PC using PC Connect.
USB Mode 2: Display Logging OFF (DEFAULT)
•Display unit DOES NOT log (save) any data in memory for PC transfer.
USB Mode 3: Display Logging ON/Internet Bridge Mode
•Display unit logs (stores) up to 2 weeks of data in memory.
•Transfer data to your PC using PC Connect.
•Stream your data from your weather center to online sources.*
USB Mode 4: Display Logging OFF/Internet Bridge Mode
•Display unit DOES NOT log (save) any data in memory.
•Stream your data from your weather center to online sources.*
* PC and internet connection must remain ON to continuously stream data
from your weather center to online sources or the Acu-Link mobile app.
Stores
Data
Shows
Data
USB
Mode
Streams
Online*
2
1
4
3
DISPLAY UNIT...


