


11
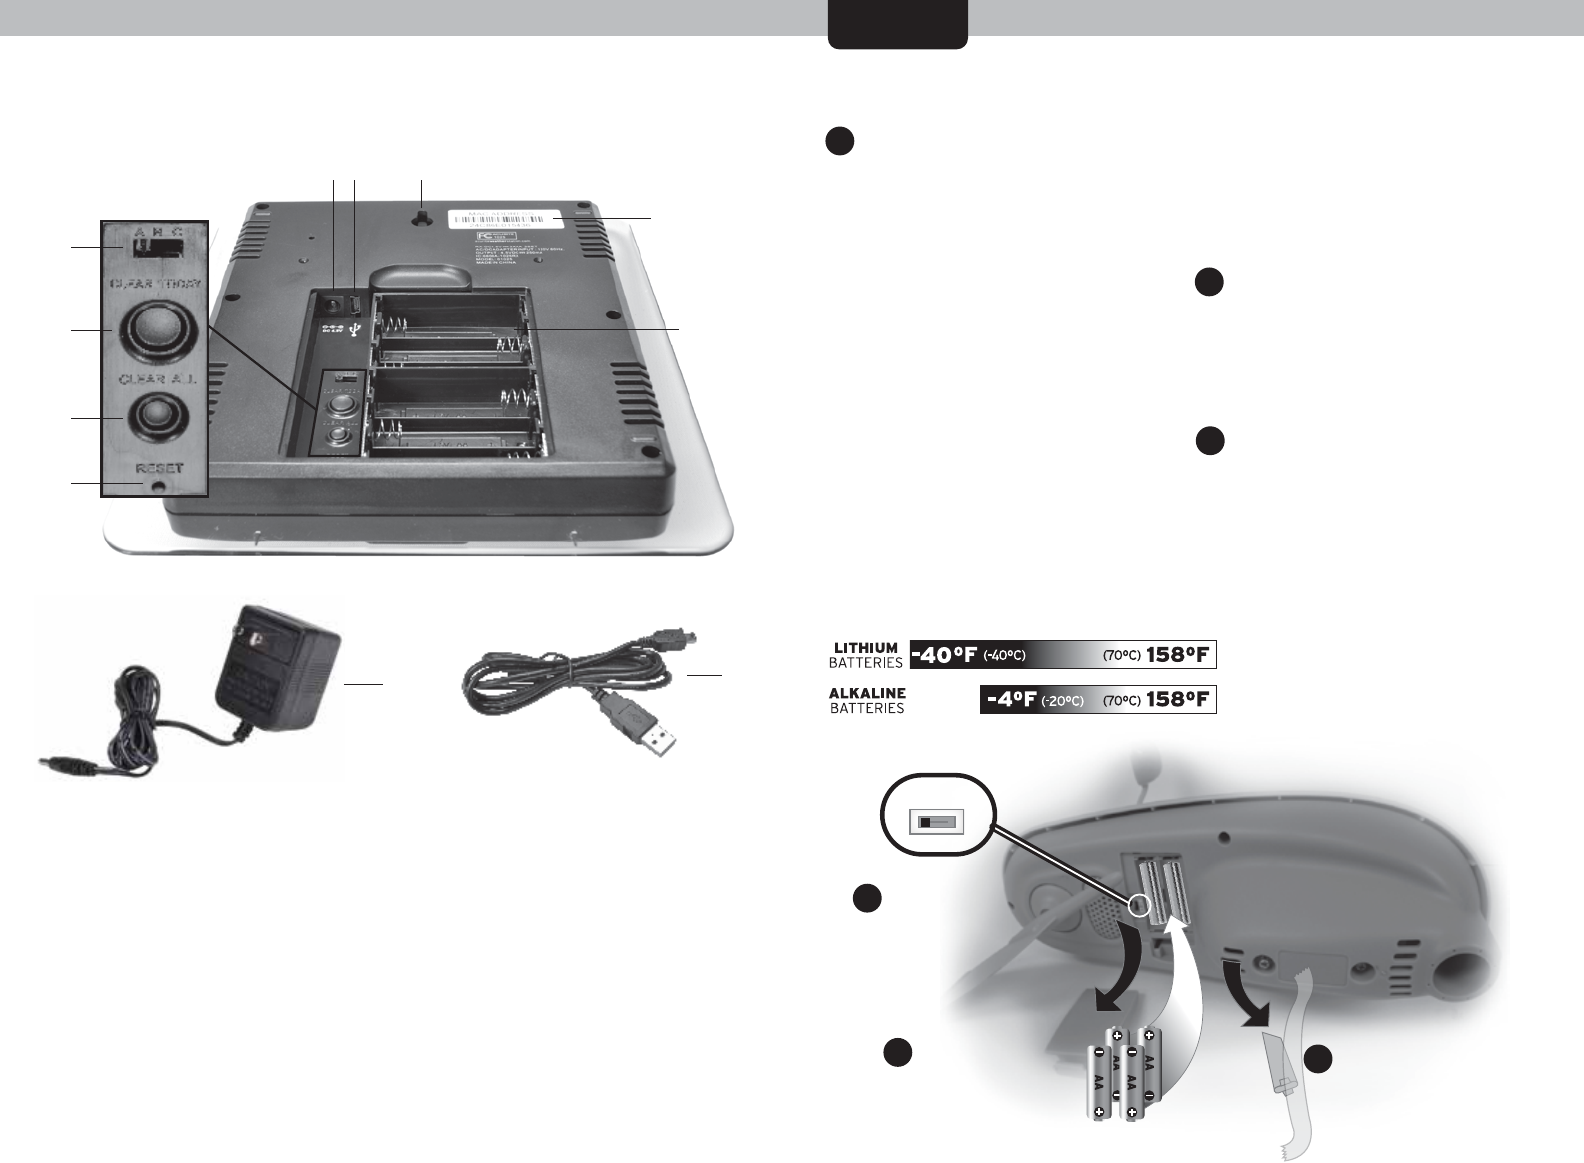
A B C
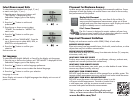
Rain Gauge Stabilizer
Remove and discard
2
3
A-B-C Switch
set to match
display unit
1
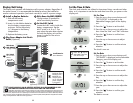
Install Batteries
4 AA batteries
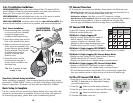
Back of Display Unit
76
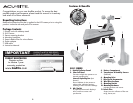
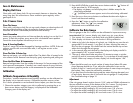
5-in-1 Sensor Setup
SETUP
1. Install or Replace Batteries
Batteries MUST be installed for this
product to operate. AcuRite
recommends high quality alkaline or
lithium batteries for the best product
performance. Heavy duty or
rechargeable batteries are not
recommended.
The 5-in-1 sensor requires lithium
batteries in low temperature
conditions. Cold temperatures can
cause alkaline batteries to function
improperly. Use lithium batteries in the
5-in-1 sensor for temperatures below
-4ºF / -20ºC.
1. Slide off the battery compartment
cover.
2. Insert 4 x AA batteries into the
battery compartment, as shown.
Follow the polarity (+/-) diagram in
the battery compartment.
3. Replace the battery cover.
2. Remove Rain Gauge Stabilizer
Locate and remove the rain gauge
stabilizer (plastic tab) taped into the
bottom of the sensor. The rain gauge
will not function until this is removed.
3. Set the A-B-C Switch
Locate the A-B-C switch inside the
battery compartment. Set the A-B-C
switch to A, B or C. You must select
the same letter choices for both the
sensor and the display unit in order
for the units to synchronize.
2
3
1
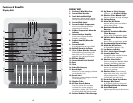
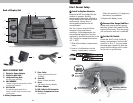
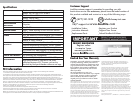
BACK OF DISPLAY UNIT
1. Plugin for Power Adapter
2. Plugin for USB Cable
3. Integrated Hang Hole
for easy wall mounting
4. MAC ADDRESS
12-digit unique ID required for online
connectivity functions.
5. A-B-C Switch
ID code that must match 5-in-1
sensorʼs A-B-C switch to ensure units
synchronize.
6. Battery Compartment
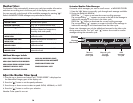
7. Clear Today
Clears data recorded since
12:00am.
8. Clear All
Clears all data recorded.
9. Reset
Full reset to factory defaults.
10. Power Adapter
11. USB Cable for PC Connection
12. Battery Compartment Cover
(not shown)
10
4
6
1 2 3
5
7
8
9