18
GB
Recording on MDs
4 Press MENU/NO.
When you have turned on Automatic Track Marking
in step 3 above, “L.SYNC” lights up in the display.
The deck marks a track number whenever the input
signal level drops to –50 dB (the trigger level for
Automatic Track Marking) or below for at least 1.5
seconds and rises above –50 dB again.
To change the trigger level for Automatic Track
Marking Z
Do the procedure below to change the signal level that
triggers Automatic Track Marking.
1 While the deck is stopped, press MENU/NO twice.
“Setup Menu” appears in the display.
2 Press ./> repeatedly until “LS(T)” appears,
then press YES.
3 Press ./> repeatedly to select the level, then
press YES.
You can set the level at any value between –72 dB and
0 dB, in 2 dB steps.
4 Press MENU/NO.
z
Additional information on Automatic Track Marking
• When recording from a CD player or MD deck connected to the
i.LINK S200 connector, the entire material may be recorded as a
single track in the following cases:
— When you consecutively record the same track two or more
times using single-track repeat play.
— When you consecutively record two or more tracks with the
same track number but from different CDs or MDs.
— When you record tracks from certain CD or multi-disc
players.
Also, if the source is an MD, a track number may not be
marked for tracks less than four seconds (in stereo mode,
monaural mode, or LP2 mode) or eight second (in LP4 mode)
long.
• When recording from a DAT deck or DBS tuner connected to
the i.LINK S200 connector, the entire material may be recorded
as a single track.
• When recording from a DAT deck or DBS tuner connected to
the i.LINK S200 connector, the deck will mark a track number
whenever the sampling frequency of the input signal changes,
regardless of the track marking parameter setting (“T.Mark
Lsync” or “T.Mark Off”).
z
You can mark track numbers even after recording has
finished
See “Dividing Tracks” on page 30.
Note
If you turn off the deck or disconnect the mains lead, the deck
will store the last settings (“T.Mark Lsync” or “T.Mark Off” and
the trigger level) and recall them the next time you turn on the
deck.
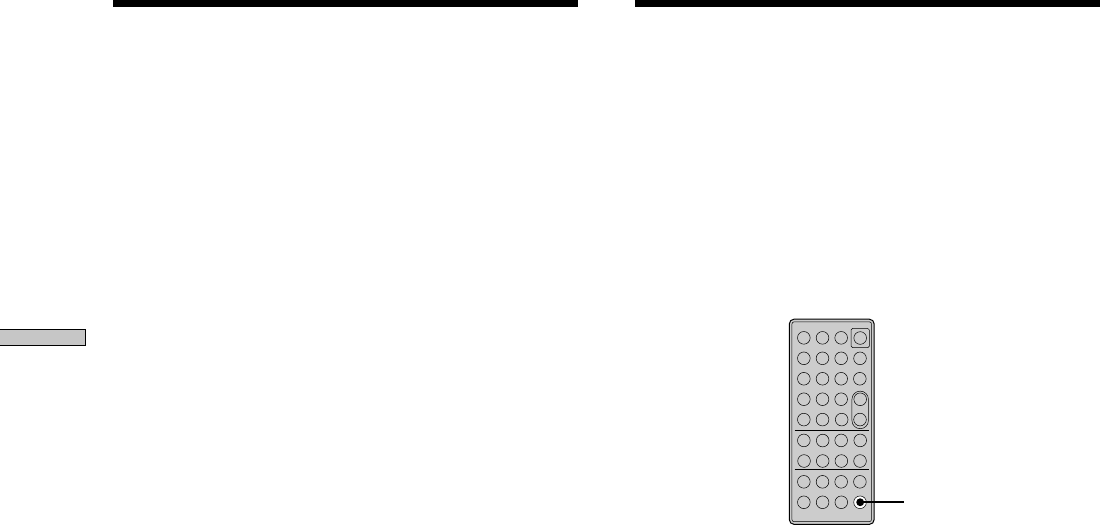
Starting Recording With 6
Seconds of Prestored Audio
Data (Time Machine Recording) Z
Whenever the deck is in recording pause, the deck’s
buffer memory continuously stores the latest 6 seconds
worth of audio data. When you press T.REC, the
recording then starts with the data in the buffer memory.
Time Machine Recording thus allows you to avoid
missing the beginning of material recorded live from an
FM or satellite broadcast.
–
+
?/1
.>mM
NXxz
789
>10
10
/0
1
23
4
56
T.REC
1 Do steps 1 to 8 of “Recording on an MD” on page
12.
The deck changes to recording pause.
2 Start playing the programme source.
3 Press T.REC at the point where you want to start
recording.
Recording starts with the 6 seconds of prestored data
in the buffer memory, then continues recording via the
buffer memory thereafter.
To stop Time Machine Recording
Press x.
Note
The storage of data in the buffer memory starts from the moment
the deck changes to recording pause. Thus, if you start recording
less than 6 seconds after changing to recording pause, less than 6
seconds worth of data will be recorded from the buffer memory.
The same is true if the programme source had been playing for
less than 6 seconds at the time you start recording.
Marking Track Numbers While Recording
(Track Marking)


