15
Getting started
Performing initial setup of the system software
After turning on the system, perform initial setup.
1 Turn on the TV, and then switch the video input of the TV to
match the input connector used by the PS3™ system.
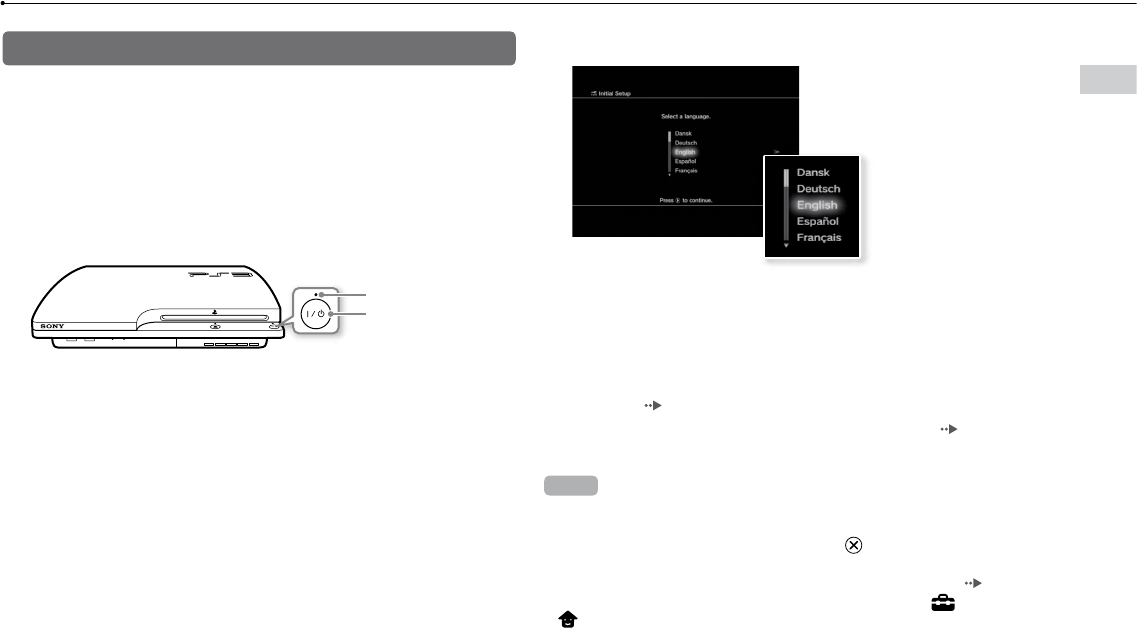
2 Press the power button.
The power indicator turns green and the picture is displayed on the TV
screen.
Power button
Power indicator
3 Connect the wireless controller to the system using a USB
cable.
4 Press the PS button on the controller.
The system will recognise the controller. After it has recognised the controller,
the initial setup screen will be displayed.
5 Perform initial setup.
Follow the on-screen instructions to enter settings for system language, time
zone, date and time, and user name.
The screen for setting up the Internet connection will be displayed. When
connecting using an Ethernet cable, basic settings will be selected
automatically if you follow the on-screen instructions. When connecting over
a wireless LAN, follow the instructions in "Adjusting network settings
(wireless)" (
page 29) to set up the connection.
After the settings have been completed, the XMB
™
menu (
page 11) will
be displayed on the TV screen.
Hints
When using an HDMI cable to connect the system to the TV, a screen for
changing the video output resolution will be displayed during initial setup. If you
select [Yes] on the screen and then press the
button, the optimal output
resolution will be selected automatically.
For details on entering text, see "Using the on-screen keyboard" (
page 34).
Settings entered during initial setup can be changed under (Settings) or
(Users). For details, refer to the online user’s guide
(access from : eu.playstation.com/manuals).
