19
BUILT-IN STITCHES
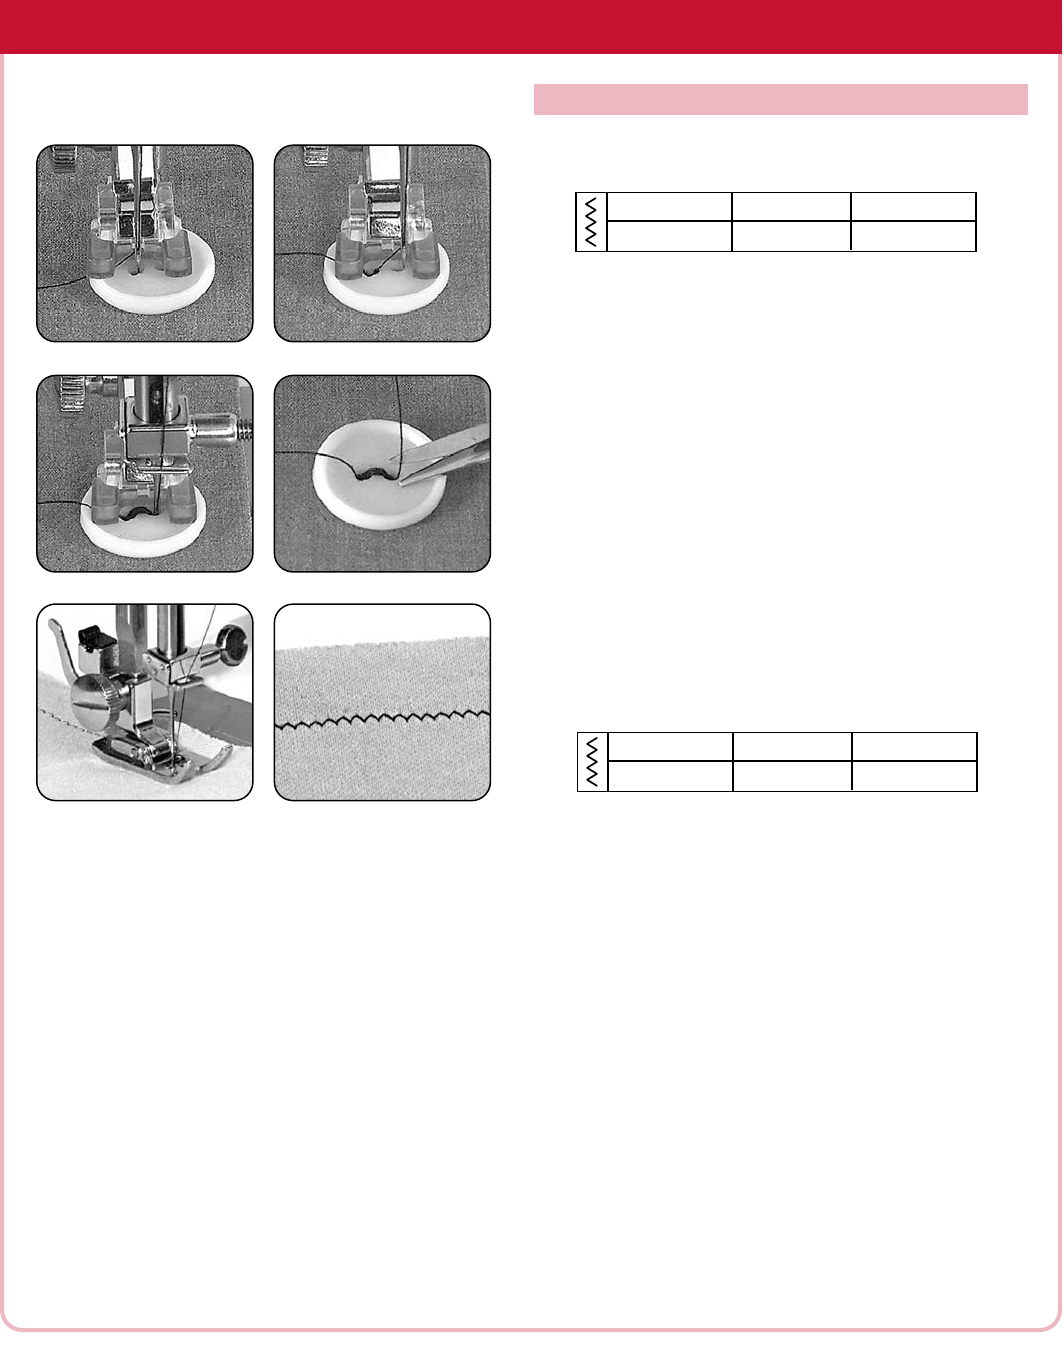
ATTACHING BUTTONS
Use this foot to quickly and securely attach flat buttons.
Attach the button sewing foot.
Set the stitch width to 0.
Position the button and fabric under the foot. Position the
needle over the left hole [Fig. 1]. Turn the handwheel to
make sure the needle clears the hole, and sew several
stitches to secure threads.
Turn the stitch width dial to 5 and reposition the fabric and
button to the left slightly so the needle is again aligned with
the left hole. Turn the handwheel to make sure the zigzag
stitch clears the holes of the button [Fig. 2]. Adjust the
stitch width, if needed. Sew 8-10 stitches [Fig. 3].
To secure the stitches, set the stitch width to 0, reposition
the needle over the button hole and sew a few stitches.
Remove the fabric and button from the machine and clip
the threads [Fig. 4].
SEAMING KNITS
A narro
w zigzag stitch is very flexible and durable making
it suitable for medium to lightweight
knit fabrics.
Align the edge of the fabric with the seam guide markings
on the needle plate and sew the seam being careful not
to stretc
h the fabric as you sew [Fig. 5].
ZIGZAG STITCH
Fig. 1
Fi
g. 3
Fig. 5
Fig. 2
Seaming knits
Fi
g. 4
STITCH WIDTH DROP FEED PRESSER FOOT
5 L
owered Button Attaching
STITCH WIDTH STITCH LENGTH PRESSER FOOT
1.5 2-3 All-purpose


