English - 40
Operation
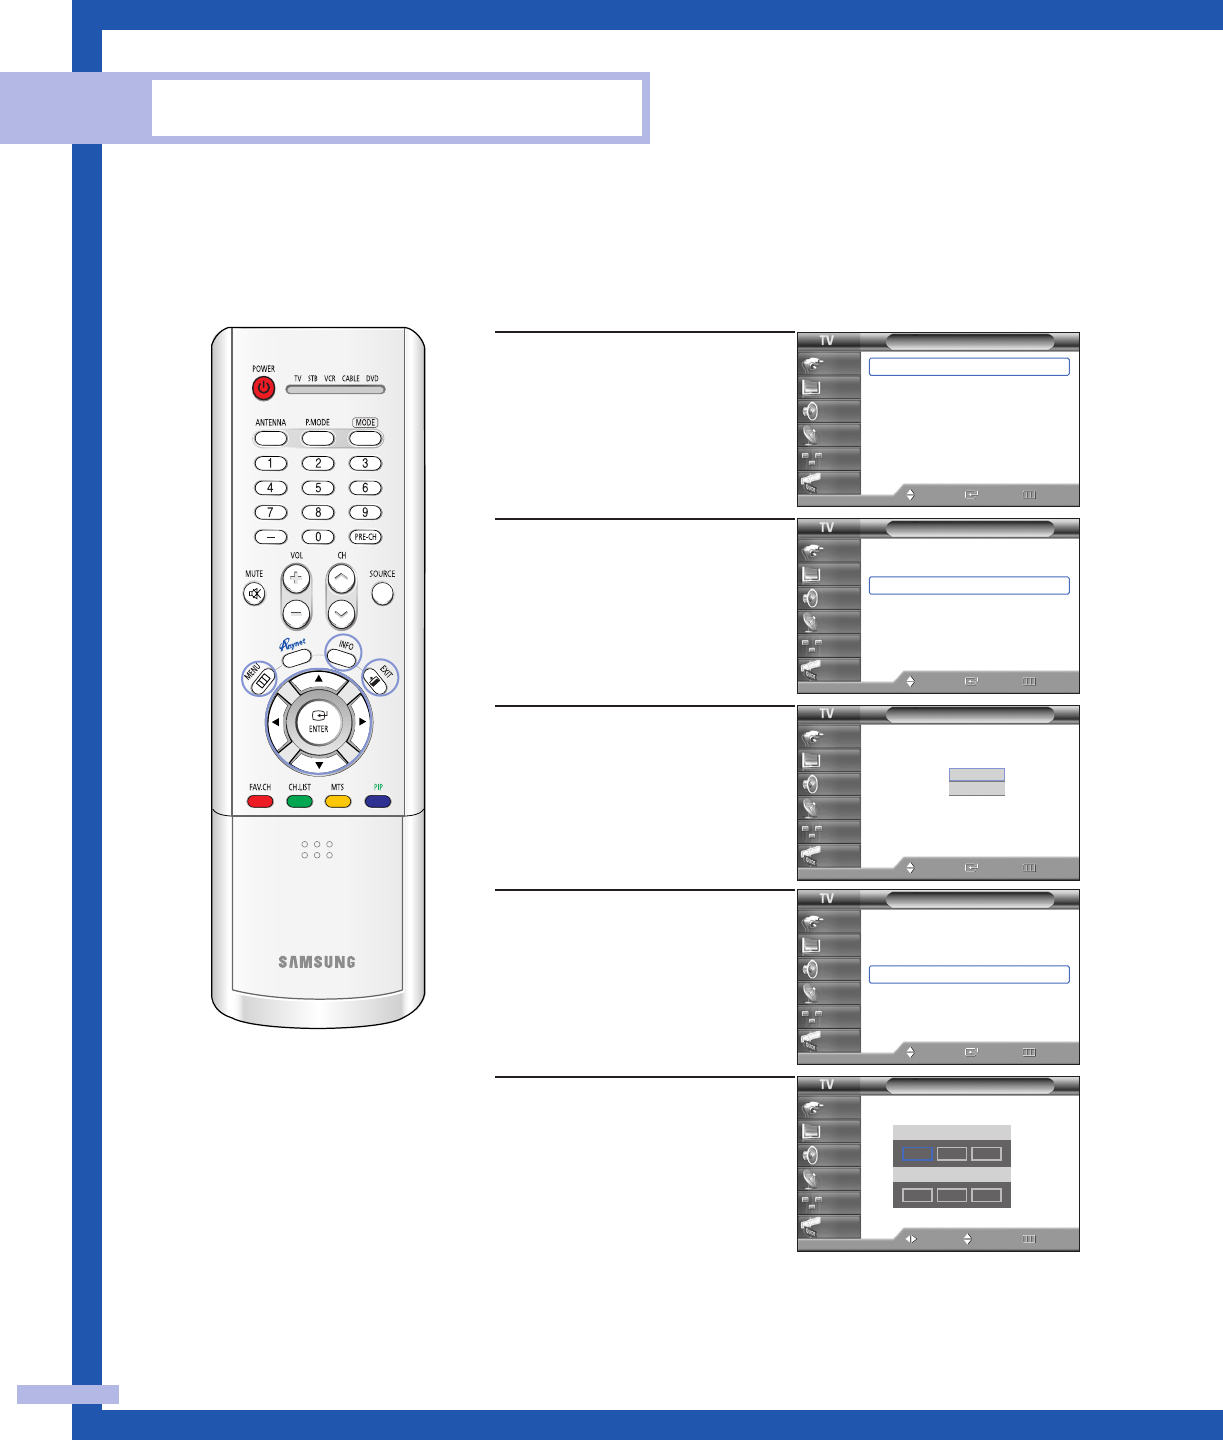
Setting the Clock
Setting the clock is necessary in order to use the various timer features of the TV. Also,
you can check the time while watching the TV. (Just press the INFO button.)
1
Press the MENU button.
Press the … or † button to
select “Setup”, then press
the ENTER button.
2
Press the … or † button to
select “Time”, then press the
ENTER button.
Press the ENTER button to
select “Clock”.
3
Press the ENTER button to
select “Clock Mode”.
Press the … or † button to
select “Manual”, then press
the ENTER button.
4
Press the … or † button to
select “Clock Set”, then
press the ENTER button.
5
Press the œ or √ button to
move to “Month”, “Day”,
“Year”, “Hour”, “Minute”,
or “am/pm”. Set the clock
you want by pressing the
… or † button, then press
the ENTER button.
Press the EXIT button to exit.
Option 1: Setting the Clock Manually
•You can set the hour and
minute directly by pressing
the number buttons on the
remote control.
Setup
Language : English
√
Time
√
V-Chip
√
Caption
√
Menu Transparency
: Medium
√
Blue Screen : Off
√
▼ More
Move Enter Return
Input
Picture
Sound
Channel
Setup
Guide
Time
--/ --/ ----/ -- : -- --
Clock
√
Sleep Timer : Off
√
On Timer : Inactivated
√
Off Timer : Inactivated
√
Move Enter Return
Input
Picture
Sound
Channel
Setup
Guide
Clock
--/ --/ ----/ -- : -- --
Clock Mode : Manual
√
Clock Set
√
Time Zone
√
DST : No
√
Move Enter Return
Input
Picture
Sound
Channel
Setup
Guide
Clock
--/ --/ ----/ -- : -- --
Clock Mode : Auto
Clock Set
Time Zone
DST : No
Move Enter Return
Input
Picture
Sound
Channel
Setup
Guide
Manual
Auto
Clock Set
Move Adjust Return
Input
Picture
Sound
Channel
Setup
Guide
Set current date and time.
Month
Day Year
Hour
Minute am/pm
▲
-- -- ----
-- -- --
▼
NOTE
• The current time will
appear every time you
press the INFO button.
3_BP68-00460A-01(32~53) 1/26/05 1:29 PM Page 40


