15
English
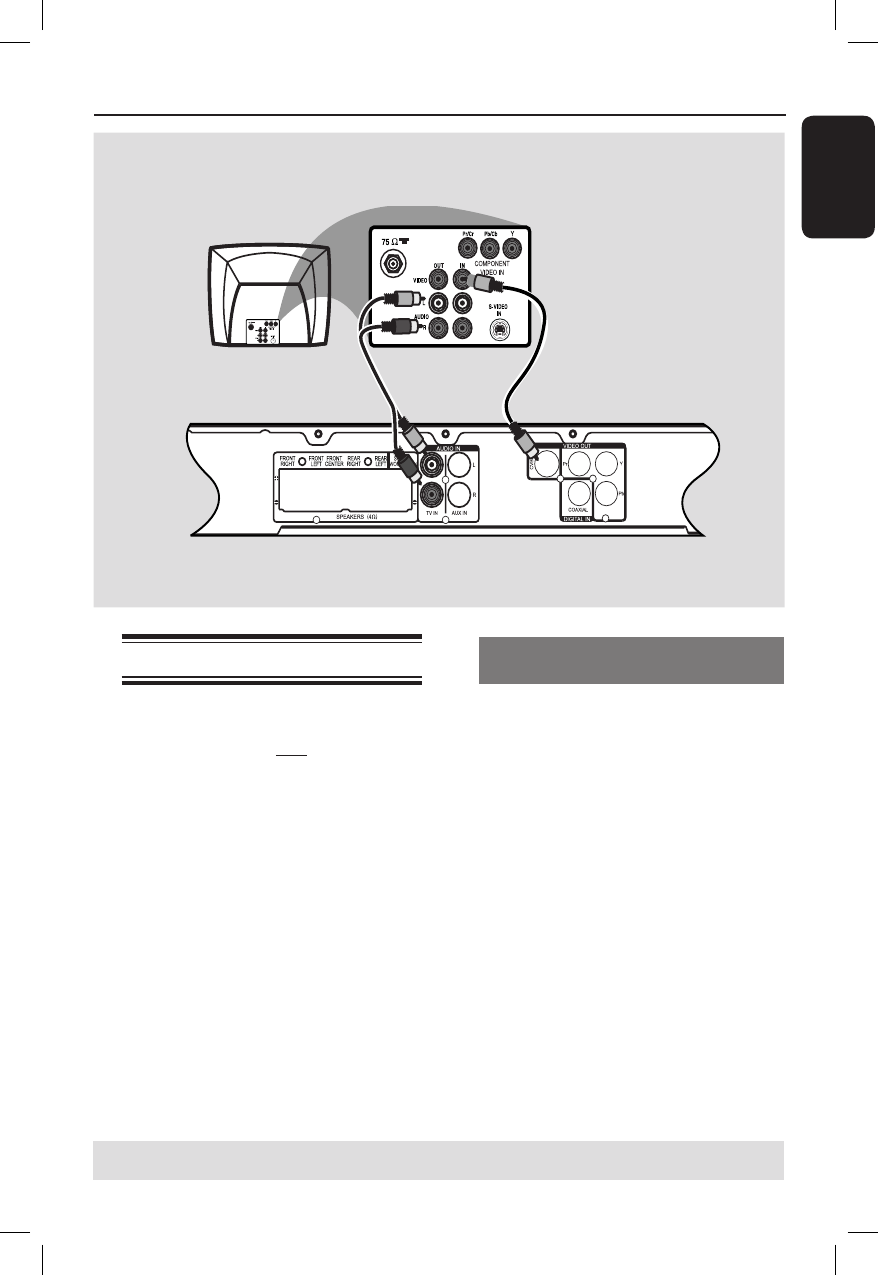
Step 3: Connecting to TV
This connection enables you to view the
playback from this DVD system. You
only need to choose one of the options
below to make your video connection.
– For a standard TV, follow option 1.
– For a progressive scan TV, follow
option 2.
IMPORTANT!
Connect the DVD system directly
to the TV.
Helpful Hint:
– To hear the TV channels through this DVD
system, connect the AUDIO IN - TV IN jacks
to the corresponding AUDIO output jacks on
the TV using an audio cable. Press TV/AUX/
DI on the remote control to select ‘TV’ when
watching the TV programs.
TIPS: Before making or changing any connections, make sure that all the devices are disconnected
from the power outlet.
Basic Connections (continued)
Option 1: Using Composite Video
jacks (CVBS)
Use the supplied composite video cable
(yellow) to connect the VIDEO OUT
jack on the DVD system to the video
input jack (or labeled as A/V In, Video In,
Composite or Baseband) on the TV.
Option 1


