7.
Create a format packet, based on how you filled out your
worksheet. See Chapter 3, "Defining Fields," for more
information.
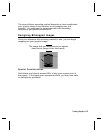
Determining Format Contents
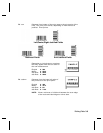
Before you lay out your format, you need to make a few
decisions. For example, how large is your supply, which fonts do
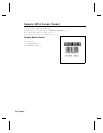
you want to use, do you want to include a bar code, and do you
want to include graphics?
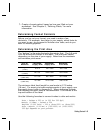
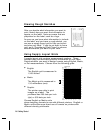
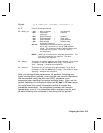
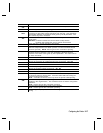
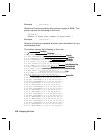
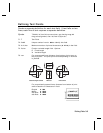
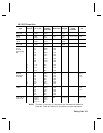
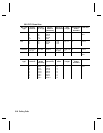
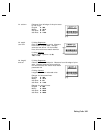
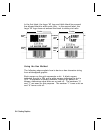
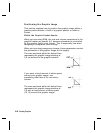
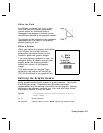
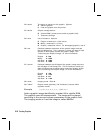
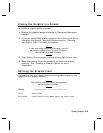
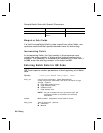
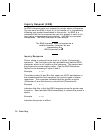
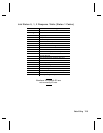
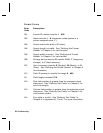
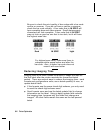
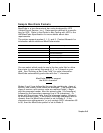
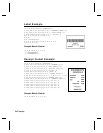
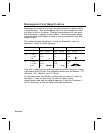
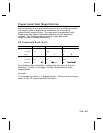
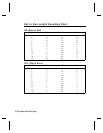
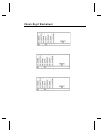
Determining the Print Area
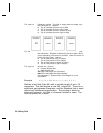
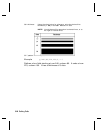
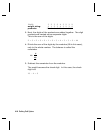
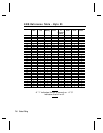
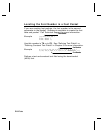
The "bottom" is the edge that exits the printer first. The 0,0 point
is at the bottom left corner of the label. The print area varies,
depending on the size of your supply. Below are the maximum
and minimum print areas.
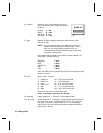
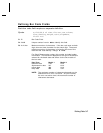
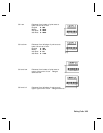
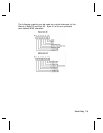
Unit of
Measure
Minimum
Supply Size
Maximum
Supply Size
Maximum
Print Area
English
(1/100")
25 X 75 425 x 1000 400 x 1000
Metric
(1/10mm)
63 X 191 1080 x 2540 1016 x 2540
Dots
(1/203 dots)
51 X 152 864 x 2030 812 x 2030
Dots
(1/300 dots)
75 X 225 1275 x 2700 1200 x 2700
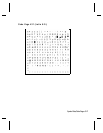
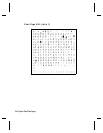
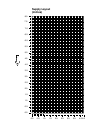
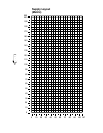
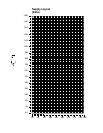
The minimum label feed length for peel mode is 0.75 inches
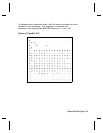
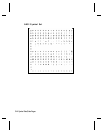
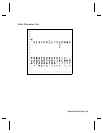
(19 mm). For exact print area measurements of your supply, see
the supply layout grids in Appendix D. When designing formats,
the following non-print zone is recommended: 0.04 inches at the
top and bottom of the label.
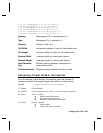
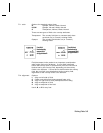
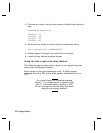
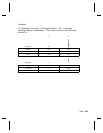
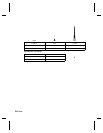
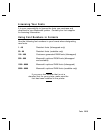
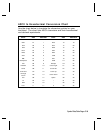
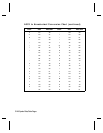
Use the following formulas to convert inches to dots and metric:
Dots = inches x 203 or (x 300 for 300 dpi)
Metric (1/10mm) = inches x 254
English (1/100 inch) = 100 x (dots/203) or (dots/300)
Dots = Metric (1/10 mm) x (799/1000) or (1181/1000)
300 dpi depends on your printer.
Getting Started
1-5