115
[Screenshot 2]
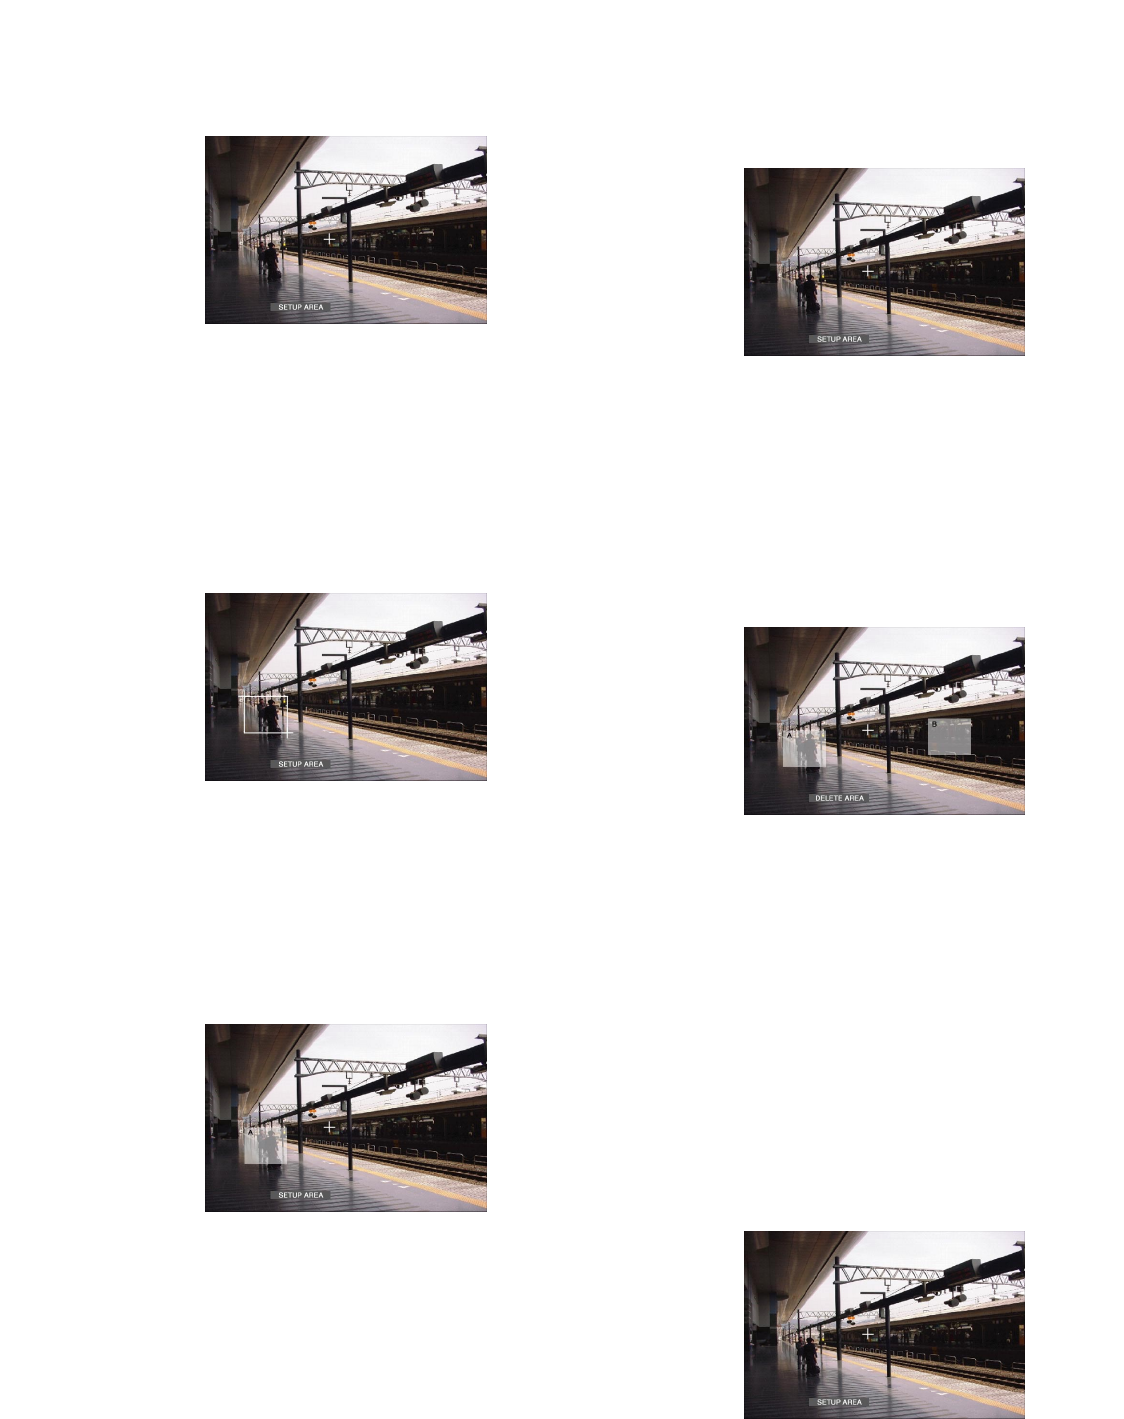
The "VMD Setup" window will be displayed.
x Move the cross cursor to a desired point to be set as
the start point of the motion detection area using the
arrows button (CDAB), and press the SET button.
Note: To set all areas on the monitor as the motion
detection area, select "ALL AREAS" and press the
SET button.
[Screenshot 3]
The start point of the motion detection area is assigned.
c Move the cross cursor to a desired point to be set as
the end point of the motion detection area using the
arrows button (CDAB), and press the SET button.
[Screenshot 4]
The motion detection area is set with the start point and the
end point as the points at opposite angles of the motion
detection area.
v Repeat steps 2 and 3 to set another motion detection
area.
Up to 4 areas can be set. The newly created areas will
be named automatically as A, B, C and D in the order of
creation.
b To complete the settings, rotate the jog dial to select
"EXIT" on the status bar, and press the SET button.
→ The "VMD Setup" window will be closed.
● Delete the motion detection area
[Screenshot 1]
Start operation from the "VMD Setup" window.
z Rotate the jog dial to select "DELETE AREA" on the sta-
tus bar.
Note: After selecting "DELETE ALL AREAS", pressing
the SET button will delete all of the motion detection
areas.
[Screenshot 2]
The cross cursor will be displayed on the "VMD Setup" win-
dow.
x Move the cross cursor onto an area to be deleted using
the arrows button (CDAB), and press the SET but-
ton.
c To complete the settings, press the SET button after
selecting "EXIT" on the status bar by rotating the jog
dial.
→ The "VMD Setup" window will be closed.
8 Set the sensitivity
Set the sensitivity for the created motion detection area.
Sensitivity can be set for each area.
[Screenshot 1]
Start operation from the "VMD Setup" window.
z Press the SET button after selecting "SENSITIVITY" by
rotating the jog dial.


