Fishnder 340C Owner’s Manual
InstAllIng the fIshfInder 340c > MountIng the fIshfInder
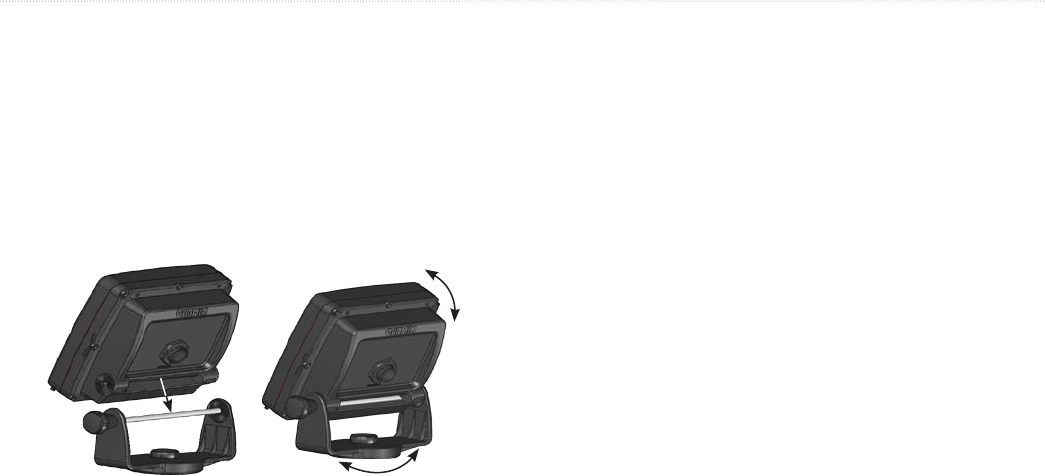
Installing the Unit on the Mounting Bracket
To install the Fishnder on the mounting bracket:
1. AligntheslotonthebackoftheFishnderwiththelong
mountingknob,andslidetheFishnderintoplace.If
necessary,adjustthelongknobtospreadthebracketarms
apart.(Turncounter-clockwisetowidenthebracketarms
andclockwisetotighten.)
2. AdjusttheFishnderangle,andtightenthelongmounting
knob until snug.
3. Rotate the swivel mount bracket by twisting it left or right.
Thebracketclicksasyouturnit.Selectagoodviewing
angle,andthentightenallknobs.
4. Connect the power/dataandtransducercablestotheback
oftheFishnder,makingsurethelockingringsarefully
tightenedonbothconnectors.
Flush Mounting the Fishnder
You can ush mount the Fishnder 340C into a at panel.
• Select an appropriately sized location for the unit.
• Use the Flush Mount Template provided in the box to
determine a location.
• Check that all cables reach the unit mounting location.
• Always wear safety goggles and a dust mask when drilling,
cutting, or sanding.
Included mounting hardware
—(4) 3 mm studs, (4) at washers,
and (8) 3 mm hex nuts.
—center punch, drill, 1/8" (3 mm) drill bit,
3/8" (6 mm) drill bit, jig saw, 1/16" (2 mm) Allen wrench, and 9/32"
(7 mm) wrench.


