3. PLOTTER OPERATION
3-44
3.10 Navigation
This section shows you how to get to a desired destination by “quick points,”
waypoints, port services and routes.
Note: Reciprocal setting and canceling of destination is available by outputting
the data sentence ZDA from the NavNet unit connected to the navigator.
3.10.1 Navigating to a “quick point”
The “quick point” feature allows you to navigate to point(s) without retaining the
data indefinitely in your unit’s memory.
Selecting quick point entry method
You need to tell your unit how to set the quick point: 1 POINT, 35 POINTS (up to
35 points) or 35PTS/PORT SVC. (For how to navigate to points/port services
see “3.10.2 Navigating to ports, port services” on page 3-45.)
1. Press the [MENU] key.
2. Press the PLOTTER SETUP soft key.
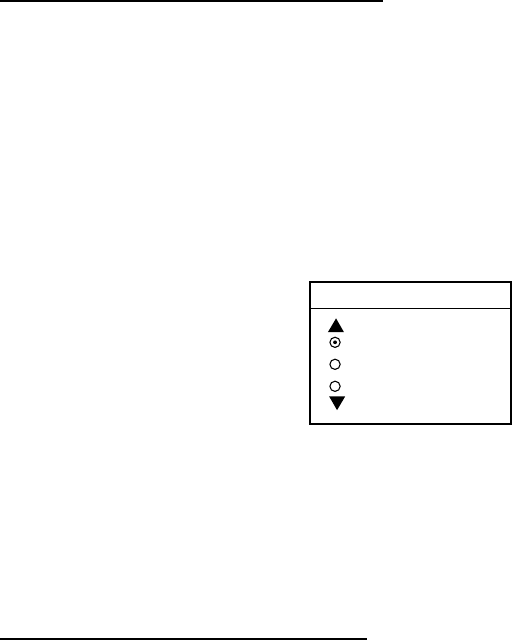
3. Use the trackball to select SET GOTO METHOD, then press the EDIT soft
key.
GOTO METHOD
1 POINT
35 POINTS
35PTS/PORT SVC
Go to method window
4. Use the trackball to select a method.
5. Press the ENTER soft key.
6. Press the [MENU] key to close the menu.
Navigating to a single quick point
1. Place the cursor on an existing waypoint (GOTO WPT soft key appears) or a
new location (GOTO CURSOR soft key appears).
2. Select “1 POINT” following the procedure in the above paragraph.
3. Depending on the selection you made at step 1, press the GOTO CURSOR
or GOTO WPT soft key.
A solid light-blue line with arrows connects between own ship and destination,
which is marked as “<QP01>” for cursor-selected location or waypoint name in
case of waypoint. This line shows the shortest course to the destination. Arrows
on the line show the direction to follow to get to the quick point. Range and
bearing from own ship to the destination appear at the top of screen. The quick
point location is saved to the waypoint list as waypoint “QP01.”
