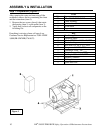
ASSEMBLY & INSTALLATION
12 DR
®
SNOW THROWER Safety, Operation & Maintenance Instructions
!
WARNING: Before installing the DR
®
SNOW THROWER, always bring the DR
®
ALL-
TERRAIN
™
MOWER to a complete stop, shut
off the engine and remove the spark plug wire.
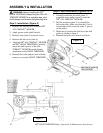
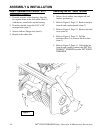
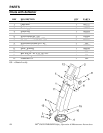
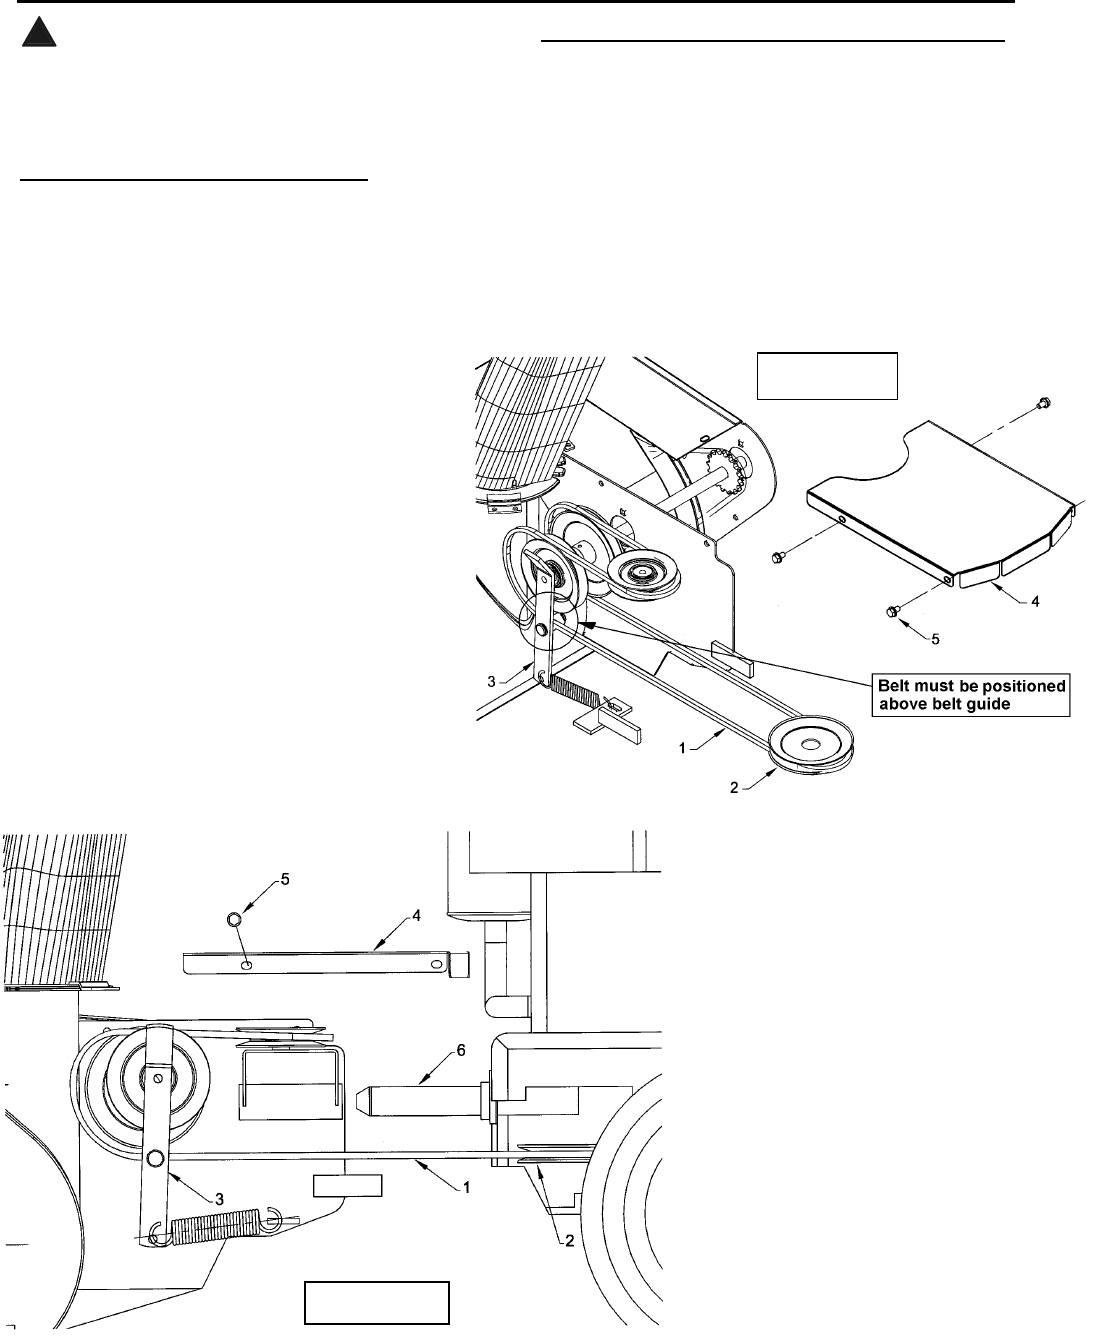
Step 3: Installation (Figure 3)
1. Remove the mowing deck from the DR
®
ALL-TERRAIN
™
MOWER.
2. Apply grease on the shaft (item 6).
3. Remove bolts (item 5) from belt cover.
4. Remove the belt cover (item 4).
5. Align the DR
®
ALL-TERRAIN
™
MOWER
and DR
®
SNOW THROWER. Carefully,
insert the shaft (item 6) of the ALL-
TERRAIN
™
MOWER into the female
attachment on the SNOW THROWER.
6. Reinstall the collar and pin used with the
mower to secure the SNOW THROWER.
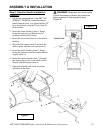
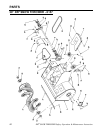
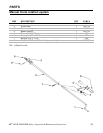
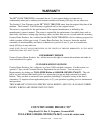
Step 4: Belt Installation (Figures 3 & 4)
1. Carefully install the drive belt (item 1)
around the drive pulley (item 2) under the
DR
®
ALL-TERRAIN
™
MOWER.
2. Pull the tensioner (item 3) to reinstall the
belt on the idler. Make sure that the V-belt is
not twisted and fits correctly in the V-groove
on the pulley.
3. Make sure to position the belt above the belt
guide, as shown in figure 4.
4. Reinstall the belt cover (item 4) and bolts.
Fi
ure 3
Figure 4