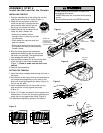
9
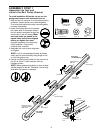
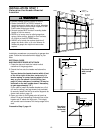
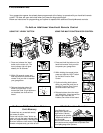
ASSEMBLY STEP 2
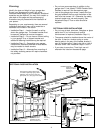
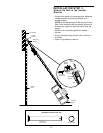
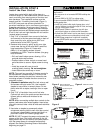
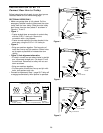
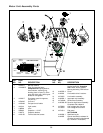
Install the Trolley
• As a temporary stop, insert a screwdriver into the
hole in the front end of the rail.
• Slide the trolley assembly along the rail to the
screwdriver stop. NOTE: If trolley hits against any
nuts on the rail, the bolts and nuts were attached
from the wrong side and must be repositioned.
Review Assembly Step 1.
• Insert a 5/16"-18x7/8" hex bolt into the trolley stop
hole in the rail as shown. Tighten securely with a
5/16" lock washer and nut. This bolt limits trolley
travel in the DOWN direction.
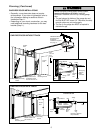
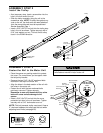
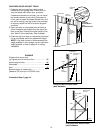
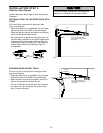
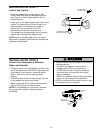
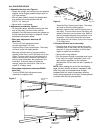
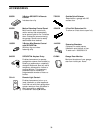
ASSEMBLY STEP 3
Fasten the Rail to the Motor Unit
• Place the opener on packing material to protect
the cover. For convenience, put a support under
the belt pulley bracket.
• Remove the two 5/16"-18x1/2" washered bolts
mounted in the top of the motor unit.
• Align the holes in the back section of the rail with
the holes in the motor unit.
• Fasten the rail with the two washered bolts
previously removed. Tighten securely.
Remember to use only these bolts! Any other
bolts will cause serious damage to the
opener.
• Insert a 5/16"-18x7/8" hex bolt into the cover
protection bolt hole in the rail as shown. Tighten
securely with a 5/16" lock washer and nut.
NOTE: This bolt prevents trolley over-travel. Keep a
2" minimum between the trolley and this bolt when
adjusting travel limits (see page 28).
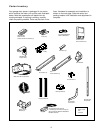
HARDWARE SHOWN ACTUAL SIZE
To avoid serious damage to opener, ONLY use
bolts/fasteners mounted in top of motor unit.