Set up
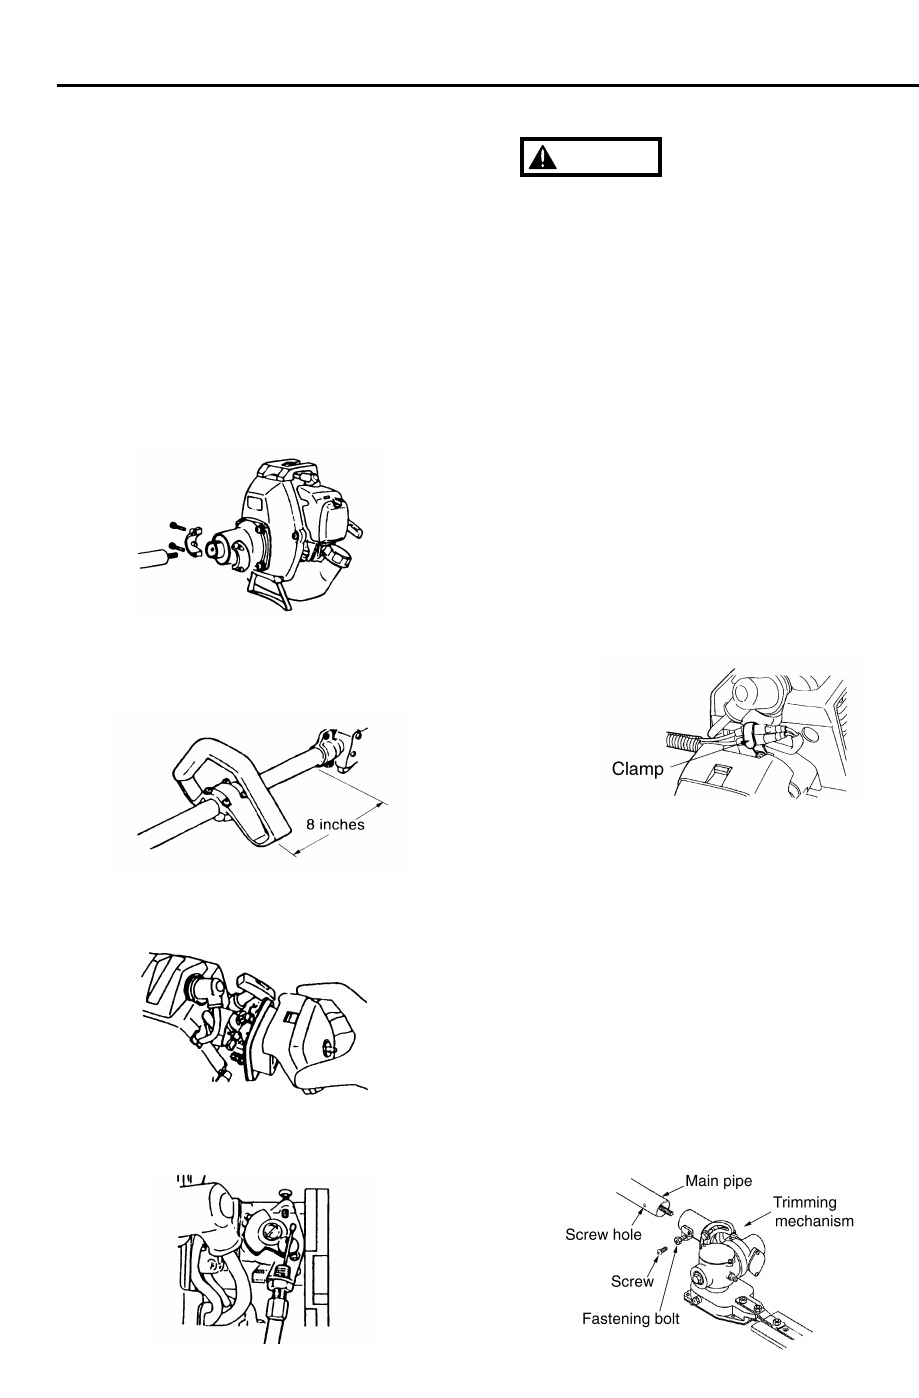
■ MOUNTING ENGINE
1. Remove the clamp temporarily attached to
the clutch housing.
2. Push the driveshaft toward the gearcase
and rotate it by hand to check that the
driveshaft is engaged with the gears.
3. Insert the shaft tube into the clutch
housing until it bottoms. When difficult to
engage, twist the engine slightly.
4. Align the positioning holes on the clutch
housing and the shaft tube and fit the boss
on the clamp into the hole. Fasten the
clamp securely.
■ INSTALLING HANDLE
Mount the handle to the shaft tube and
clamp it at your best operating position.
■ CONNECTING THROTTLE WIRE
1. Remove the air cleaner cover.
2. Connect the end of the throttle wire to the
joint on the top of the carburetor.
■ CONNECTING THE SWITCH CORD
• Insert the end of the cord firmly. An
improper connection may result in the
cord becoming loose during operation
or in causing the engine to fail to stop
even after the switch has been turned
off.
• Be careful never to bend the end of the
cord when connecting it.
1. Connect the terminal ends of the two
cords on the side of the engine to the
terminal ends of the two cords on the
side of the trimmer. Note that no
distinction is made between positive and
negative nodes, and that the cords may
be connected in any combination.
2. After the cords have been connected,
use the clamp located on the side of the
engine cover to fix the ends of the cords
firmly into place.
■
ATTACHING THE TRIMMING MECHANISM
1. Remove the cap on the end of the main
pipe.
2. Remove the screw screwed into the end of
the trimming mechanism.
3. Insert the end of the trimming mechanism
into the main pipe.
4. Line up the hole on the end of the
trimming mechanism into which the screw
is to be inserted with the hole on the main
pipe, and screw the screw firmly in.
5. Using a 10-mm wrench, screw in the
hexagonal bolt provided to fix the trimming
mechanism into place.
WARNING
9


