GB-14
HB2302 / HBZ2601
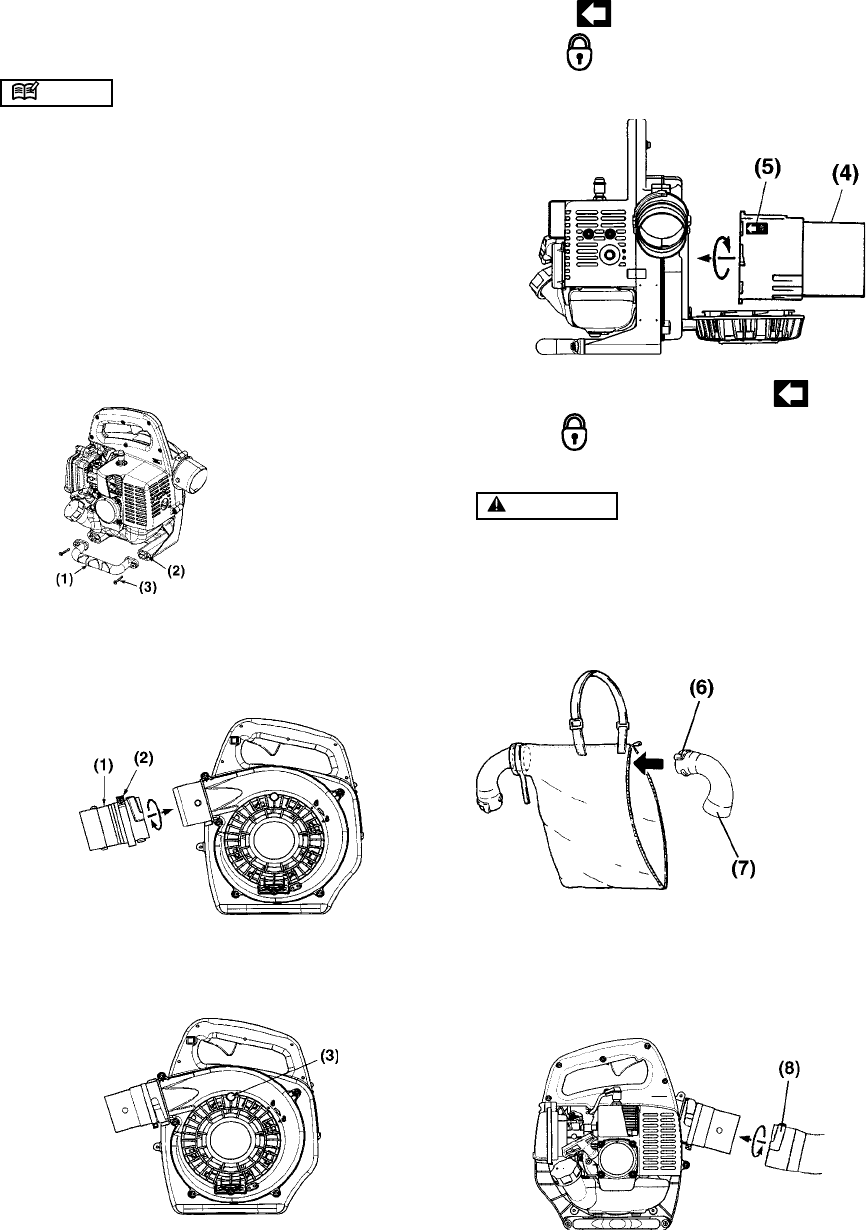
2. Align the (5) indicated on the vacuum pipe (4)
with the
indicated on the blower. Then insert the
vacuum pipe (4) into the blower.
3. Turn the vacuum pipe (4) until the (5) is aligned
with the
indicated on the blower to lock the vacuum
pipe.
WARNING
• Hold the bottom of the vacuum pipe when turning the
vacuum pipe to install or remove it.
4) Installing Elbow and Dust Bag
1. Open the fastener of the dust bag.
2. Insert the elbow convex groove into the dust bag el-
bow opening.
Continue to push the elbow convex groove until the
convex hits against the dust bag opening.
Close the dust bag fastener.
(8)Groove
(6)Convex Groove
(7)Convex End
Attach the adequate accessories, respectively
for blower operation and dust-collecting op-
eration.
NOTE
• Use the gloves during operation.
• In adjustment of the blower/dust collector or in other
types of operation, be sure to stop the engine and
detach the spark plug cap.
• Never start operation unless this machine is com-
pletely assembled.
MOUNTING THE DUST-COLLECTING KIT
1) Installing Support Handle
• This handle is supplied with the blower.
• Fit the holes of volute and handle, tighten the screws.
• Be sure to tighten the screws straightly.
2)
1. Fit the extension pipe (1) groove with main unit port
projection, turn to mount the pipe to the main unit.
2. Tighten the clamp screw (2) securely.
3) Installing Vacuum Pipe (nozzle)
1. Loosen the screw (3), and open the suction port cover.
(1) Support Handle
(2) Holes
(3) Screws
11. Optional vacuum kit usage


