5
• Make sure the spray hose loops freely without kinking or
squeezing.
4. After using sprayers and other equipment, CLEAN UP!
Dispose of debris in trash receptacles.
■ MAINTENANCE
1. In order to maintain your product in proper working order,
perform the maintenance and checking
operations described in the manual at
regular intervals.
2. Examine the sprayer at intervals for loose
fasteners and rusted or damaged parts.
Use special care for chemical leakage.
3 Clean and rinse tank and spraying assembly after each use
to prevent crystallizing, which would later cause clogging
and chemical damage to the unit.
4. All service except for those described in this manual should
be performed by competent service personnel.
5. When replacing the any other part, or any lubricant, always
be sure to use only RedMax products or products which
have been certified by RedMax for use with the RedMax
product.
6. In the event that any part must be replaced or any
maintenance or repair work not described in this manual
must be performed, please contact a representative from
the store nearest RedMax authorized servicing dealer for
assistance.
7. Do not use any accessory or attachment other than those
bearing the RedMax mark and recommended for the unit.
8. Under no circumstances should you ever take apart the
product or alter it in any way. Doing so might result in the
product becoming damaged during operation or the product
becoming unable to operate properly.
■ TRANSPORTATION
• Clean and rinse tank and spraying assembly after each use
to prevent crystallizing, which would later cause clogging
and chemical damage to the unit.
• Drain the content from the tank before transporting or
storing the sprayer.
• Secure the unit carefully to prevent movement when it is
transported.
•A unit that receives a strong shock during transport and
unloading may malfunction.
■ STORAGE
• Clean and rinse tank and spraying assembly after each use
to prevent crystallizing, which would later cause clogging
and chemical damage to the unit.
• Do not store sprayer under pressure, or with spray solution
in tank.
• When storing the sprayer, choose a space indoors free
from moisture and out of the reach of children.
■ DISPOSAL
• When disposing your machine, or chemical, be sure to
allow your local regulations.
4. For safe operation
5. Set up
Hose clamps are not completely tight.
Please tighten hose clamps prior to using.
Hose clamps are left loose to extend life of gaskets and
fittings.
Oil cap gasket before using and lubricate weekly so the
gasket will seal properly and prevent chemical leaks.
Oil check valve and maintain breather hole clear of
debris. Your failure to oil may can cause the tank to
collapse and crack due to vacuum created by pump
lubricate with "3 and 1" oil.
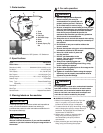
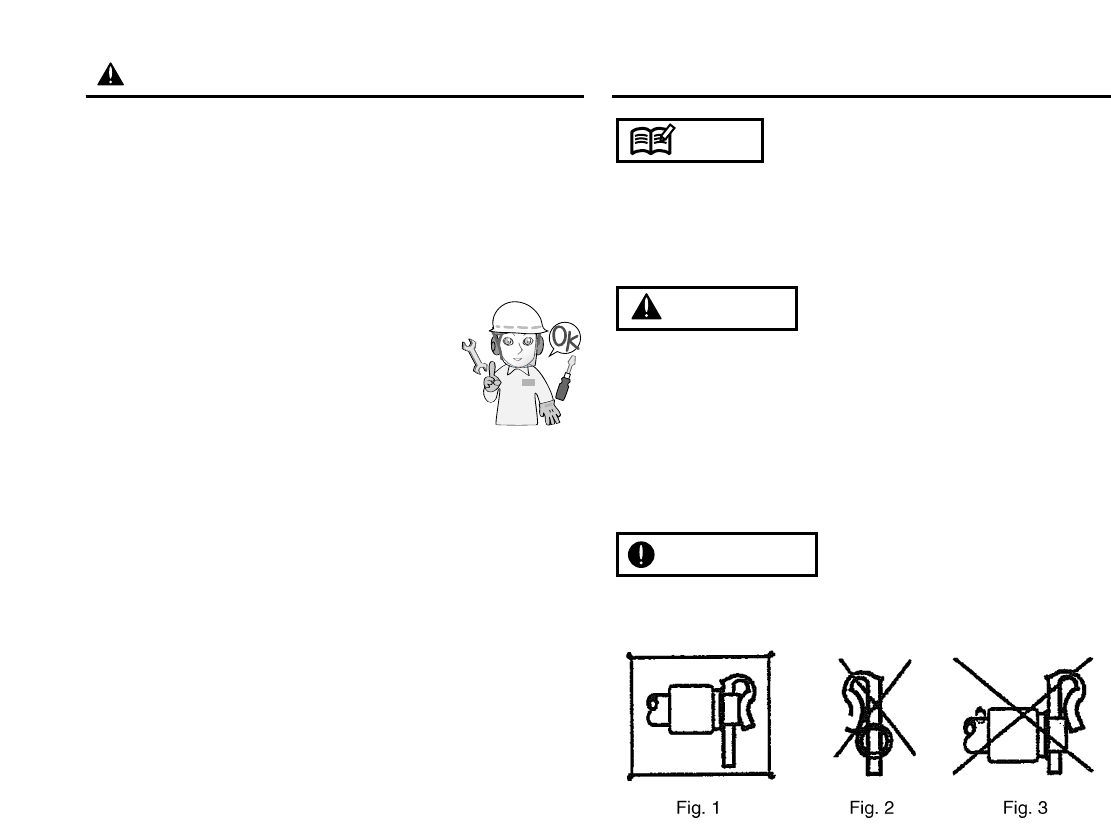
Make sure to insert the locking pin for the pump handle in its
(only) CORRECT POSITION.
The pin limits the pump stroke for optimum performance
without see page. Observe Fig. 1 exactly. (Fig. 2 and 3 spell
trouble.)
For best results and to maintain a good seal, re-grease piston
sleeve periodically with vaseline or similar light lubricants.
■ HOW TO ASSEMBLE
1. Attach spray wand to spray gun and tighten firmly.
2. Take pump handle RMKIT 7 and insert into the tube on the
pump lever RMKIT 5 ("T" shape lever on sprayer), you will
notice holes drilled through both sides of both the pump
handle and the pump lever. Align these holes, take the "R"
pin provided and place through the holes. This affixes the
handle in place and is ready for use.
For storage reverse process and then place "R" pin through
the pump lever RMKIT to keep from losing "R" pin.
3. Instructions for installing shoulder strap plastic buckle:
First put the sprayer on a hard flat surface, take the white
plastic buckle and while holding the sprayer up slightly,
place buckle under the tubular metal frame. Slowly push
down forcing the frame into the buckle. Repeat the same
procedure for other side.
IMPORTANT
WARNING
NOTE


