


12
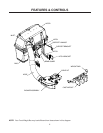
ASSEMBLY
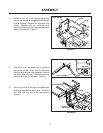
12. Position the belt guide approximately 1/8"
away from the belt. Re-tighten the 3/8" nut.
13. Re-install the pulley cover and 1/4" x 5/8"
screws.
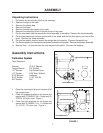
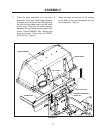
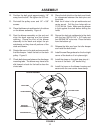
14. Place the blower pin weldments in the tubes
on the blower assembly. Figure 8.
15. Rest the blower assembly on the end and
align the deck opening and the blower
opening. Clamp the front of the blower
assembly to the deck and adjust the pin
weldments so they clear all portions of the
deck and blower.
16. Rotate idler arm to the side and secure with
the idler keeper. Install the belt on the deck
pulley. Figure 8.
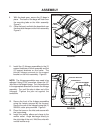
17. Check belt clearance between the discharge
mounting tabs. The blower may have to be
slid forward or back for the belt to clear the
chute tabs.
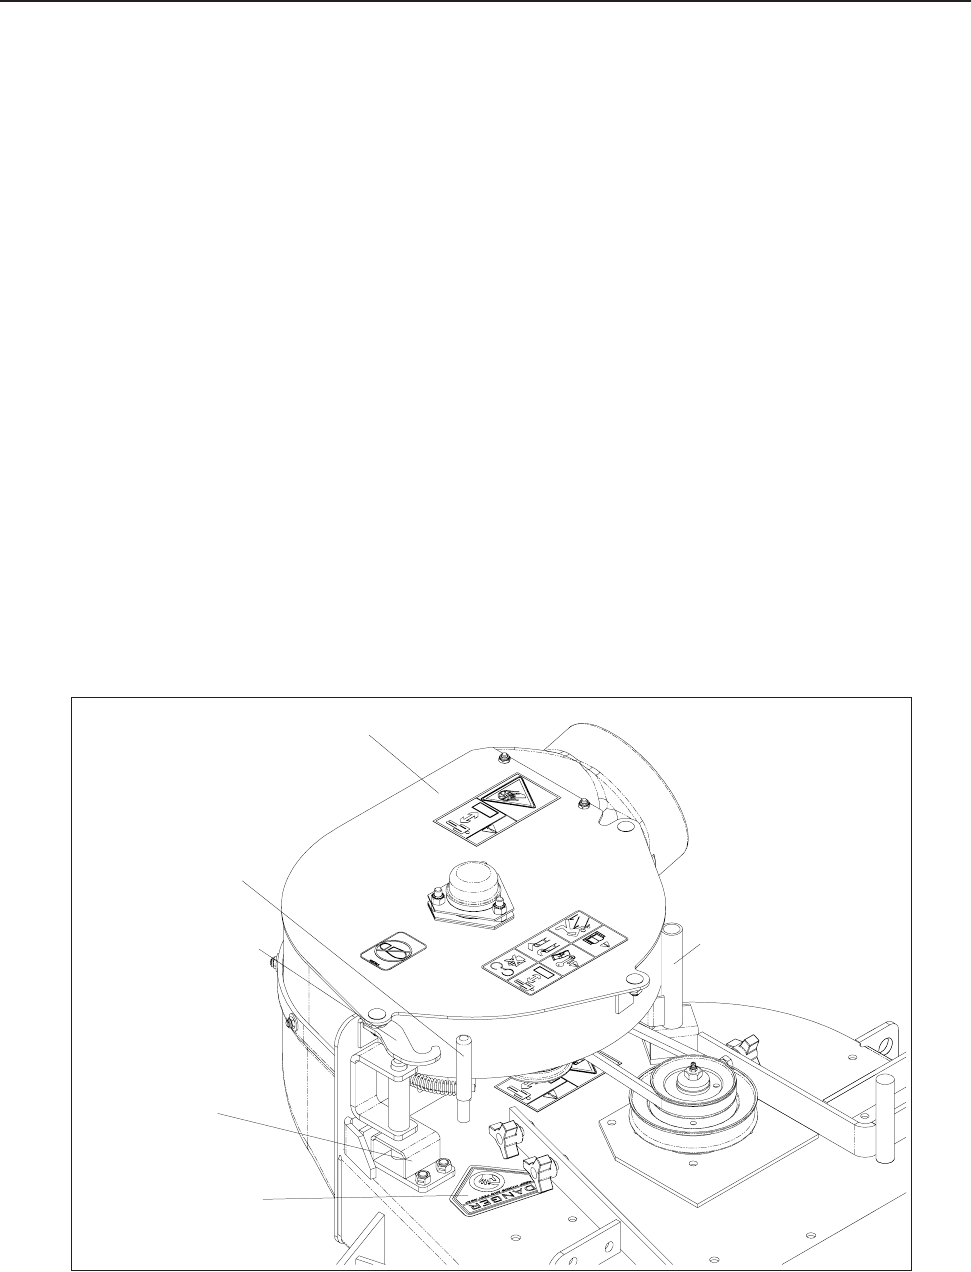
FIGURE 8
18. Place the belt shield on the deck and check
for clearances between the deck pins and
the shield.
19. Mark the 4 holes in the pin weldments and
center punch. Drill the four holes with an
11/32" drill bit. Note: Make sure the blower
is tight against the deck before drilling the
holes.
20. Secure the deck pin weldments to the deck
with the four 990134 3/8" x 3/4" bolts and
four 990546 3/8" nyloc nuts. Place the bolts
from the bottom up.
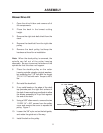
21. Release the idler arm from the idler keeper
and install the belt shield.
22. Install the new Danger decal on the front right
corner of the deck so it is in plane sight.
23. Install the stops on the deck stop pins at t
he rear of the deck. (48" decks only.)
24. Install the hose on the blower housing and
secure with the over center hose clamp.
BLOWER ASSEMBLY
IDLER ARM
IDLER KEEPER
DECK PIN
WELDMENT
DANGER DECAL
BLOWER TUBE