


6
3
Setup and
Adjustment
1. Before assembling, remove the unit from the carton.
a. Open carton and remove loose parts included with
unit. Do not crimp cables while removing loose
parts or the entire unit from the carton.
b. Cut corners and lay carton down flat. Remove
packing material. Roll or slide unit out of carton.
Check carton thoroughly for loose parts.
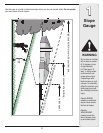
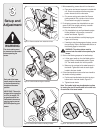
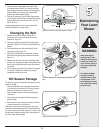
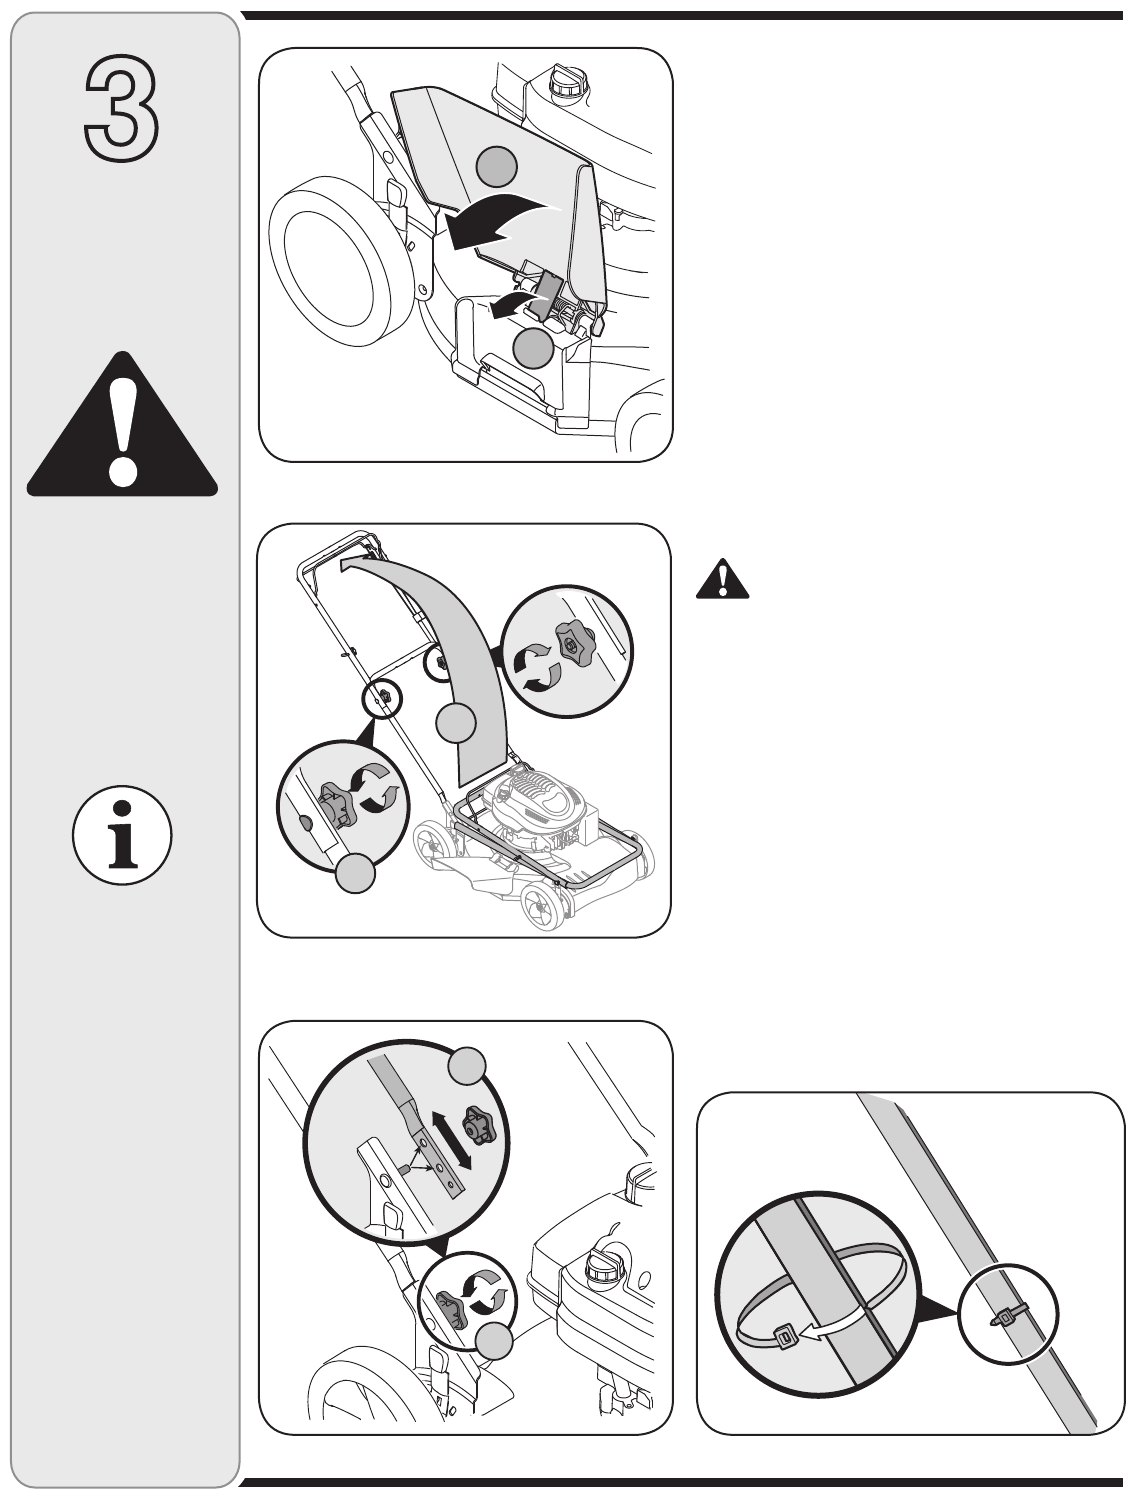
2. For shipping purposes, the chute deflector on your
mower is held in an upright position by a retainer.
Remove the retainer as follows:
a. Pull chute deflector up and back towards engine.
Holding deflector in this position, remove the
retainer and discard, Figure 3-1.
b. Lower the chute deflector carefully keeping your
fingers out of the way.
c. If wanting to side discharge grass clippings, remove
the mulch plug. Refer to the Adjustment section on
the following page for instructions.
WARNING: The chute retainer must be
removed and discarded before operating the
mower.
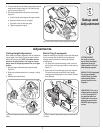
3. Perform the following sequence for handle setup:
a. Lift the upper handle up from the folded position
and pull it back to the extended position, Figure
3-2. The handle should click into this position.
b. Make sure the carriage bolt is seated properly in
the handle. Tighten star knobs to secure upper
handle to the lower handle
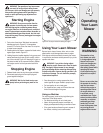
4. Follow the steps below to secure the lower handle to
the handle mounting brackets:
a. Position each handle bracket stud into the top or
bottom hole in the lower handle, Figure 3-3.
b. Tighten the star knobs.
Note: The handle height may be adjusted at anytime
by moving the stud on each bracket to the other hole
on each side of the lower handle.
Each end of the lower
handle must be attached
to the handle mounting
brackets at the same
position.
IMPORTANT: This unit is
shipped without gasoline
or oil in the engine. Fill
up gasoline and oil as
instructed in the accom
-
panying engine manual
BEFORE operating your
mower.
WARNING
The chute retainer must
be removed and discarded
before operating the
mower.
Figure 3-1: Remove retainer from underside of chute.
Figure 3-2: Unfold handle and tighten hardware.
Figure 3-3: Secure lower handle to mounting brackets. Figure 3-4: Use cable tie to secure cables to lower handle.