


12
CLEANING
Use a small brush to clean off the outside of the unit. Do
not use strong detergents. Household cleaners that
contain aromatic oils such as pine and lemon, and
solvents such as kerosene, can damage plastic housing
or handle. Wipe off any moisture with a soft cloth.
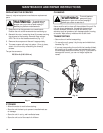
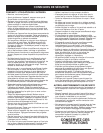
TRANSPORTING
• Secure the unit while transporting.
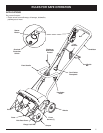
• To move the unit, grasp it by the top and middle front
handles (Fig. 12).
• If you are transporting the unit with the handles folded,
be careful not to make contact and accidentally bend
the discharge directional control (Fig. 6). If you bend or
damage the control, you can no longer adjust the
vanes.
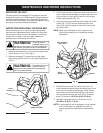
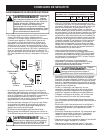
REPLACING THE SCRAPER
Use only original equipment manufacturer replacement
parts.
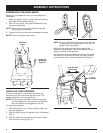
1. Place the unit on the ground or on a work bench.
Position the unit so the vanes and rotor are facing up.
2. Beneath the rotor, locate the three (3) screws securing
the scraper to the housing. Remove them using a
#T20 Torx bit or flat blade screwdriver (Fig. 11).
3. Remove the scraper and discard it appropriately.
4. The new scraper will snap into place. Once in place,
attach it to the unit by reinstalling the three (3)
screws.
Torque the screws to:
25-30 in•lb (2.8-3.3 N•m).
Scraper
Fig. 12
Fig. 11
To avoid serious
personal injury,
always turn your unit off and unplug it
before you perform maintenance.
WARNING:
To avoid serious
personal injury,
always turn your unit off and unplug it
before you clean or service it.
WARNING:
MAINTENANCE AND REPAIR INSTRUCTIONS
STORAGE
• Allow the motor to cool before storing.
• Store the unit locked up to prevent unauthorized use
or damage.
• Store the unit in a dry, well-ventilated area.
• Store the unit out of the reach of children.