


15
BLADE MOUNTING TORQUE
Center Bolt: 450 in. lbs. min., 600 in. lbs. max.;
Blade Adapter Bolts (if applicable): 200 in. lbs. min.,
350 in. lbs. max.
To ensure safe operation of your unit, all nuts and
bolts must be checked periodically for correct
tightness.
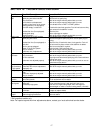
DECK
The underside of the mower deck should be
cleaned after each use to prevent a buildup of grass
clippings, leaves, dirt or other matter. If this debris is
allowed to accumulate, it will invite rust and
corrosion, and may cause an uneven discharge of
grass clippings at the next cutting.
The deck may be cleaned by tilting the mower and
scraping clean with a suitable tool (make certain the
spark plug wire is disconnected).
ENGINE
Refer to the separate engine manual for engine
maintenance instructions.
Maintain engine oil as instructed in the separate
engine manual packed with your unit. Read and
follow instructions carefully.
Service air cleaner every 25 hours under normal
conditions. Clean every few hours under extremely
dusty conditions. Poor engine performance and
flooding usually indicates that the air cleaner should
be serviced. To service the air cleaner, refer to the
separate engine manual packed with your unit.
The spark plug should be cleaned and the gap reset
once a season. Spark plug replacement is recom-
mended at the start of each mowing season; check
engine manual for correct plug type and gap specifi-
cations.
Clean the engine regularly with a cloth or brush.
Keep the cooling system (blower housing area) clean
to permit proper air circulation which is essential to
engine performance and life. Be certain to remove all
grass, dirt and combustible debris from muffler area.
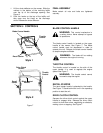
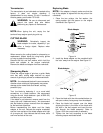
REAR FLAP REPLACEMENT
The rear flap is attached to the back of the mower
deck, and is designed to minimize the possibility that
objects will be thrown from the rear of the mower
toward the operator. If the rear flap becomes dam-
aged, replace as follows.
To remove the old rear flap, remove the three hex
screws and the retaining plate. Attach the new rear
flap with the retaining plate hex screws previously
removed.
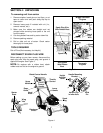
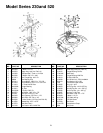
Belt Replacement
Disconnect the spark plug wire and ground it
against the engine.
1. Drain the fuel tank or place a piece of plastic
beneath the cap to prevent gasoline leakage.
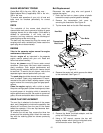
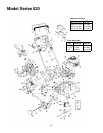
2. Remove the transmission belt cover by
removing the three bolts. See Figure 16.
3. Tip the mower back on its side. Block securely.
Figure 16
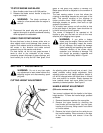
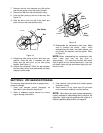
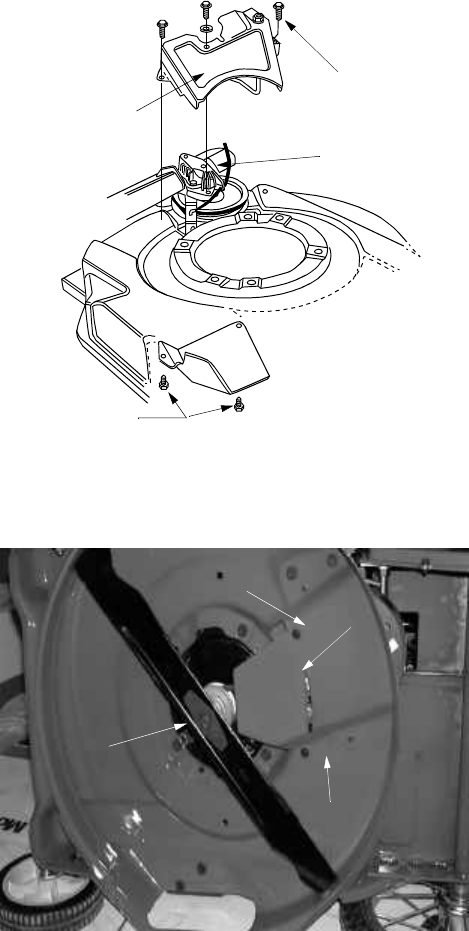
4. Remove the center bolt which secures the blade
to the crankshaft. See Figure 17.
Figure 17
5. Remove the blade, the blade adaptor, and the
pulley half. Remove the belt.
6. Using a 3/8” wrench, remove the two self-
tapping screws which hold the inside belt cover,
and remove the cover. See Figure 17.
Hex Bolt
Transmission
Belt Cover
Hex Bolts
Transmission
Self-Tapping
Screws
Remove Bolt
Remove Bolt
Inside
Belt
Guard
Remove
Center
Bolt