


6
SECTION 4: SET-UP INSTRUCTIONS
IMPORTANT: After assembly, service engine
with gasoline, and check oil level as instructed in the
separate engine manual packed with your unit.
NOTE: All references to right or left side of the
snow thrower are determined from behind the unit in
the operating position.
UNPACKING
1. Remove staples, break glue on the top flaps, or
cut tape at carton end and peel along top flap to
open carton.
2. Remove any loose parts included with unit (i.e.,
operator’s manual, etc.)
3. Cut corners and lay end of carton down flat.
4. Remove packing material.
5. Roll unit out of carton. Check carton thoroughly
for loose parts.
TOOLS REQUIRED FOR ASSEMBLY
• Two Adjustable Wrenches
LOOSE PARTS IN CARTON
A Hopper Assembly
B Discharge Chute
C Chipper Chute (463 or 465)
DBag
ATTACHING THE HOPPER ASSEMBLY
AND DISCHARGE CHUTE
All Models
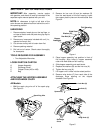
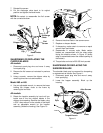
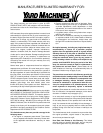
1. Pull the spark plug wire off of the spark plug.
See Figure 3.
Figure 3
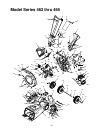
2. Remove six hex nuts (A) and six washers (B)
from the weld studs on the flail housing. Leave
the support plate in place on the weld studs. See
Figure 4.
Figure 4
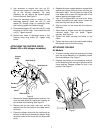
3. Place hopper assembly into position in front of
flail housing. Align holes in hopper assembly
collar with weld studs on flail housing.
4. Slide hopper assembly onto weld studs.
5. Replace the washers (B) and the hex nuts (A).
6. Tighten the hex nuts (A).
7. Lift hopper until it clicks into the raised position.
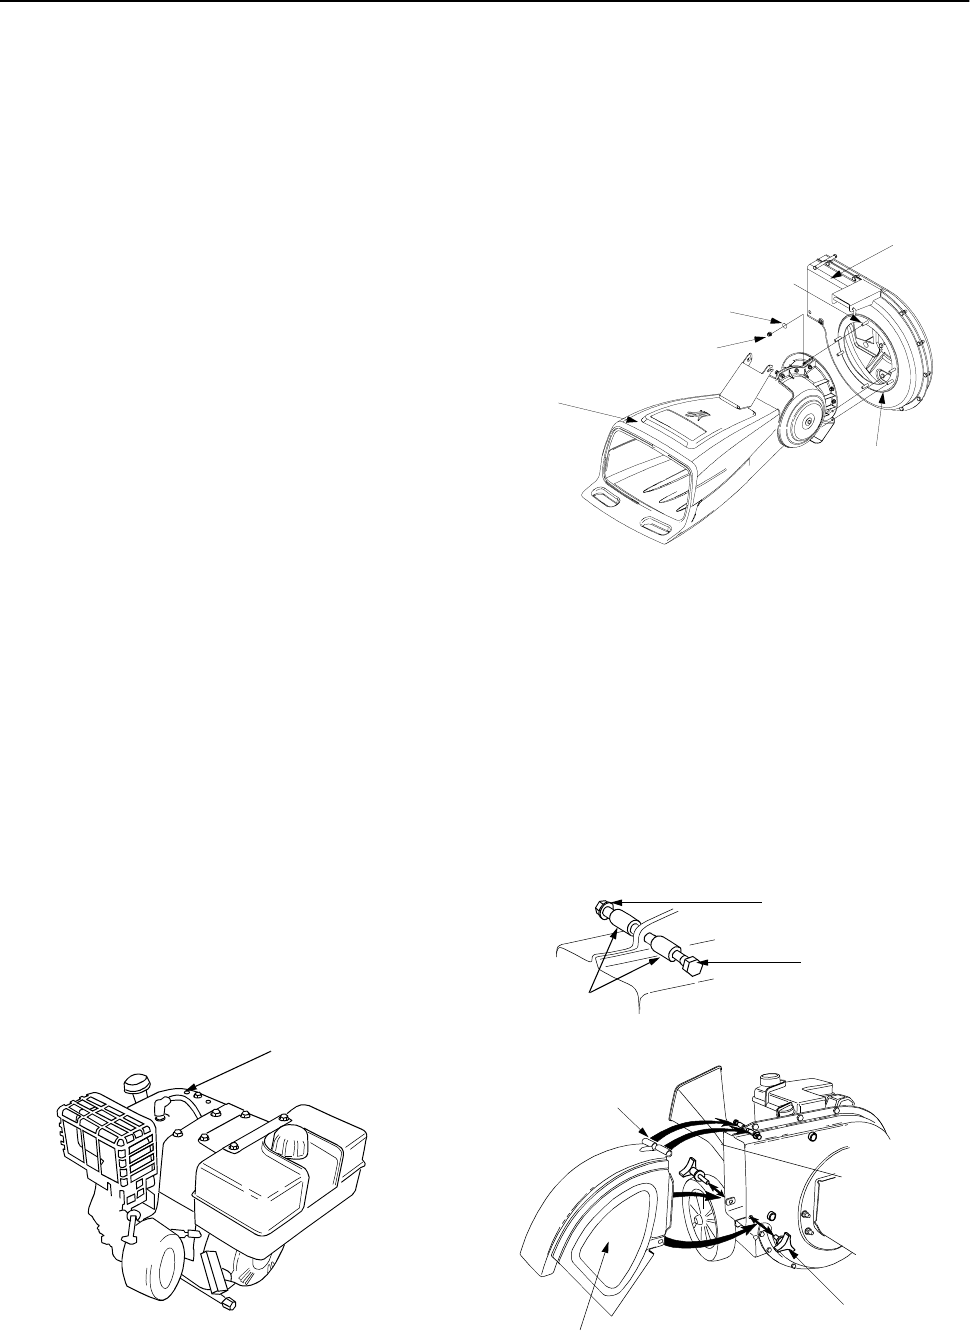
8. Remove wing knobs (C) from each side of the
discharge chute opening on the chipper
shredder. See Figure 5.
Figure 5
Spark Plug Wire
Hex Nut (A)
Weld Stud
Hopper
Washer (B)
Support Plate
Flail Housing
Assembly
Hex Lock Nut (D)
Spacers (E)
Hex Bolt (F)
Chute
Discharge
Hinge
Wing Knob (C)