


13
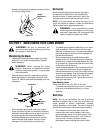
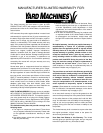
wheels must be placed in the same relative position
for uniform cutting height.
Figure 17
Carburetor
Minor carburetor adjustments may be required to
compensate for differences in fuel, temperature,
altitude and load. To adjust carburetor, refer to the
separate engine manual packed with your mower.
NOTE: A dirty air cleaner will cause an engine to run
rough. Be certain air cleaner is clean and attached to
the carburetor before adjusting carburetor.
WARNING: If any adjustments are made
to the engine while the engine is running (e.g.
carburetor), keep clear of all moving parts. Be
careful of heated surfaces and muffler.
SECTION 7: MAINTAINING YOUR LAWN MOWER
WARNING: Be sure to disconnect and
ground the spark plug wire before performing
any repairs or maintenance.
Maintaining the Blade
• Periodically inspect the blade adapter for cracks,
especially if you strike a foreign object. Replace
when necessary.
WARNING: When removing the cutting
blade for sharpening or replacement, protect
hands by using heavy gloves or a rag to grasp
the cutting blade.
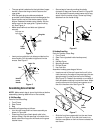
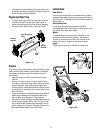
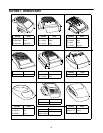
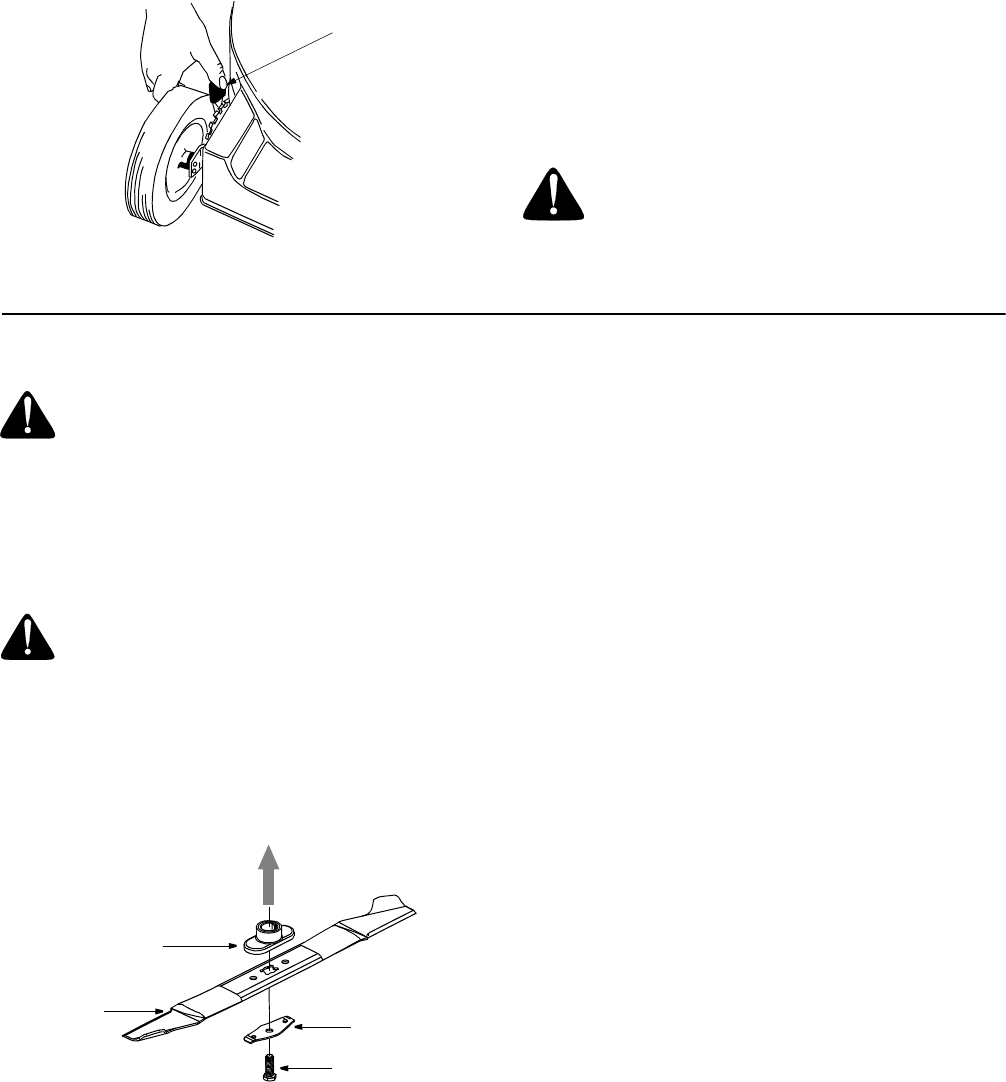
• Remove the bolt and bell support which hold the
blade and adapter to the engine crankshaft. See
Figure 18 . Remove the blade and adapter from the
crankshaft.
Figure 18
• When sharpening the blade, follow the original
angle of grind as a guide. It is extremely important
that each cutting edge receive an equal amount of
grinding to prevent an unbalanced blade. An
unbalanced blade will cause excessive vibration
when rotating at high speeds, and may cause
damage to the mower and/or personal injury.
• The blade can be tested by balancing it on a round
shaft screwdriver. Remove metal from the heavy
side until it balances evenly. It is recommended that
the blade always be removed from the adapter for
the best test of balance.
• Before reassembling the blade and the blade
adapter to the unit, lubricate the engine crankshaft
and the inner surface of the blade adapter with light
oil (or engine oil). Also lubricate the bolt holes, bolts
and inner surface of the nuts.
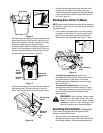
• Install the blade adapter on the crankshaft with the
“star” away from the engine. Place the blade with
the side marked bottom (or with part number) facing
away from the adapter. Align the blade bell support
over the blade with the tabs in the holes of the
blade and insert the hex bolt. Tighten the hex bolt to
the torque listed here.
Blade Mounting Torque:
Center Bolt: 450 in. lbs. min., 600 in. lbs. max.
• To ensure safe operation of your unit, all nuts and
bolts must be checked periodically for correct
tightness.
Deck Care
NOTE: We do not recommend the use of pressure
washers or garden hose to clean your unit.These may
cause damage to electric components, spindles,
pulleys, bearings or the engine. The use of water will
shorten life of the mower and reduce its serviceability.
• The underside of the mower deck should be
cleaned after each use to prevent a build-up of
grass clippings, leaves, dirt or other matter. If this
debris is allowed to accumulate, it will invite rust
and corrosion, and may cause an uneven
discharge of grass clippings at the next cutting.
Height
Adjustment
Lever
Blade
Adapter
Bell
Support
Hex Bolt
Blade
Crankshaft