


5
SECTION 2: ASSEMBLING YOUR TILLER
IMPORTANT:
This unit is shipped without gasoline or oil
in the engine. Be certain to service engine with gasoline
and oil, as instructed in the engine manual, before
operating your tiller. (The engine manual is packed
seperately and shipped in the tiller carton.)
NOTE: Reference to right or left side of the tiller is
observed from the operating position.
Removing Unit From Carton
• Remove staples, break glue on top flaps, or cut
tape at carton end and peel along top flap to open
carton. Remove loose parts (i.e., operator’s
manual, etc.) from carton.
• Cut along corners, lay carton down flat, and remove
packing material. Roll or slide unit out of carton and
check carton thoroughly again before discarding.
• Extend control cables to the rear of the tiller and lay
them on the floor. Do not bend or kink cables.
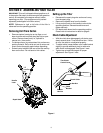
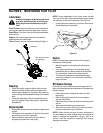
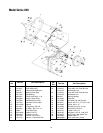
Setting up the Tiller
• Disconnect the spark plug wire and move it away
from the spark plug.
• Remove the handle lever from the handle.
• Lift up and pull back on the handle to raise to the
operating position. Reinsert handle lever and
tighten securely.
• Pull depth stake down into the operating position.
Please refer to instructions in detail on page 8.
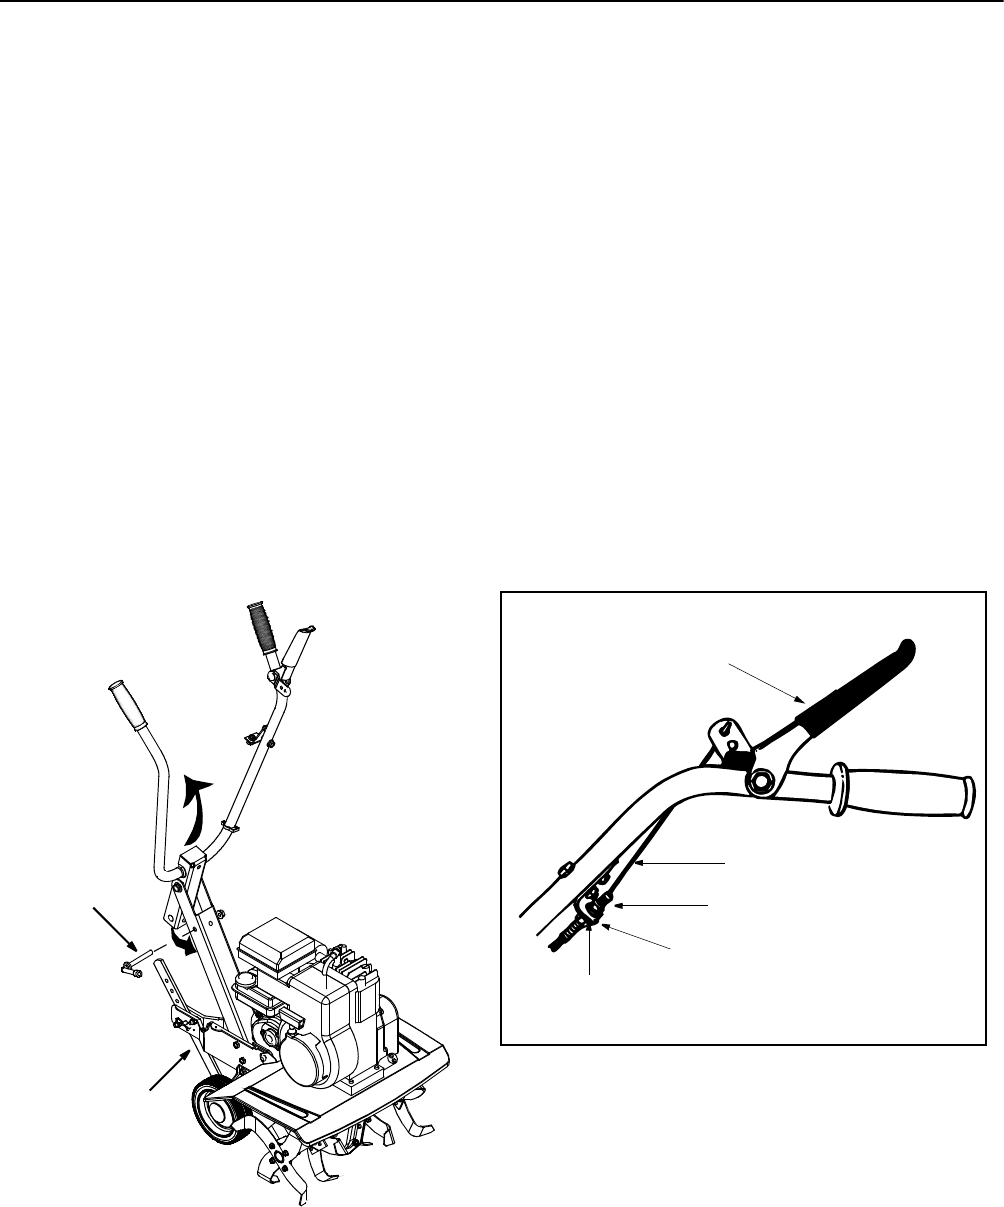
Check Cable Adjustment
• With the clutch lever disengaged, pull starter rope
slowly several times. Tines should not turn. If tines
do turn, the cable is not adjusted properly.
• To adjust cable, loosen bottom nut at cable bracket
slightly to provide additional slack in cable wire
while clutch is disengaged. See Figure 1 inset.
• Tighten top nut and check again for proper
adjustment. See Figure 1 inset.
Figure 1
Handle
Lever
Lift
up
handle
Depth Stake
Tine Clutch
Control Lever
Clutch Cable
Top Hex Nut
Bottom
Hex Nut
Cable
Bracket