14
both feet firmly on the foot platform and turn on the
blade clutch switch. Run blades for a minute or so.
Try engaging and disengaging the blades a few
times about 10 seconds apart. If the blades do not
start and stop in a few seconds each time, inspect
the clutch or contact your local Wright dealer. Under
mowing load, the clutch’s life will be the greatest at
the highest RPM setting.
How to Test the Operator Presence Control
(OPC) Switch
With the parking brakes applied and the blades ON,
try lifting your feet off the foot platform to test the
Operator Presence Control switch (OPC). The
engine should kill and the blades should stop within
a few seconds. If not, service the OPC system or
contact your local Wright dealer.
Service and Adjustments
Tire Maintenance and Pressure
Excessively worn tire tread is dangerous on all hills.
Replace drive tires with less than 3/32” of any tread
groove left. Use tires with the tread pattern
recommended by Wright Mfg., Inc. only. Keep the
tire pressure in the drive tires between 18 and 24
psi. Higher pressures will cause the tires to have
less traction which will force you to go slower and
with less safety and give you a harder ride. Front
Casters are equipped with non-pneumatic tires and
do not required any air. They do not have any tread
but should be replaced when excessively worn.
Height-of-Cut
Before adjusting the height-of-cut be sure the mower
blades are not spinning, and all four tires have
proper air pressure. Check for even tire wear. The
height-of-cut can be adjusted the following ways:
• Pull the deck lift lever on the right hand side of the
mower towards the rear of the mower until it clicks
once into the locked transport position. Then set
the mower blade height with the selector pin on
the left hand side of the mower. Once the proper
height setting is set on the left, pull back on the
deck lift lever on the right hand side and then
lower the lever towards the front of the machine
until it stops at the set height of cut.
Deck Adjustments
The mower deck can be adjusted for pitch and side-
to-side lever. Pitch is the relationship between the
front of the deck and the rear of the deck in regards
to height of cut. In most cases, a positive pitch (front
of the deck lower than the rear of the deck) of ¼” is
the optimum setting. These two adjustments can
easily be made by using the deck lift rod assemblies
attached to the front deck arms and the threaded
deck hangers located at the rear of the deck frame.
These hangers are connected to the chains that
hold the deck. Adjust the rear deck hangers (by
using a socket through the hole above the toe
area of the platform) to achieve a ¼” pitch.
These hangers are right-handed threads. If you
raise any of these settings above the factory
setting, the deck may not raise all the way up
into transport position. Be sure and check the
deck height of cut range after any adjustments
are made to these hangers to ensure that the
height of cut adjustments work properly. If
unable to make the adjustments needed by only
using these hangers, contact your dealer for
assistance.
Belt Tension Adjustment
The pump drive belt is self-adjusting, and requires
no adjustment, just replacement. The blade drive
belts are self-adjusting also and require no
adjustment, just replacement.
Deck Lift Spring Adjustment
To adjust deck spring tension, tighten or loosen the
eye-bolt Nylock jam nut located in the front tank
bracket. If tightening for more lift assist make sure
not to over tighten creating the deck to hop over
rough terrain.
Spring platform Adjustment
The factory setting is both springs set at the most
forward position. The more rearward the spring
position, the stiffer the platform gets. Adjustment will
be to preference of feel. The two adjustment springs
should at all times, be positioned next to each other
not one forward or back more than the other. To
adjust, loosen each spring retaining bolt from the top
just enough to slide it, then tighten with impact
wrench. The nut may spin using hand wrench.
NOTE, do not loosen too much, if the nut falls off,
the foot platform will have to be removed to reinstall.
There is an extra hole for a third spring for operators
heavy enough to bottom out the duel spring stock
set up.
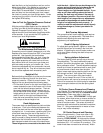
Oil Cooler Screen Removal and Cleaning
Your Stander ZK is equipped with an oil cooler, the oil
cooler debris screen will need to be cleaned several
times a day. Clean more often in bush hog
conditions. To clean, “STOP ENGINE” lift thigh pad
for access, either wipe screen or remove screen for
cleaning. To remove screen, lift and rotate spring
locks to free the screen. The screen is bowed to
prevent a rattle and should be installed hump down,
like a “U”. Using compressed air or water to clean
may or may not be necessary.
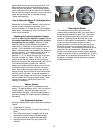
Oil Cooler Removal and Cleaning
Clean oil cooler weekly. Clean more often in dry
conditions. To remove oil cooler for a thorough
cleaning “STOP ENGINE”, lift thigh pad for access.
Loosen knob as far as necessary to slide the cooler
back about 3/8 – 1/2" and then lift up and out. (The
cooler knob does not need to be removed) Watch
WARNING


