9
ETL-ES-Solana-WH09
L
F
S
S
E
F
H
K
12
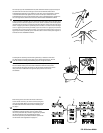
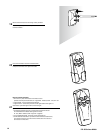
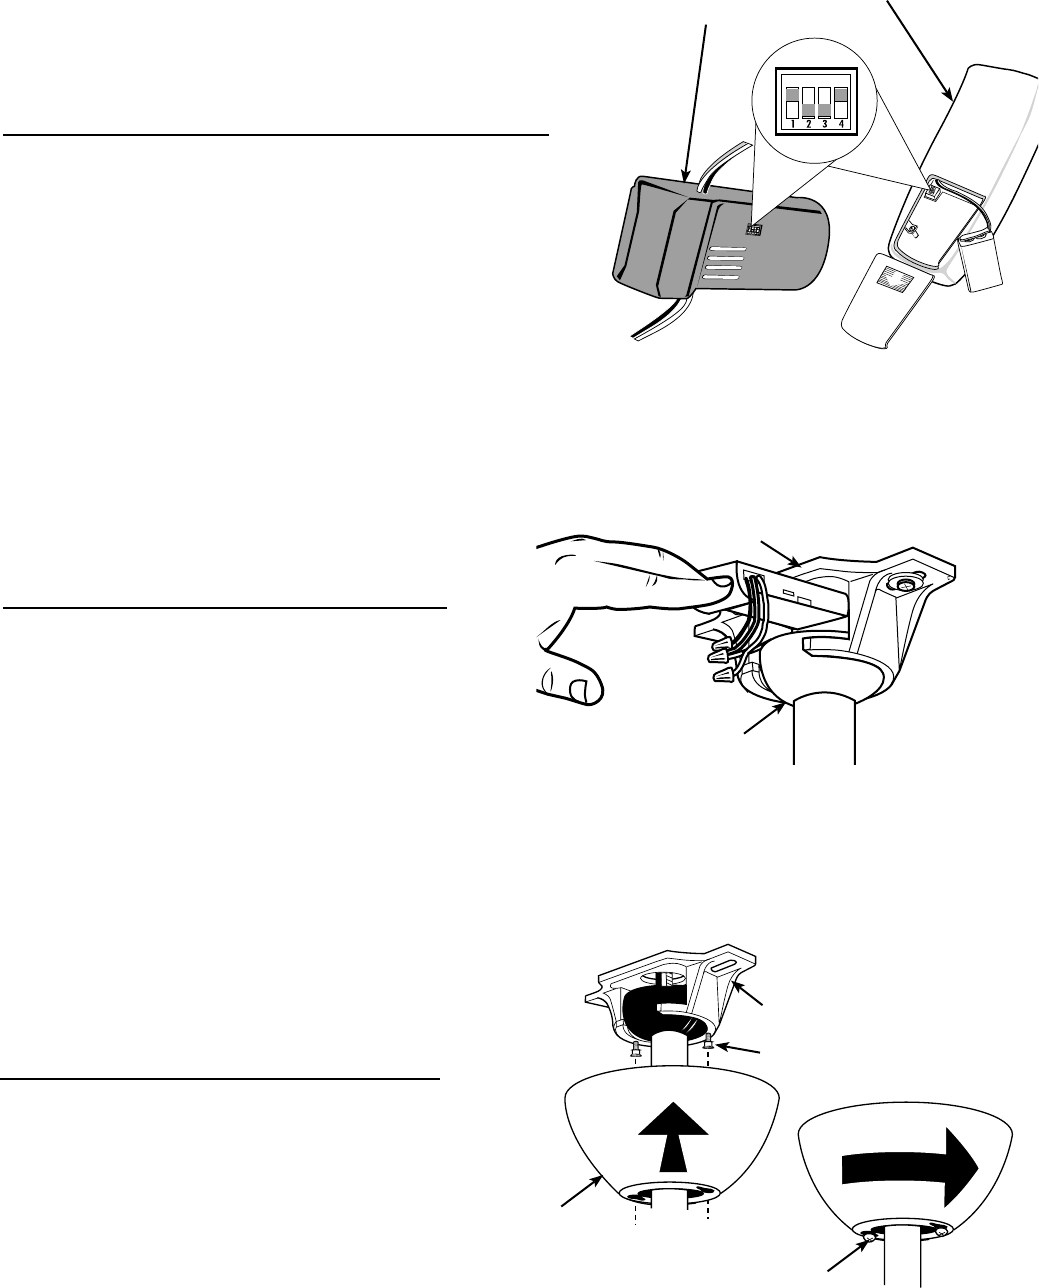
This remote control unit is equipped with 16 code combinations to
prevent possible interference from or to other remote units. The frequency
switches on your receiver (L) and transmitter (K) have been preset at the
factory. Please recheck to make sure the switches on transmitter (K) and
receiver (L) are set to the same position, any combination of settings will
operate the fan as long as the transmitter and receiver are set to the same
position.
Note: Install one 6F22 (9V) battery by removing battery cover on back
of transmitter, installing battery, and replacing battery cover.
Esta unidad de control remoto está equipada con 16 códigos de combinación
para prevenir posibles interferencias con otras unidades de control remoto.
Los interruptores de frecuencia en su receptor (L) y transmisor (K) han sido
programados en fábrica. Por favor verifique que los interruptores en
el transmisor (K) y el receptor (L) estén en la misma posición, cualquier
combinación hará funcionar el ventilador siempre y cuando el transmisor y
el receptor estén en la misma posición.
Nota: Para instalar la pila 6F22 (9V) quite la cubierta del receptáculo
para la pila en la parte posterior del transmisor, instale la pila y vuelva
a colocar la cubierta.
13
14
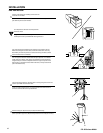
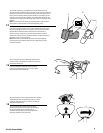
Once wiring step has been completed, slide the wired
remote receiver in between the bracket (F) and the top
of the downrod ball (H).
Una vez completado el cableado, deslice el receptor
remoto entre la pieza de fijación (F) y la parte superior
de la esfera de la varilla vertical (H).
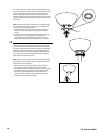
Align the keyholes on the canopy (E) with the protruding
screw heads (S) from the mounting bracket (F). Lift the
canopy up and rotate clockwise until the screwheads
engage the keyslots fully.
Alinee los orificios del escudete (E) con las cabezas
de tornillo sobresalientes (S) del soporte de montaje (F).
Levante el escudete y gírelo en dirección de las
manecillas del reloj hasta que las cabezas de tornillo
calcen por completo con los chaveteros.


