


16
ETL-ES-Fairview-WH10
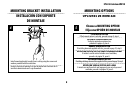
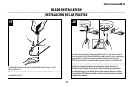
SECURE TO CEILING
ASEGURE EL VENTILADOR AL CIELORRASO
18
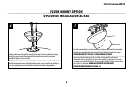
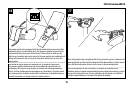
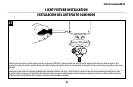
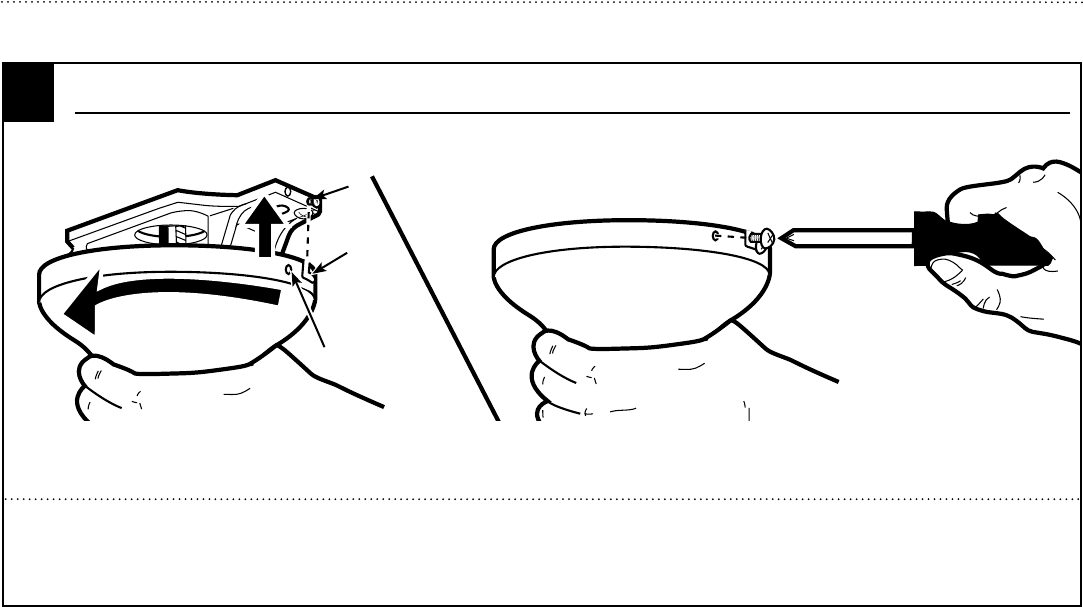
The canopy has two mating slots (1) and two mating holes (2). Position both slots on canopy directly under and in line with two screws in the mounting bracket (3). Lift
the canopy, allowing the two screws to slide into the mating slots. Rotate the canopy until both screws from the mounting bracket drop into the slot recesses. Tighten
screws securely. Install two screws into the mating holes of the canopy and tighten to secure the canopy to the mounting bracket.
El dosel tiene dos ranuras coincidentes (1) y dos orificios coincidentes (2). Coloque ambas ranuras del dosel directamente abajo y en línea con los dos tornillos del soporte
de montaje (3). Eleve el dosel, permitiendo que los dos tornillos se deslicen dentro de las ranuras. Gire el dosel hasta que ambos tornillos del soporte de montaje caigan
dentro de las ranuras. Apriete los tornillos asegurándolos. Instale los dos tornillos en los orificios coincidentes del dosel y ajústelos para asegurar el dosel al soporte
de montaje.
2
3
1
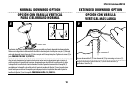
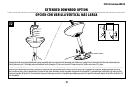
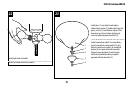
For flush mount fans, carefully lift fan from the mounting bracket, making sure not to break any wire connections.
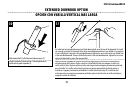
For downrod fans, slide the canopy up to the mounting bracket.
Para ventiladores de instalación al ras, levante con cuidado el ventilador del soporte de montaje asegurándose de que no interrumpa ninguna conexión de los cables.
Para ventiladores con varilla vertical, deslice el dosel hacia arriba hasta el soporte de montaje.