


16 17
ETL-ES-Contractors-R-WH14 ETL-ES-Contractors-R-WH14
1
2
19
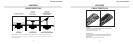
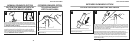
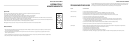
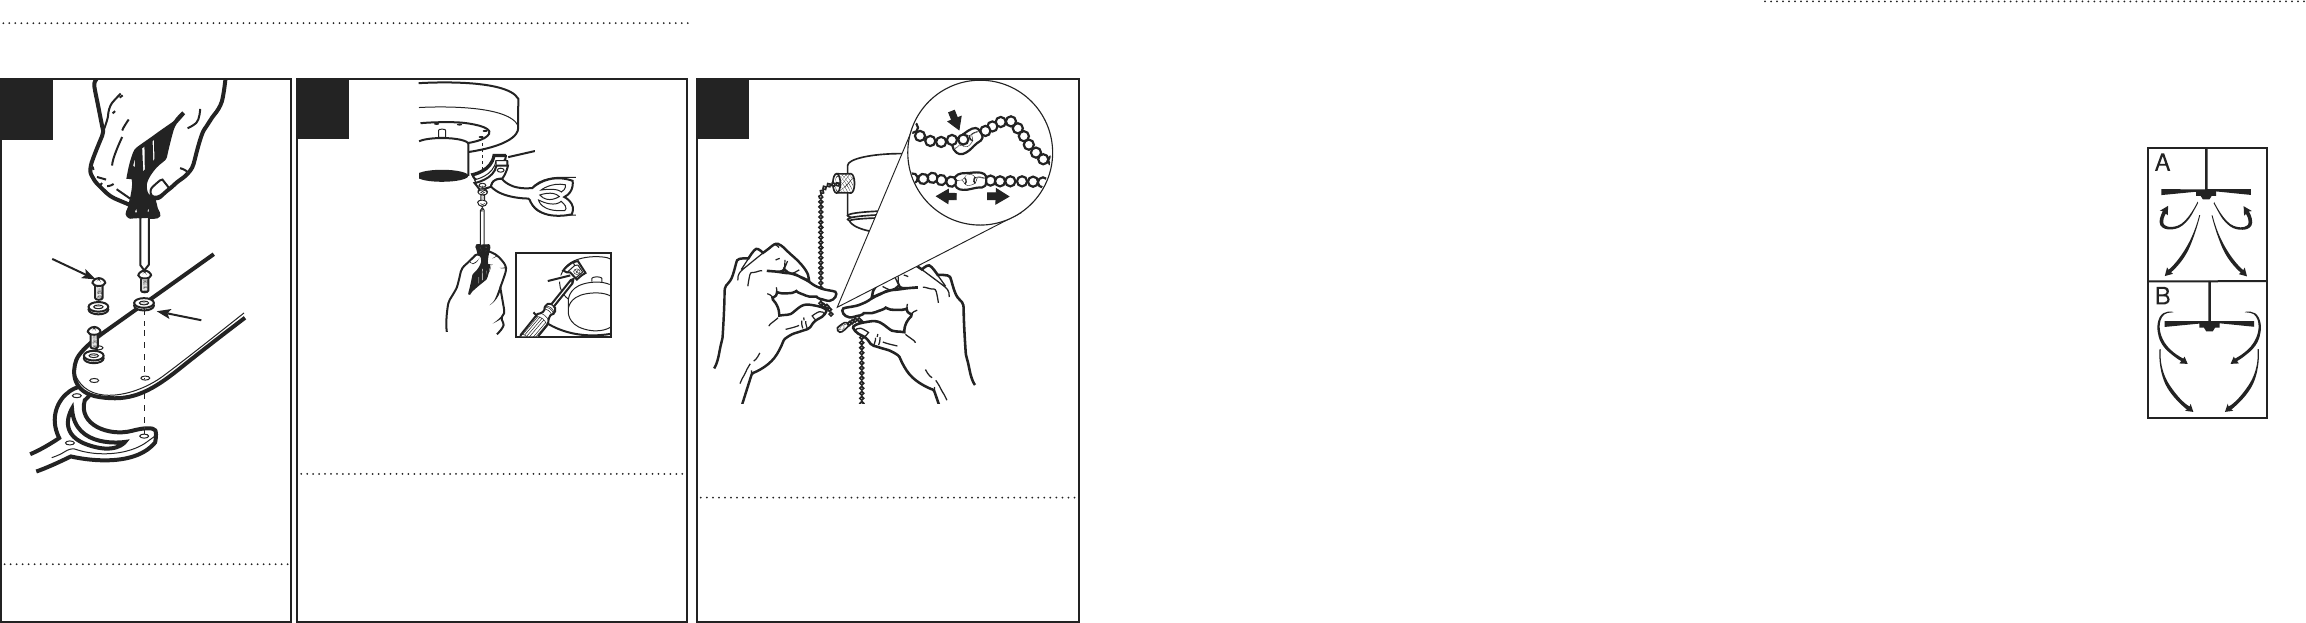
Check the motor for plastic shipping stabilizer tabs (1), and
remove them if they are present. Attach blade assembly to
motor using the noise-dampening motor gaskets (2) and motor
screws provided. Tighten screws securely. NOTE: Some models do
not utilize motor gaskets, washers, or stabilizer tabs.
Verifique si hay lengüetas plásticas de embalaje para sostener
al motor (1) y descártelas. Fije el conjunto de las aletas al
motor usando las juntas reductoras de sonido del motor (2)
y los tornillos para el motor incluidos. Apriete los tornillos
asegurándolos. NOTA: Algunos modelos no utilizan juntas para el
motor, arandelas o lengüetas de embalaje.
18
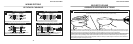
Attach blade brackets to blades using the blade
bracket screws (1) and fabric washers (2).
Fije los soportes para aletas a las aletas con
los tornillos (1) y las arandelas de tela (2).
2
1
BLADE INSTALLATION
INSTALACIÓN DE LAS PALETAS
20
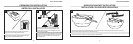
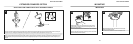
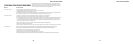
Assemble decorative fob and extension chains from hardware
bag to fan pull chains by inserting end of chain into chain
coupling. Confirm chains are held by lightly pulling both chains
in coupling.
Conecte las cadenilla de tiro con las piezas finales
correspondientes a las cadenas del ventilador introduciendo el
extremo de la cadenilla de tiro a la pieza de unión. Asegúrese
de que las cadenas están bien sujetas, tirando ligeramente de
ambas cadenas por la pieza de unión.
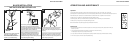
Operation
Turn on the power and check operation of fan. The pull chain controls the fan speeds as follows: 1 pull - high; 2 pulls - medium; 3 pulls - low; 4 pulls - off.
Speed settings for warm or cool weather depend on factors such as room size, ceiling height, number of fans and so on. The slide switch controls direction, forward or reverse.
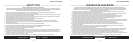
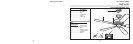
Warm weather/down position - (Forward) Fan turns counterclockwise direction. A downward air flow creates a cooling effect as shown in illustration A.
This allows you to set your air conditioner on a higher temperature setting without affecting your comfort.
Cool weather/up position - (Reverse) Fan turns clockwise direction. An upward airflow moves warm air off the ceiling area as shown in illustration B.
This allows you to set your heating unit on a lower setting without affecting your comfort.
NOTE: Turn off and wait for fan to stop before changing the setting of the forward/reverse slide switch.
Maintenance
1. Because of the fan’s natural movement, some connections may become loose. Check the support connections, brackets, and blade attachments twice a year.
Make sure they are secure.
2. Clean your fan periodically to help maintain its new appearance over the years. Do not use water when cleaning.
This could damage the motor, or the wood, or possibly cause electrical shock.
3. Use only a soft brush or lint-free cloth to avoid scratching the finish. The plating is sealed with a lacquer coating to minimize discoloration or tarnishing.
4. There is no need to oil your fan. The motor has permanently lubricated bearings.
OPERATION AND MAINTENANCE