


19
MUFFLER
Inspect and replace corroded muffler and
spark arrester (if equipped) as it could create
a fire hazard and/or damage.
SPARK PLUG(S)
Replace spark plug(s) at the beginning of
each mowing season or after every 100
hours of operation, whichever occurs first.
Spark plug type and gap setting are shown
in“PRODUCTSPECIFICATIONS”section
of this manual.
CLEANING
• Cleanengine,battery,seat,finish,etc.of
all foreign matter.
• Keepfinishedsurfacesandwheelsfree
of all gasoline, oil, etc.
• Protectpaintedsurfaceswithautomotive
type wax.
We do not recommend using a garden hose
or pressure washer to clean your riding
mower unless the engine and transmission
are covered to keep water out. Water in en-
gine or transmission will shorten the useful
life of your riding mower. Use compressed
air or a leaf blower to remove grass, leaves
and trash from riding mower and mower.
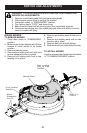
CLEAN AIR INTAKE/COOLING AREAS
To ensure proper cooling, make sure the
grass screen, cooling fins, and other exter-
nal surfaces of the engine are kept clean
at all times.
Every 100 hours of operation (more often
under extremely dusty, dirty conditions),
remove the blower housing and other
cooling shrouds. Clean the cooling fins
and external surfaces as necessary. Make
sure the cooling shrouds are reinstalled.
NOTE: Operating the engine with a
blocked grass screen, dirty or plugged
cooling fins, and/or cooling shrouds
removed will cause engine damage due to
overheating.
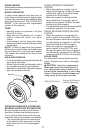
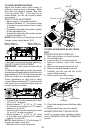
CLEAN AIR SCREEN
Air screen must be kept free of dirt and chaff
to prevent engine damage from overheating.
Clean with a wire brush or compressed air to
remove dirt and stubborn dried gum fibers.
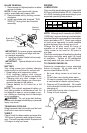
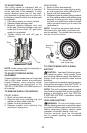
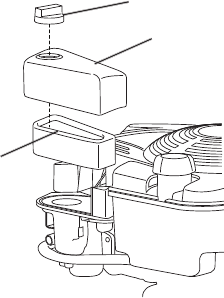
AIR FILTER
Your engine will not run properly using a
dirty air filter. Replace the air filter every
100 hours of operation or every season,
whichever occurs first. Service air cleaner
more often under dusty conditions.
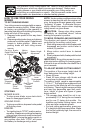
1. Remove cover knob and cover.
2. Carefully remove cartridge.
3. Clean base carefully to prevent debris
from falling into carburetor.
4. Clean by gently tapping on a flat sur-
face.
5. Reinstall cartridge, cover and secure with
cover knob.
NOTE: If very dirty or damaged, replace
cartridge.
IMPORTANT: Petroleum solvents, such as
kerosene, are not to be used to clean the
cartridge. They may cause deterioration of
the cartridge. Do not oil cartridge. Do not
use pressurized air to clean cartridge.
Cover Knob
Air Filter
Cover
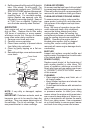
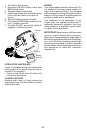
4. Refill engine with oil through oil fill dipstick
tube. Pour slowly. Do not overfill. For
approximatecapacitysee“PRODUCT
SPECIFICATIONS” section of this manual.
5. Use gauge on oil fill cap/dipstick for
checking level. For accurate reading,
tighten dipstick cap securely onto the
tube before removing dipstick. Keep oil
at“FULL”lineondipstick.Tightencap
onto the tube securely when finished.