


5
ASSEMBLY
WARNING: If received assembled,
repeatallstepstoensure yourunit isproperly
assembled and all fasteners are secure.
Examine parts for damage. Do not use dam-
aged parts.
NOTE: If you need assistance or find parts
missing or damaged, call 1-800-554-6723.
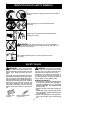
It is normal for the fuel filter to rattle in the
empty fuel tank.
Findingfuelor oil residueon muf fleris normal
due t o carburetor adjustments and t esting
done by the manufacturer .
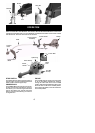
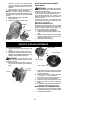
SHAFT ASSEMBLY
CAUTION:
When assembling shaft, place
the unit on a flat surface for stability .
1. Align grooves on upper and lower shafts.
Upper Shaft
Lower Shaft
Grooves
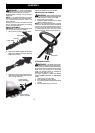
2. Push the two shafts togetheruntil the lower
shaft is fully seated in the upper shaft (the
shafts lock into place).
3. S lidelowerlockingsleeveassemblyover
upper locking sleeve a ssembly andtight-
en by turning clockwise.
Upper Locking
Sleeve Assembly
Lower Locking
Sleeve Assembly
NOTE: If locking sleeve assembly will not
tighten, th e shafts are not fully seated.
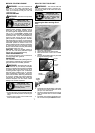
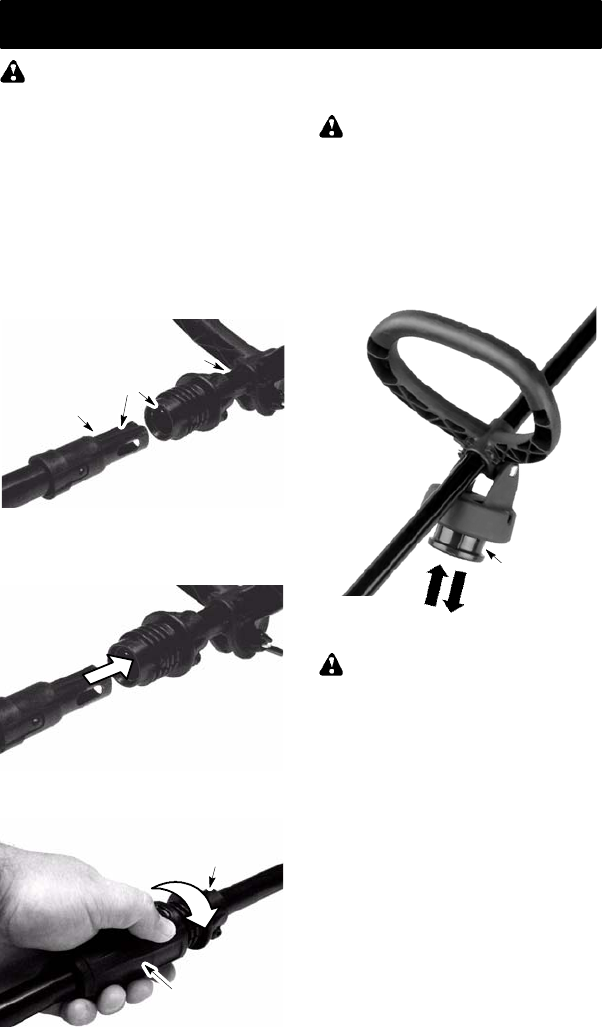
ADJUSTING THE HANDLE
WARNING: Whenadjusting the a ssist
handle,be sureitremains abovethe safetylabel
and below the m ark or arrow on the shaft.
1. Loosen wing nut on handle.
2. Rotate the handle on the shaft to anupright
position; retighten wing nut.
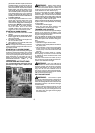
NOTE: Your unit is equipped with a special
accessory attached to the assist handle that
can store an extra replacement spool of line.
Tostoreextraspool,pushspool intoaccesso-
ry until it snaps into place. The spool can be
removed by firmly pulling on the tap button.
Tap Button
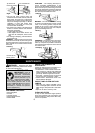
ATTACHING SHIELD
WARNING: The shield must b e prop-
erly installed.The shieldprovides partialprotec-
tion from the risk ofthrown objects to theopera-
tor and others and is equipped with a line limiter
blade which cuts excess line to the proper
length. The line limiter blade (on underside of
shield) is sharp and can cut you.
For proper orientation of shield, see KNOW
YOUR TR IMMER i llustratio n in OPERA TION
sectio n.
1. Remove wing nut from shield.
2. Insert bracket into slot as shown.
3. Pivot shield untilbolt passesthrough holein
bracket.
4. Securely tighten wing nut onto bolt.