


24
TO ADJUST CARBURETOR
The carburetor has been preset at the factory and adjust-
ment should not be necessary. However, minor adjustment
may be required to compensate for differences in fuel,
temperature, altitude or load. If the carburetor does need
adjustment, see engine manual.
IMPORTANT: NEVER TAMPER WITH THE ENGINE
GOVERNOR, WHICH IS FACTORY SET FOR PROPER
ENGINE SPEED. OVERSPEEDING THE ENGINE ABOVE
THE FACTORY HIGH SPEED SETTING CAN BE
DANGEROUS. IF YOU THINK THE ENGINE-GOVERNED
HIGH SPEED NEEDS ADJUSTING, CONTACT YOUR
NEAREST AUTHORIZED SERVICE CENTER/
DEPARTMENT, WHICH HAS PROPER EQUIPMENT AND
EXPERIENCE TO MAKE ANY NECESSARY
ADJUSTMENTS.
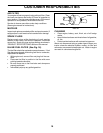
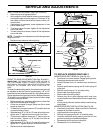
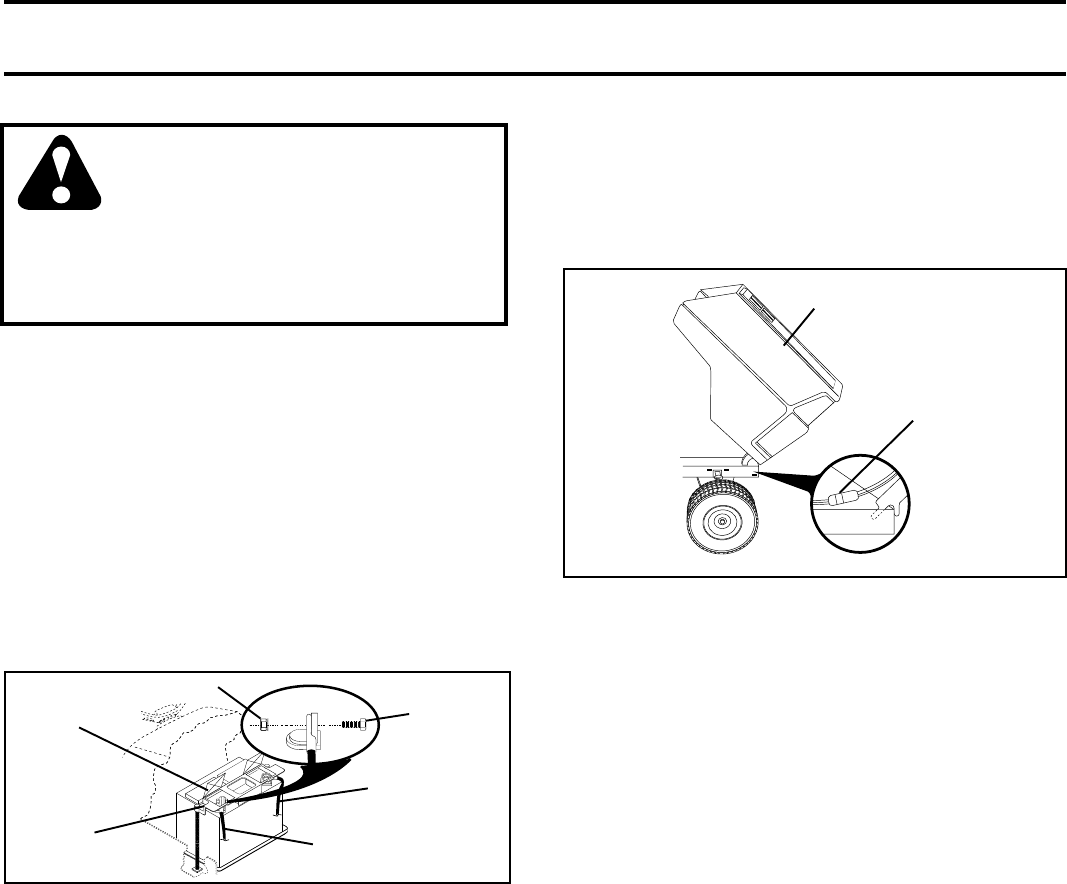
TO REMOVE HOOD AND GRILL ASSEMBLY
(See Fig. 30)
• Raise hood.
• Unsnap headlight wire connector.
• Stand in front of tractor. Grasp hood at sides, tilt toward
engine and lift off of tractor.
• To replace, reverse above procedure.
FIG. 30
HEADLIGHT
WIRE
CONNECTOR
HOOD
ENGINE
Maintenance, repair, or replacement of the emission control
devices and systems, which are being done at the custom-
ers expense, may be performed by any non-road engine
repair establishment or individual. Warranty repairs must be
performed by an authorized engine manufacturer's service
outlet.
TO ADJUST THROTTLE CONTROL CABLE
The throttle control has been preset at the factory and
adjustment should not be necessary. Check adjustment as
described below before loosening cable. If adjustment is
necessary, see engine manual.
TO ADJUST CHOKE CONTROL
The choke control has been preset at the factory and
adjustment should not be necessary. Check adjustment as
described below before loosening cable. If adjustment is
necessary, see engine manual.
SERVICE AND ADJUSTMENTS
TO REPLACE HEADLIGHT BULB
• Raise hood.
• Pull bulb holder out of the hole in the backside of the grill.
• Replace bulb in holder and push bulb holder securely
back into the hole in the backside of the grill.
• Close hood.
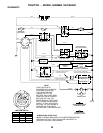
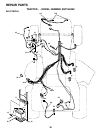
INTERLOCKS AND RELAYS
Loose or damaged wiring may cause your tractor to run
poorly, stop running, or prevent it from starting.
• Check wiring. See electrical wiring diagram in the Repair
Parts section.
TO REPLACE FUSE
Replace with 20 amp automotive-type plug-in fuse. The fuse
holder is located behind the dash.
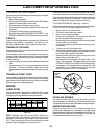
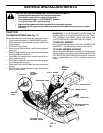
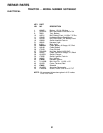
REPLACING BATTERY (See Fig. 29)
CAUTION: Do not short battery termi-
nals by allowing a wrench or any other
object to contact both terminals at the
same time. Before connecting battery,
remove metal bracelets, wristwatch
bands, rings, etc.
Positive terminal must be connected
first to prevent sparking from accidental
grounding.
• Lift hood to raised position.
• Remove terminal guard.
• Disconnect BLACK battery cable then RED battery
cable and carefully remove battery from tractor.
• Install new battery with terminals in same position as old
battery.
• Reinstall terminal guard.
• First connect RED battery cable to positive (+) battery
terminal with hex bolt and keps nut as shown. Tighten
securely.
• Connect BLACK grounding cable to negative (-) battery
terminal with remaining hex bolt and keps nut. Tighten
securely
• Close terminal access doors.
• Close hood.
HEX BOLT
KEPS NUT
POSITIVE
(RED) CABLE
NEGATIVE
(BLACK) CABLE
TERMINAL
GUARD
TERMINAL
ACCESS
DOOR
FIG. 29