


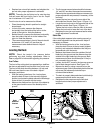

20
• After cleaning the battery and terminals, apply a
light coat of petroleum jelly or grease to both
terminals
• Always keep the rubber boot positioned over the
positive terminal to prevent shorting.
IMPORTANT:
If removing the battery for any reason,
disconnect the NEGATIVE (Black) wire from it’s
terminal first, followed by the POSITIVE (Red) wire.
When re-installing the battery, always connect the
POSITIVE (Red) wire its terminal first, followed by the
NEGATIVE (Black) wire. Be certain that the wires are
connected to the correct terminals; reversing them
could change the polarity and cause damage to your
engine’s alternating system.
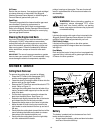
Charging
If the unit has not been put into use for an extended
period of time, charge the battery with an automotive-
type 12-volt charger for a minimum of one hour at six
amps.
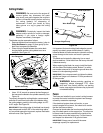
WARNING: Batteries give off an explosive
gas while charging. Charge battery in a well
ventilated area and keep away from an open
flame or pilot light as on a water heater, space
heater, furnace, clothes dryer or other gas
appliances.
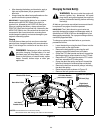
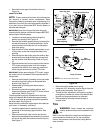
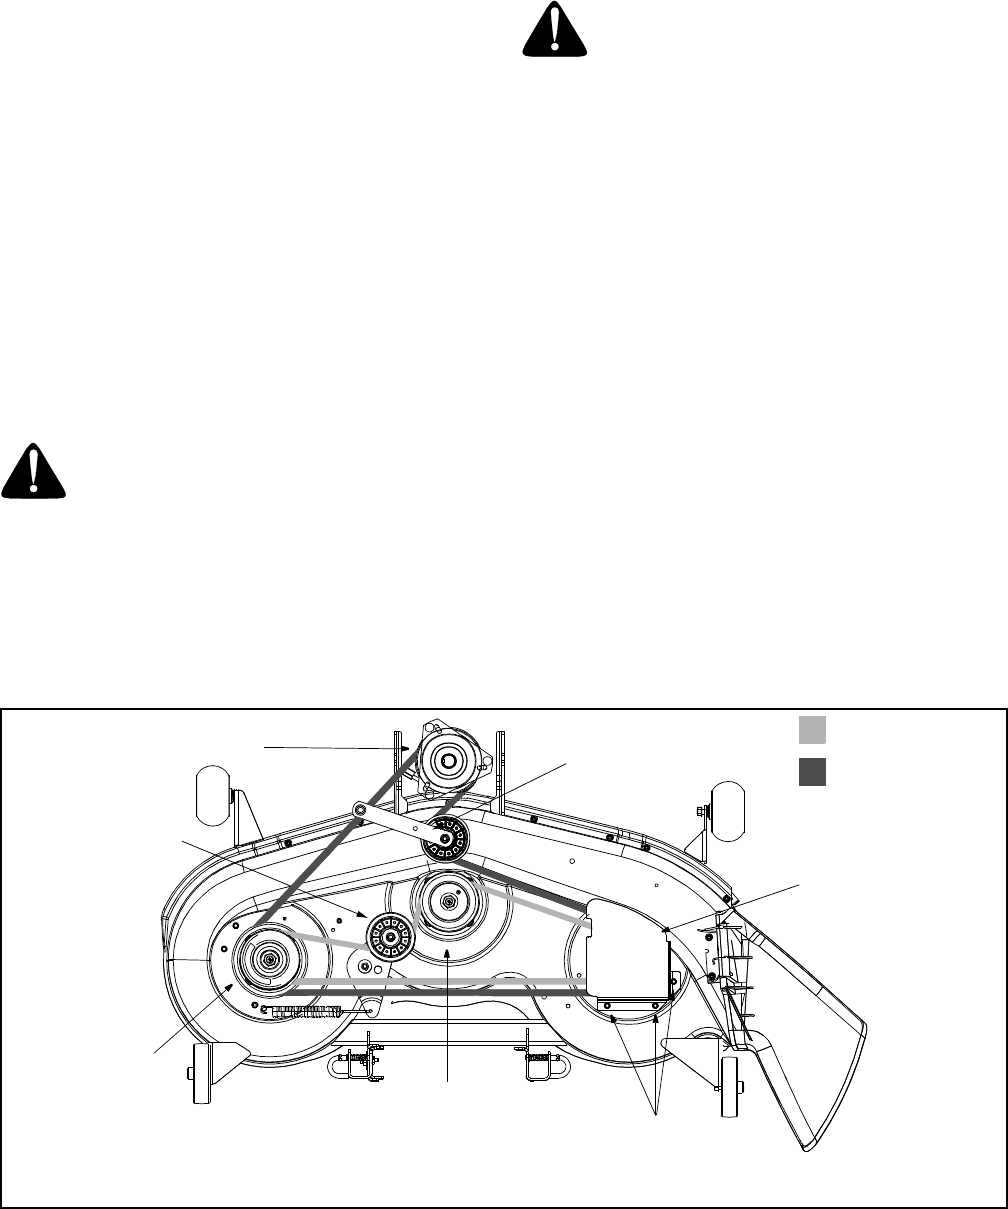
Changing the Deck Belt(s)
WARNING: Be sure to shut the engine off,
remove ignition key, disconnect the spark
plug wire(s) and ground against the engine to
prevent unintended starting before removing
the belt(s).
All belts on your tractor are subject to wear and should
be replaced if any signs of wear are present.
IMPORTANT:
The V-belts found on your tractor are
specially designed to engage and disengage safely. A
substitute (non-OEM) V-belt can be dangerous by not
disengaging completely. For a proper working machine,
use factory approved belts.
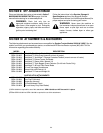
To change or replace the deck belts on your tractor,
proceed as follows:
• Lower the deck by moving the deck lift lever into the
bottom notch on the right fender.
• Remove the belt guards by removing the self-
tapping screws that fasten them to the deck.
• Grasp the PTO idler bracket and pivot it toward the
discharge chute to relieve tension on the PTO belt.
• Remove the PTO belt from the electric PTO clutch
and from around the PTO idler pulley.
• Grasp the deck idler pulley and pivot it toward the
left side of the deck to relieve tension on the belt.
• Remove the belt from around all pulleys, including
the deck idler pulley.
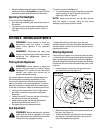
• Route the new belts as shown in Figure 15.
• Remount the belt guards removed earlier.
Figure 15
Electric PTO Clutch
Left Hand
Double Pulley
Right Hand
Double Pulley
Center Pulley
Deck Idler Pulley
Self-Tapping Screws
(beneath belt guard)
PTO Idler Bracket
(mounted on tractor)
NOTE:
Left hand belt cover not shown for clarity.
Deck belt (Bottom)
PTO belt (Top)
46-inch deck shown. Belt routing is the same on 50-inch decks.