6
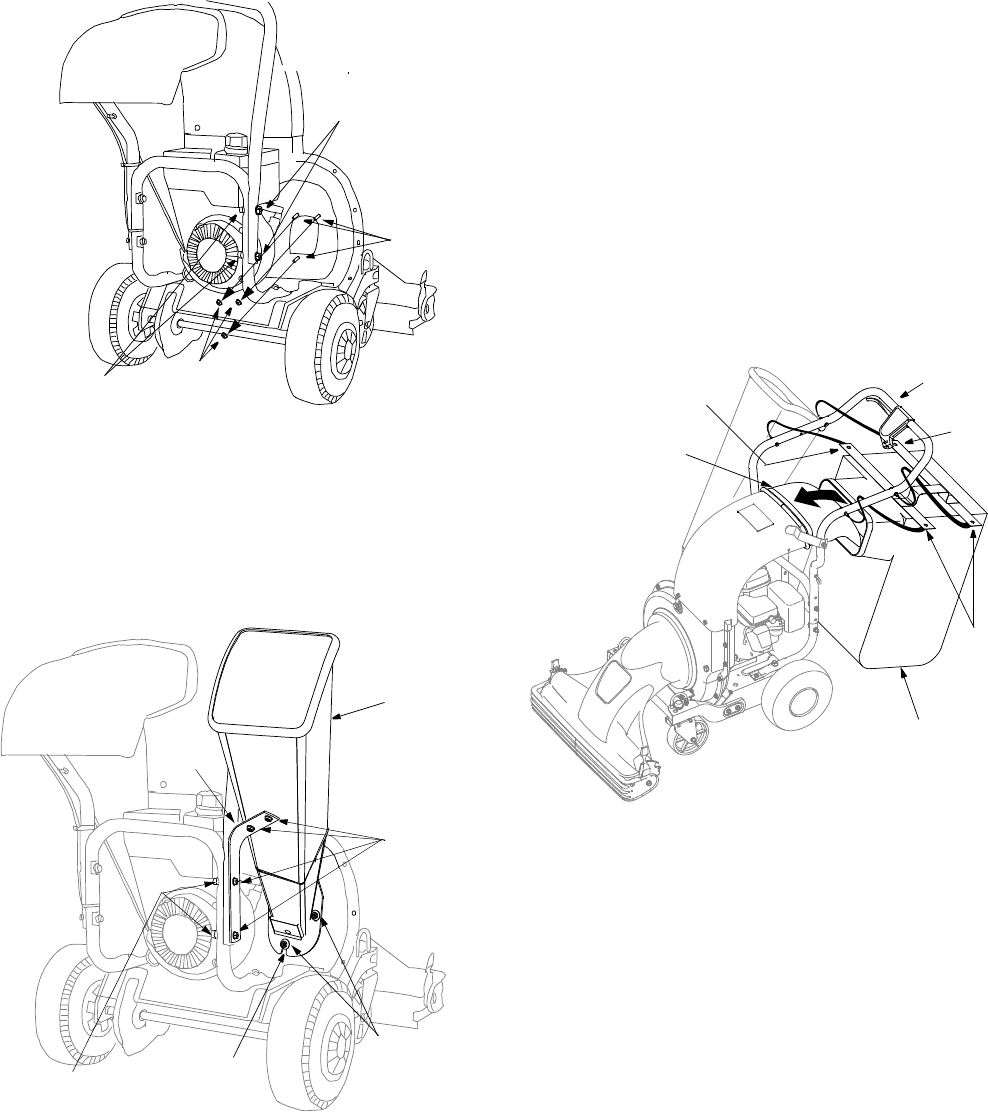
• Remove the three hex nuts and bell washers from
the weld studs beside the opening on the right side
of the chipper-shredder vacuum. See Figure 4.
Figure 4
• Place the chipper chute over the weld studs
keeping the slotted side towards the bottom.
Loosely secure with the three hex nuts and bell
washers that were removed earlier. Do not fully
tighten the hex nuts at this point in the assembly.
See Figure 5.
Figure 5
• Align the support bracket with the holes in the right
side of the upper and lower handles where the hex
bolts were just removed. Push up slightly on the
chipper chute in order to better align the holes in
the support bracket with the holes in the handles.
• Replace the hex bolts, saddle washers and flange
nuts to affix the support bracket to the handle
assemblies. See Figure 5.
• Follow by tightening all hardware securely first on
the chipper chute, then on the support bracket,
and finally on the handle.
Attaching The Bag
• Place bag under the upper handle assembly and
slip the front opening on the bag over the discharge
chute, making certain it is over the rim on the
discharge chute. Follow direction of the arrows in
Figure 6.
Figure 6
• Place the four straps on top of the bag over the
upper handle, hooking them on the studs to secure
in place. See Figure 6. Squeeze the clamp on the
drawstring and pull the drawstring tight. Release
the clamp.
Hex Bolts &
Saddle Washers
Flange Nuts
Weld
Hex Nuts &
Bell Washers
Studs
Flange
Nuts
Chipper
Chute
Hex Nuts &
Bell Washers
Slot
Hex Bolts &
Saddle Washers
Support
Bracket
Bag
Upper
Handle
Discharge
Chute
Strap
Strap
Strap


