


16 Section 7— Service
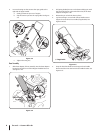
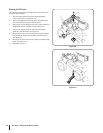
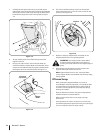
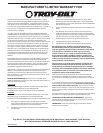
7. Carefully tilt and support the unit up to provide access
underneath to the nozzle mounting hardware and impeller.
Remove the three shoulder bolts securing the black plastic
lower flail housing to the lower housing. Refer to Figure
7-4.
Figure 7-4
8. Tilt top of black plastic lower flail housing toward the
engine to remove.
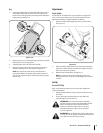
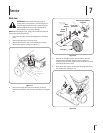
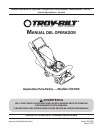
9. Using a 3/16” allen wrench, remove the flat head cap
screws that hold the chipper blade to the impeller. These
screws are accessible through the opening created when
the chipper chute was removed earlier. See Figure 7-5.
Chipper
Blade
Flat Head
Cap Screws
Figure 7-5
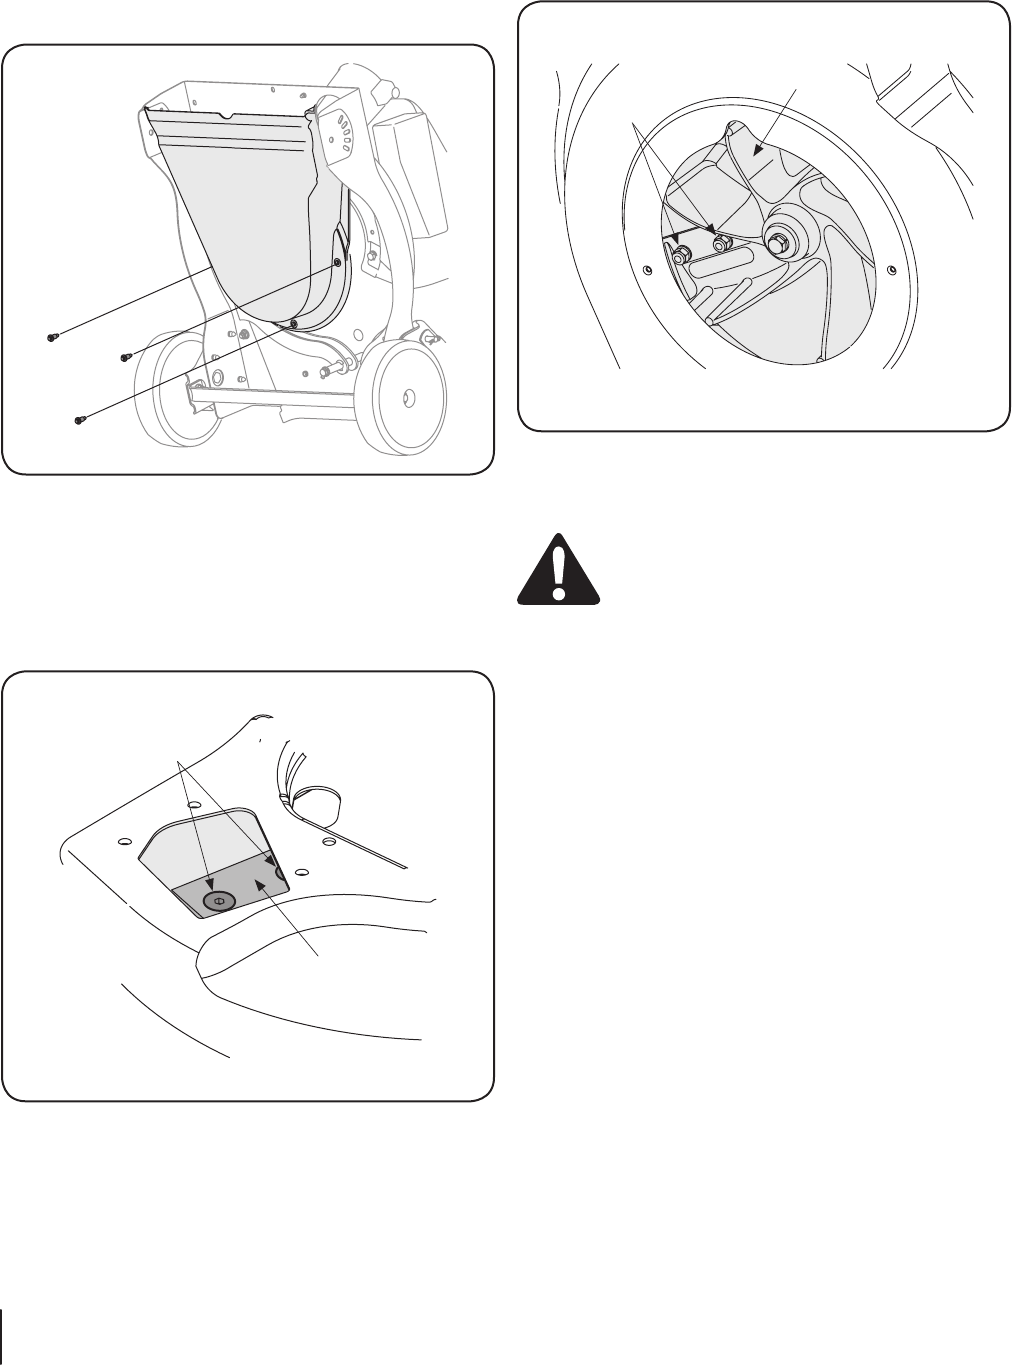
10. The nuts on the flat head cap screws can be reached
from underneath using a 1/2-inch socket, universal, and
extension. See Figure 7-6.
Nuts
Impeller
Figure 7-6
11. Replace or sharpen chipper blade. The blade can be
sharpened with a file or on a grinding wheel.
WARNING: The chipper blade is sharp. When
sharpening blade, wear leather work gloves to
protect your hands and follow the original angle of
grind.
12. Reassemble by performing the previous steps in the
opposite order and manner of removal.
NOTE: Tighten blade screws to 210 - 250 in-lbs. Make
certain chipper blade is reassembled with the sharp edge
facing upward.
Off-Season Storage
• When storing the chipper/shredder vacuum in an
unventilated or metal storage shed, care should be taken
to rustproof the non-painted surfaces. Using a light oil
or silicone, coat the equipment, especially any springs,
bearings, and cables.
• Remove all dirt from exterior of engine and equipment.
• Follow lubrication recommendations.
• Refer to engine manual for correct engine storage
instructions.
• Store equipment in a clean, dry area. Do not store in an
area where equipment is present that may use a pilot light
or has a component that can create a spark.