


13
SECTION 7: SERVICE & ADJUSTMENTS
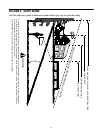
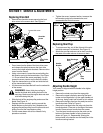
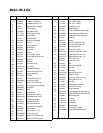
Replacing Drive Belt
• Remove two shoulder screws securing the front
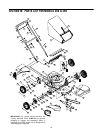
drive cover to the mower deck. See Figure 11.
Figure 11
• Press inward on the sides of the front drive cover
and release the tabs that secure the front drive
cover to the height adjuster brackets. Remove drive
cover from the mower.
• Using a torx wrench, loosen the screw holding the
belt tension spring to the transmission. See Figure
11. Do not remove the screw completely. As you
loosen the screw, tension on the belt will release.
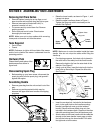
• Push the transmission up a little and slide the belt
off the transmission pulley.
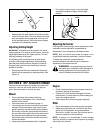
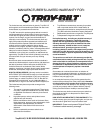
• Lift the mower to access the belt from the underside
of the mower.
• Slide the belt off the engine pulley and around the
blade. See Figure 12 .
• Replace with the new belt, working around the
blade. Make sure the belt is firmly seated on the
engine pulley while pulling from the other side and
sliding it around the transmission pulley.
• Put the mower down with all four wheels firmly
placed on one level.
• Tighten the screw, loosened earlier, to secure the
belt tension spring to the transmission, and
reassemble the front drive cover.
Figure 12
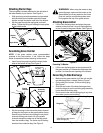
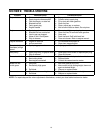
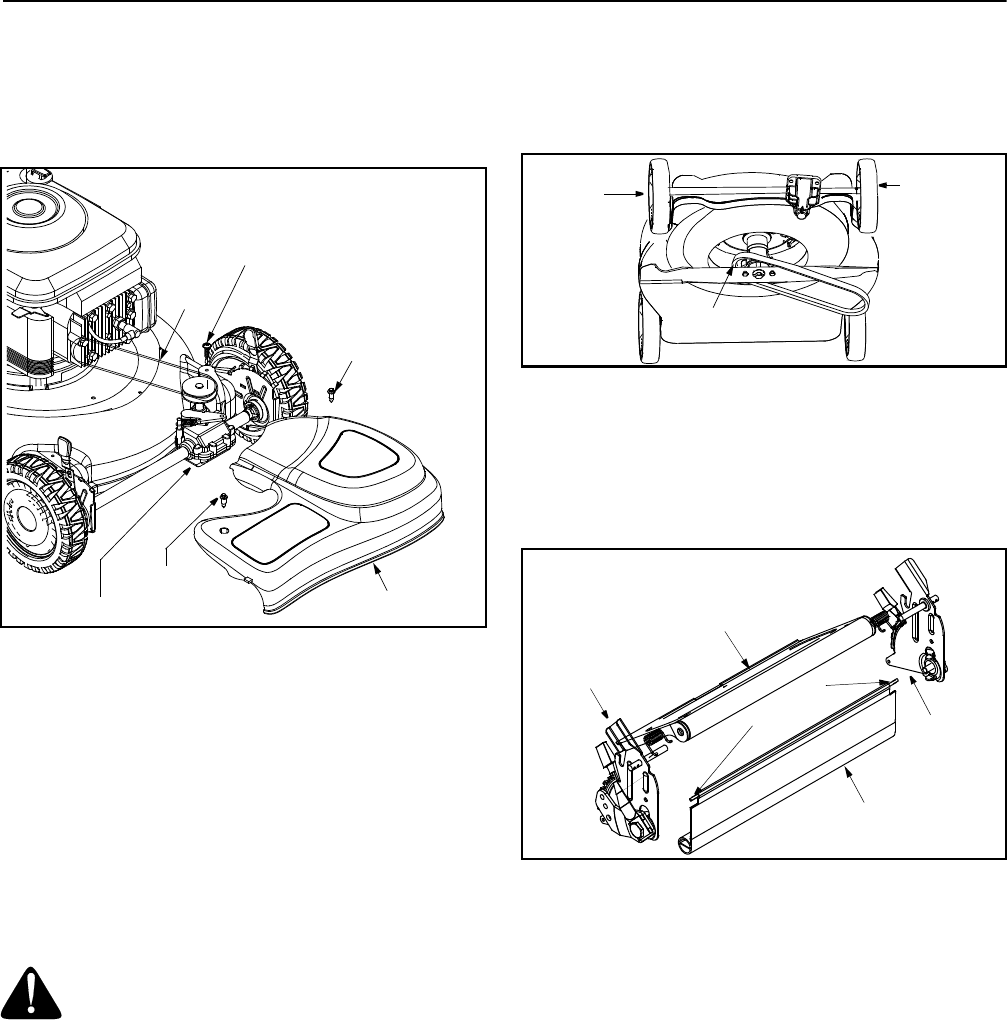
Replacing Rear Flap
• To remove rear flap, cut off the flat end of the wire
rod which secures it to the deck. See Figure 13 .
• Attach the new flap and new rod to deck, bending
the ends of the new rod over to secure to deck.
Figure 13
Adjusting Handle Height
Your mower is shipped with the handle in the higher
height position.
• Remove the starter rope from the rope guide.
• Remove the upper handle by removing the hand
knobs and carriage bolts. Lay the upper handle out
of the way, being careful not to bend or kink cables.
• Remove the hairpin clips from the weld pins on the
handle brackets. Refer to Figure 3 .
• Remove the carriage bolts and wing nuts from the
handle brackets. Press out on the legs of the lower
handle. Remove lower handle from the mower.
• Turn the lower handle around so the notch on the
bottom of the lower handle is facing forward as
shown in Figure 14 . Reassemble, placing the
bottom holes in the handle over the weld pins in the
handle mounting bracket.
WARNING:
Use a thick piece of rag to
handle the blade while sliding the belt in the
next step. Make sure the engine does not start
at all while doing this job.
Loosen this screw
Shoulder
Shoulder
Screw
Screw
Front Drive
Cover
Belt
Transmission
Engine Pulley
Left Front
Wheel
Right Front
Wheel
Handle
Bracket
Handle
Bracket
Rear Discharge
Door
Rear
W
i
r
e
R
o
d
Flap