


14
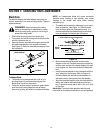
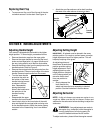
Replacing Rear Flap
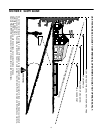
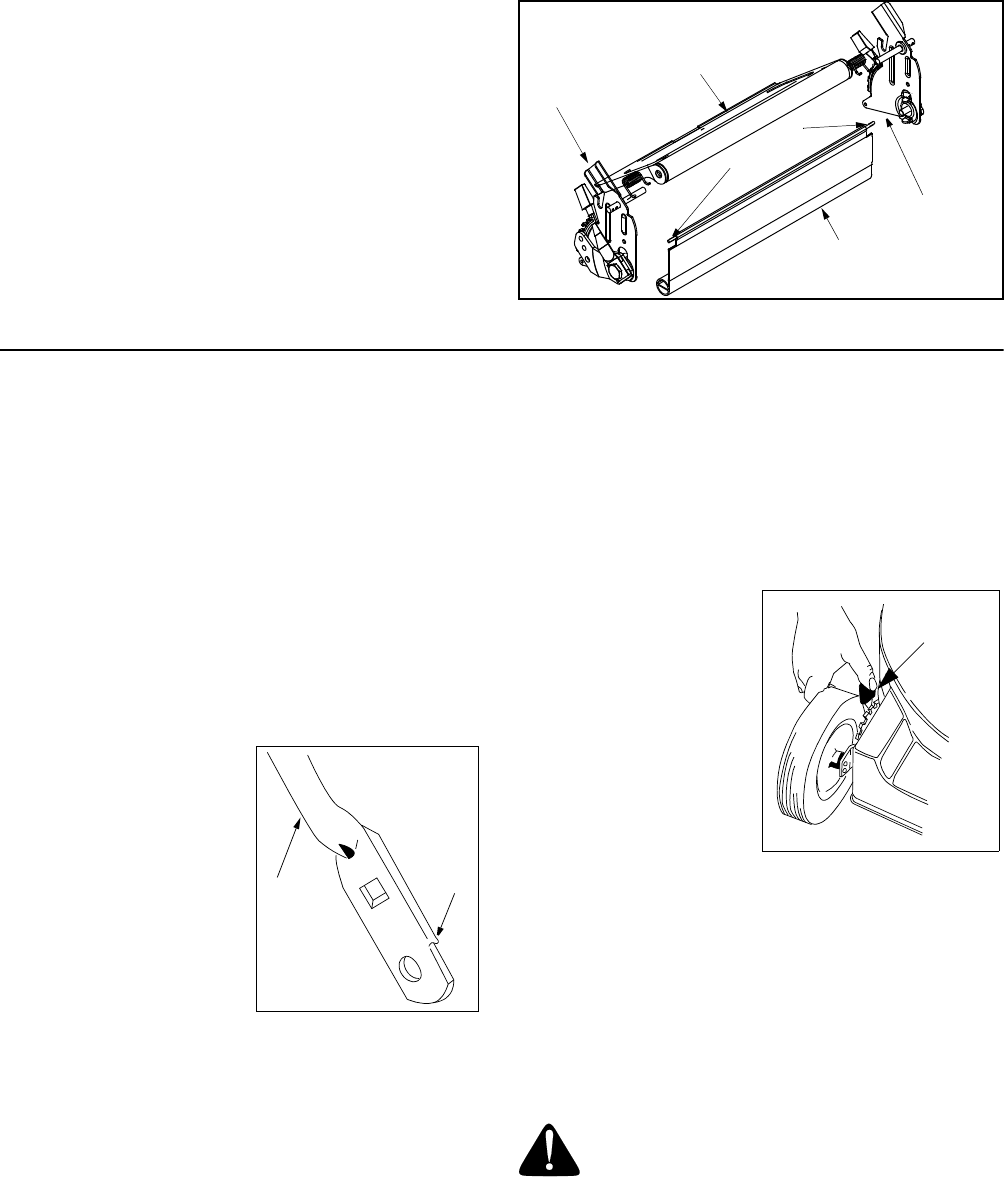
• To remove rear flap, cut off the flat end of the wire
rod which secures it to the deck. See Figure 14 .
• Attach the new flap and new rod to deck, bending
the ends of the new rod over to secure to deck.
Figure 14
SECTION 8: MAKING ADJUSTMENTS
Adjusting Handle Height
Your mower is shipped with the handle in the higher
height position. To lower height, proceed as follows:
• Remove the starter rope from the rope guide.
• Remove the upper handle by removing the hand
knobs and carriage bolts. Lay upper handle out of
the way, being careful not to bend or kink cables.
• Remove the hairpin clips from the weld pins on the
handle brackets. Refer to Figure 3 .
• Remove the carriage bolts and wing nuts from the
handle brackets. Press out on the legs of the lower
handle. Remove lower handle from the mower.
• Turn the lower handle
around so the notch on
the bottom of the lower
handle is facing forward
as shown in the box
here. Reassemble,
placing the bottom
holes in the handle over
the weld pins in the
handle mounting
bracket.
• Reassemble the upper
handle to the lower handle.
• Insert hairpin clips in the inner holes of the weld
pins and replace the carriage bolts and wing nuts
on the handle brackets. Attach the starter rope as
instructed in the “Assembling Your Lawn Mower”
section.
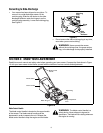
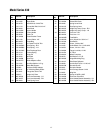
Adjusting Cutting Height
IMPORTANT:
All wheels must be placed in the same
relative position. For rough or uneven lawns, move the
height adjustment lever to a higher position. This will
help stop scalping of the grass.
An adjusting plate and
thumb lever at each wheel
position provides cutting
height adjustment. Each
adjusting plate has nine
height positions. Height of
cut will change when you
move the thumb lever
from one position to
another.
• Simply depress the
lever towards the
wheel and move the lever assembly to desired
position. See the illustration in the box above.
Adjusting Carburetor
NOTE: A dirty air cleaner may cause an engine to run
rough too. Make sure that the air cleaner is clean and
attached to the carburetor before deciding to adjust the
carburetor.
To adjust carburetor, please follow the engine manual.
Handle
Bracket
Handle
Bracket
Rear Discharge
Door
W
i
r
e
R
o
d
Rear Flap
Lower
Handle
Notch
WARNING: If any adjustments are made to
the engine (e.g. carburetor) while the engine is
running, keep clear of all moving parts. Be
careful of heated surfaces like the muffler.
Adjustment
Lever