22
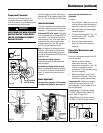
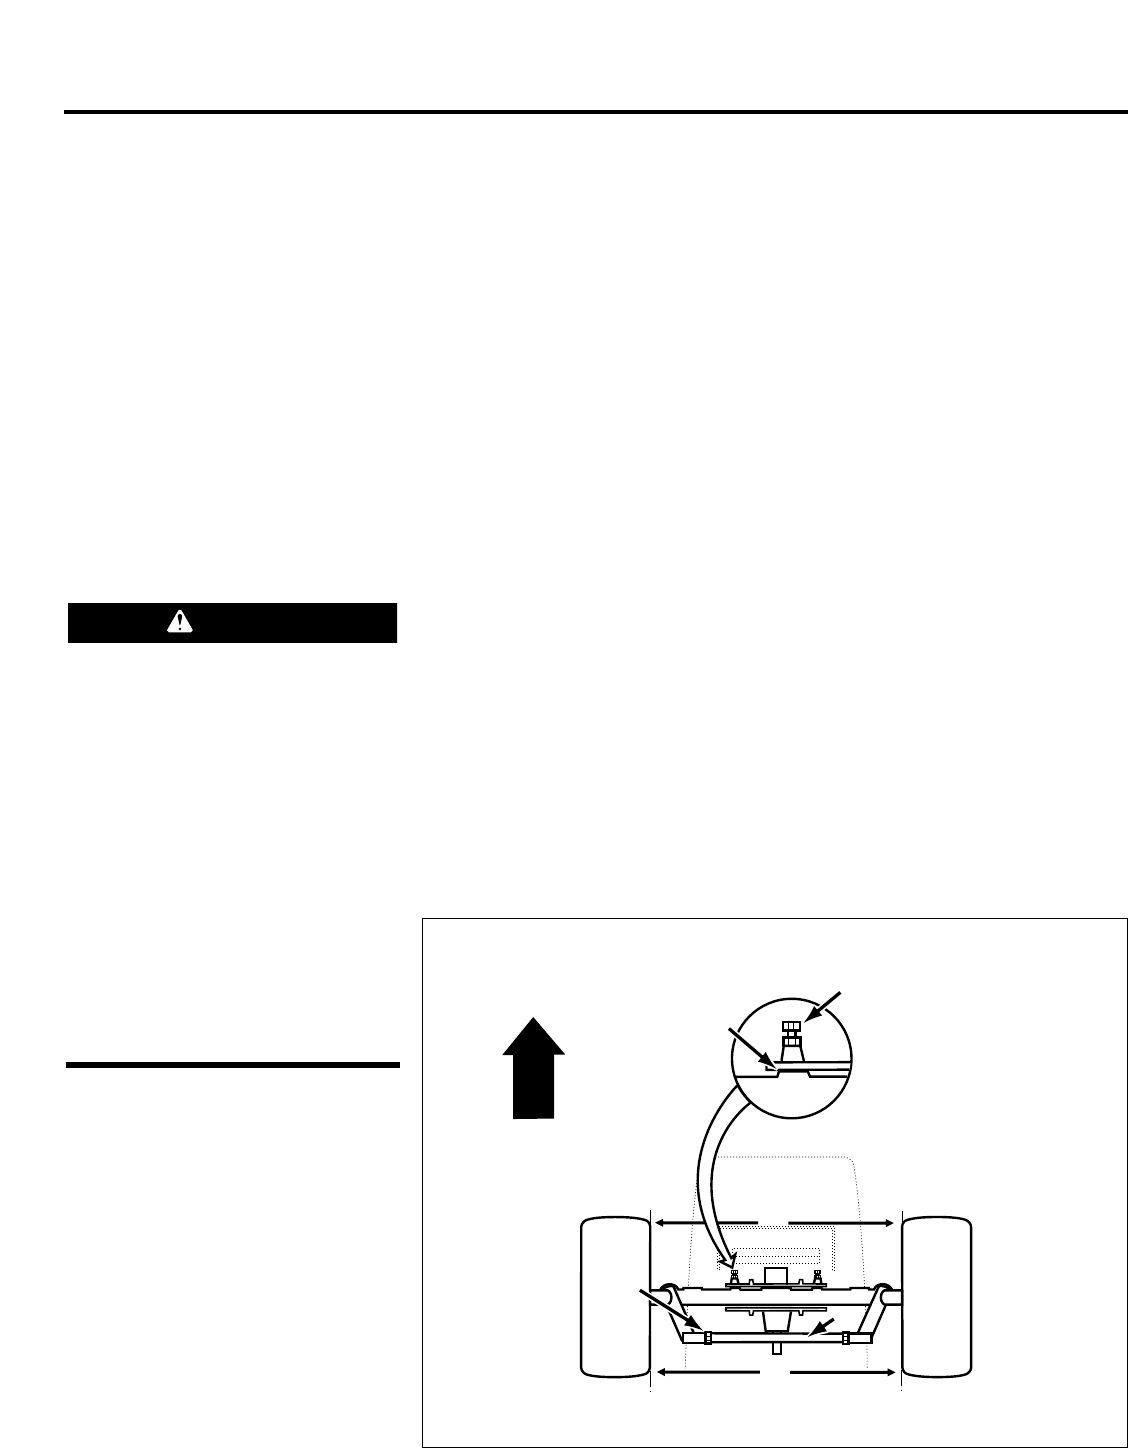
2. Adjust screws (N, Fig. 7-5). These
screws apply pressure to the front
axle. Axle should pivot with a small
amount of drag.
Front Wheel Alignment
Straighten front wheels. Loosen locknuts
(Q, Fig. 7-5). Adjust tie rod (Z) so
measurement (O) is 1/8" longer than
measurement (P).
Power Steering
Power steering is controlled by the
hydraulic system. No adjustment is
necessary.
Maintenance (continued)
Carburetor
The carburetor is adjusted at the factory.
It should not need resetting. If black
exhaust is noted, check the air cleaner
first. An over-rich fuel mixture is usually
caused by a poorly serviced or clogged air
cleaner element, not an improperly
adjusted carburetor. If readjustment is
necessary, refer to the engine manual or
see your dealer.
Battery
The battery is maintenance-free and the
acid level cannot be checked. Keep cables
and terminals clean. If cables are
corroded, clean them.
BATTERIES PRODUCE EXPLOSIVE
GASSES. KEEP OPEN FLAMES AND
SPARKS AWAY. DO NOT SET TOOLS
ACROSS TERMINALS.
BATTERY ELECTROLYTE CAN CAUSE
SEVERE BURNS. EYE CONTACT CAN
CAUSE BLINDNESS. ALWAYS WEAR EYE
PROTECTION AND RUBBER GLOVES
WHEN WORKING NEAR BATTERY.
NEVER WEAR JEWELRY.
IF ELECTROLYTE CONTACTS SKIN OR
EYES, RINSE IMMEDIATELY WITH
WATER FOR AT LEAST 15 MINUTES.
CALL PHYSICIAN IMMEDIATELY.
After cleaning battery, apply a light coat of
petroleum jelly or grease to terminals and
over the bolt stud.
Remove battery cables before removing
battery. Remove negative (-) cable first,
followed by the positive (+) cable. Always
check the polarity of the battery terminals.
Make sure the battery is not reversed.
The negative (-) cable is the ground.
ALWAYS CONNECT THE NEGATIVE (-)
TERMINAL LAST.
Charging: If the unit has not been used for
an extended time period, charge the
battery at 6 to 10 amps for 1 hour.
DANGER
Spark Plugs
Every 100 hours remove and inspect spark
plugs. Do not service a plug which is in
poor condition. Best results are obtained
with a new plug. Under good operating
conditions, the plug will have a light gray
coating or a tan deposit. A white, blistered
coating could indicate engine overheating.
A black (carbon) coating could indicate an
over-rich fuel mixture caused by a clogged
air cleaner or improper carburetor
adjustment. See engine manual for spark
plug specifications.
NOTE: Do not clean spark plugs in
machines which use abrasive grit. Clean
spark plugs by scraping, wire brushing or
washing with a commercial solvent.
Front Axle Adjustment
In time, a gap may form between the
bolster and front axle. See Fig. 7-5. The
following adjustment can reduce play in
the axle. To make adjustment:
1. Set parking brake. Securely block
rear wheels. Raise front of tractor
with a hoist or jack. See page 23 for
jacking instructions.
FRONT
View from
under tractor.
Q
Z
N
Adjust screws (N)
at each side to
tighten gap.
Measure distance (P)
and distance (O) at
the outside edges
of each tire.
P
Gap
O
Fig. 7-5


