Section 4: Operation 15
TILLING TIPS & TECHNIQUES (cont.)
Power composting simply means tilling under and burying in the soil all manner of
organic matter such as crop residues, leaves, grass clippings and cover crops. This
material will decompose during the non-growing season and add important natural nutri-
ents to the soil.
The first place to begin is with crop residues such as leftover vines, stalks, stems and
roots. Power compost these crop residues as soon as they finish bearing. The sooner
this is done, the better, as tender green matter is easier to till under. Use the deepest
depth regulator setting possible without causing the engine to labor or the tiller to jump
ahead.
Standing cornstalks of reasonable height can be power composted. Pushing over (but
not uprooting) cornstalks will often make it easier to chop up the stalks. Keep the tines
clear of excessive tangling by “fishtailing” or frequently using reverse. Make several
passes, then return a few days later to finish off any remaining stubble.
After tilling under crop residues, add more organic matter such as leaves, grass clippings and even kitchen scraps. When tilled into the
soil, this organic matter will decompose and add even more important nutrients to the soil.
After power composting, you may want to plant a “green manure” cover crop to protect the soil during the off-season. You simply
grow a crop of clover, alfalfa, buckwheat, peas, beans, rye grass, grain, or kale and then till it into the soil prior to the planting season.
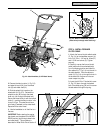
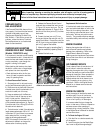
When power composting, do not keep
the Depth Regulator Lever at a deep
setting if the tiller jumps or bucks.
If jumping or bucking occurs, move the
Depth Regulator Lever down to a
shallow setting and then slowly
increase the tilling depth on later
passes.
Failure to follow this warning could
result in personal injury.
WARNING
Tilling On Slopes
Power Composting
Tilling Up and Down Slopes (Vertical Tilling)
• To keep soil erosion to a minimum, be sure to add enough organic matter to the
soil so that it has good moisture-holding texture and try to avoid leaving footprints
or wheel marks.
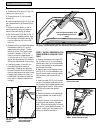
• When tilling vertically, try to make the first pass uphill as the tiller digs more
deeply going uphill than it does downhill. In soft soil or weeds, you may have to
lift the handlebars slightly while going uphill. When going downhill, overlap the
first pass by about one-half the width of the tiller.
Tilling Across Slopes Without Using
Terraces (Horizontal Tilling)
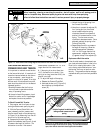
• If vertical or terracing gardening aren’t
practical for you, then you can till laterally
across a slope. We don’t recommend this
method as it can create unsure footing and
invites soil erosion.
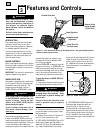
• As in terrace gardening, start at the top of
the slope and overlap the first pass by half
the width of the tiller. For added stability of
the tiller, always keep the uphill wheel in the
soft, newly tilled soil.
Read the following recommendations before tilling on slopes:
If you must garden on a moderate slope, please follow two very important
guidelines:
1. Till only on moderate slopes, never on steep ground where footing is difficult
(review safety rules in Section 1: Safety of this manual).
2. We recommend tilling up and down slopes rather than terracing. Tilling vertically
on a slope allows maximum planting area and also leaves room for cultivating.
IMPORTANT: When tilling on slopes, be sure the correct oil level is maintained in
the engine (check every one-half hour of operation). The incline of the slope will
cause the oil to slant away from its normal level and this can starve engine parts of
required lubrication. Keep the motor oil level at the full point at all times!
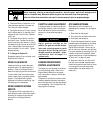
Do not operate tiller on a slope too
steep for safe operation. Till slowly
and be sure you have good footing.
Never permit tiller to freewheel down
slopes. Failure to follow this warning
could result in personal injury.
WARNING
Terrace Gardening
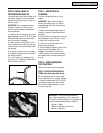
• When a slope is too steep or too short for vertical tilling, it may be necessary to till across the slope and create terraced rows. Ter-
races are rows that are cut into the side of a slope, creating a narrow, but flat area on which to plant.
• On a long slope, you can make several terraces, one below the other.
• Terraces should be only 2-to-3 feet wide. Digging too far into the side of the slope will expose poor subsoil that is unproductive for
plants.


