PRECIPITATION GAUGES:
Rain gauges should be installed on a level plot of ground, at a distance from any object of at least two and
preferably four times the height of the object above the top of the gauge. All types of gauges must be exposed
with the rim of the receiver in a horizontal plane and at a level well above the average level of snow surfaces.
Roof-mounting of rain gauges should be avoided when possible. Air currents at heights other than at ground
level have been observed to cause an apparent decrease in rainfall catch commensurate with the increase in
mounting height above ground level.
Objects which individually or in small groups constitute a "windbreak" reduce prevailing wind speed in the
vicinity of the gauge. This reduction of wind speed will, as a consequence, also reduce possible eddy currents
and turbulence around the gauge. The presence of such objects is usually beneficial in providing a more
accurate rainfall catch. Ideally, the "windbreak" objects (fences, bushes, etc.) should be generally uniform in
height and distance from the gauge. Height above the gauge should not exceed about twice their distance from
the gauge.
ANEROID BAROMETERS - SELF-CONTAINED MECHANICAL INSTRUMENTS AND
ELECTRONIC REMOTE BAROMETRIC PRESSURE SENSORS:
Select a site where the instrument will not be subject to rapid fluctuations of temperature or to jarring and
continuous vibration. Avoid exposing the instrument to direct sunlight or radiant heaters and to direct drafts
such as open windows and doors.
Reference 1:
U.S. Department of Commerce - National Weather Service Bulletin
LS 5927 Revised, 0-4.12, January, 1963.
SOLAR RADIATION SENSORS:
The Solar Radiation Sensor is normally mounted on a level surface totally remote from trees, poles, or power
lines that might cast a shadow on the sensor at any time of the day. However, there may be occasions, because
of extreme latitudes, when it is desired to mount the sensor at some angle other than level.
The sensors may also be mounted on a sun tracking mechanism or behind a shadow band if diffuse sky
radiation is to be measured.
WIND DIRECTION & SPEED SENSORS
INSTALLATION
These instructions apply to roof-top installation. We advise that you first read over these instructions before
beginning assembly as several referenced items are not supplied with your weather equipment (this is because
most every installation is unique thus these parts are best obtained by the installer). Reference to the "U-Tube
Cross-Bar Installation" figure and ".Sensor Installation" figure may be helpful.
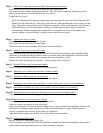
Step 1: Attach the three anemometer cups to the speed sensor head.
Loosen the three set screws on the top of the anemometer (lower unit).
Insert the anemometer cup arms into the holes. Be sure to press the arms all the way in and make
sure that the flat areas on the arms face toward the set screws.
Tighten the set screws.


