


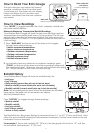
Your Wireless Rain Gauge has a temperature alert feature. When
either the indoor or outdoor temperature exceeds the high or low
pre-set limits, an alarm will sound for five seconds, repeating every
minute. An alert and arrow icons will also flash to indicate the
temperature has reached the high or low limit.
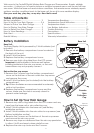
Disconnected Signals
If the receiver unit does not receive a transmission from a remote channel for 1 hour, the
display will show dashes. To correct this problem:
1. Check that the rain gauge collection cup is properly positioned, within the appropriate
transmission range. Transmissions are vastly affected by building materials and where the
base unit and rain collection cup are positioned. Try various set ups for the best results.
Shorten the distance between base unit and rain collection cup units when necessary.
2. Check to make sure the transmission path is clear of obstacles and interference.
3. If new batteries are faulty on the initial installation, install fresh batteries. Low Battery Icon
will warn you if the base unit or rain cup collector batteries have lost their charge. Replace
the batteries when necessary.
4. Press RE-SYNC on the back of the base unit to send a transmission signal to the base unit.
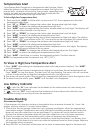
1. Press after setting the temperature alert limits (see previous section). The
icon will appear.
2. An alarm will sound when a temperature is higher or lower than the set temperature limit.
Press “ALERT” to stop the alarm. The alert icon will stop flashing. The arrow icon will continue
to flash to indicate the set high/low temperature limit is too high or low.
3. The alarm will sound again if the set high/low temperature falls back within the high/low limit.
4. To deactivate the alarm, press “ALERT” until the alert icon disappears.
“ALERT” “ALERT”
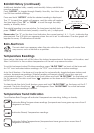
A “ “ with the “IN” icon indicates the batteries on the indoor base unit are running low
and should soon be replaced.
A “ “ with the “OUT” icon indicates the batteries on the outdoor rain collection cup
sensor are running low and should soon be replaced.
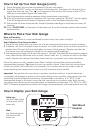
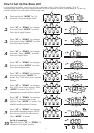
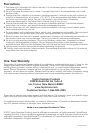
To Set a High/Low Temperature Alert:
1. Press and hold “ALERT” until the alert, up arrow and “IN” icons appear and the alert
temperature digits flash.
2. Press “UP” or “DOWN” to change the indoor alert temperature high limit digits.
3. Press “ALERT” to select the displayed temperature high limit.
4. Press “ALERT” again to begin setting the indoor temperature low limit digits. The display will
show a down arrow instead of an up arrow.
5. Press “UP” or “DOWN” to change the indoor alert temperature low limit digits.
6. Press “ALERT” to select the displayed temperature low limit.
7. Press “ALERT” again to begin setting the outdoor temperature high limit digits. The display
will show an “OUT” icon instead of an “IN” icon and an up arrow instead of a down arrow.
8. Press “UP” or “DOWN” to change the outdoor alert temperature high limit digits.
9. Press “ALERT” to select the displayed temperature high limit.
10. Press “ALERT” again to begin setting the outdoor temperature low limit digits. The display
will show a down arrow instead of an up arrow.
11. Press “UP” or “DOWN” to change the outdoor alert temperature low limit digits.
12. Press “ALERT” to select the displayed temperature low limit.
13. Press “ALERT” a final time to confirm the temperature limits. The limits are set.
NOTE: The temperature limit increments are 1.8°F (1.0°C).
Temperature Alert
To View a High/Low Temperature Alert
Low Battery Indicator
Trouble-Shooting
7