


OPERATION
Intended use:
This log splitter is intended and designed to only split wood. NEVER use
for any other purposes. Doing so can cause injury or VOID THE WARRANTY.
ASSEMBLY INSTRUCTIONS
This log splitter has been partially assembled at the factory. Refer to the drawings and part
lists should it become necessary to disassemble the unit for repair or replacement of parts.
Inspect all components for damage.
WARNING:
Exercise extreme caution, as parts are very heavy. Sufficient persons or
mechanical handling equipment should be used.
IMPORTANT:
This unit is shipped with oil but without gasoline in the engine. After
assembly, see separate Engine Manual for proper fuel and oil recommendations.
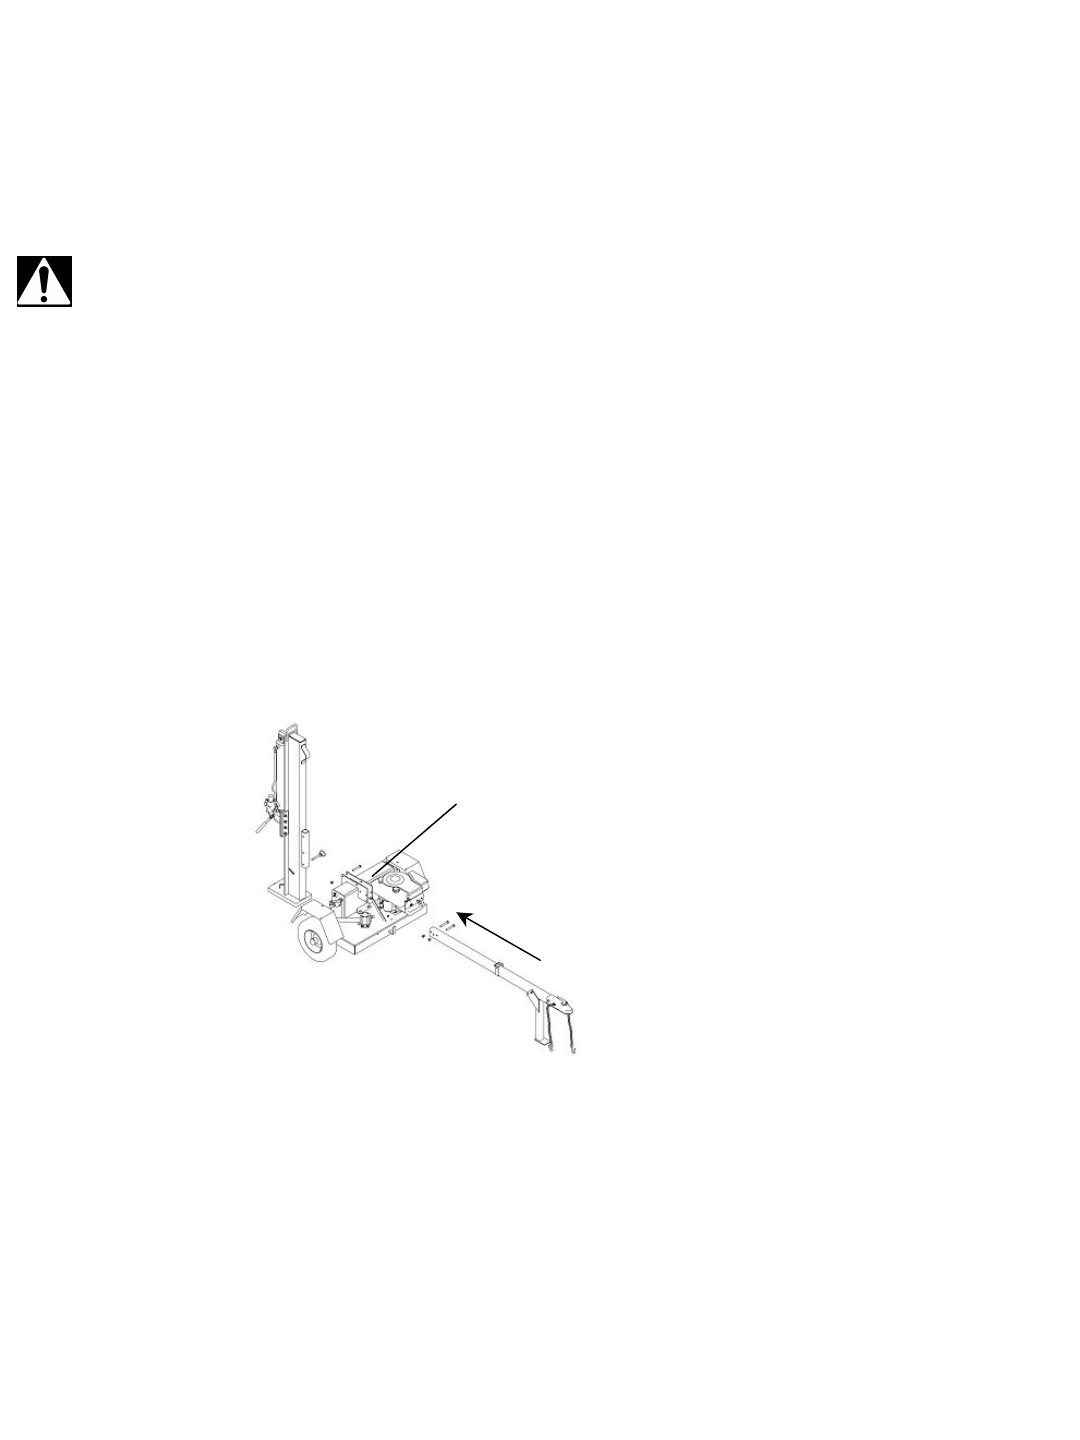
1. General Assembly: Remove top, sides and ends of crate. Place crate panels aside
to avoid puncturing tires. Remove tongue assembly from top.
2. Carefully set the beam pre-assembly aside.
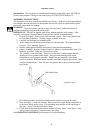
3. Attach tongue to tank/mount plates using two bolts and nuts. Be certain hardware
is secure. (See Assembly Figure 1)
4. Remove tank/engine assembly from base of crate and discard banding.
5. Fender Assembly: Remove fenders from box. Mount to fender brackets with 5/16
hardware provided. Make sure fender clears wheel.
6. The cylinder is tied to the base. Remove ties and slide cylinder/wedge forward
aligning clevis at cylinder end to beam. Insert pin and retaining clips, check
component to assure proper assembly. Stand beam pre-assembly vertical and
secure in position. Roll tank/engine assembly into place, aligning pivot holes. Bolt
with provided hardware. Note: Do not over tighten; this is the vertical/horizontal
pivot point.
7. Pivot beam assembly into the horizontal position and lock with pin provided.
8. Hose Assembly: Locate the Pressure Hose, noted by the pipe fittings, and attach it
to the lower fitting on the valve. The remaining hose attaches to the top fitting of
the valve. Secure with provided hose clamp.
9. Check both the horizontal and vertical positions for any “kinks” in the hoses. Note:
Always make sure beam is locked securely into place.
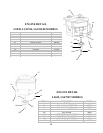
See
OPERATING POSITIONS
for Horizontal to Vertical Splitting
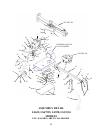
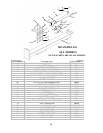
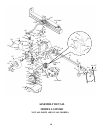
Assembly Figure 1
Tank/Mount Plates
6