


6
IMPORTANT! - READ THIS MANUAL BEFORE OPERATING MOWER
Be sure to check your new Swisher Riding Mower for shipping damage before beginning assembly.
These parts are packaged with your new mower.
The following tools are needed for assembling your new Swisher Riding Mower:
- Steering Wheel - includes one (1) 1/4-20 x 1/2 bolt, washer and cap plug
- Seat - includes two (2) 3/8 - 16 x 3/4 bolts, washers, nuts
- Grass Chute ( for non-mulching mowers) with bolt, nut and spring
- Wheels
- Cotter Pins
Safety Glasses
1/2” box wrench
2 - 7/16” box wrenches
7/16” socket and ratchet
5/32” hex key wrench
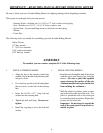
ASSEMBLY
To assemble your new mower, complete ALL of the following steps.
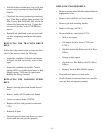
Align the key in the steering wheel hub
with the slot in the end of the steering shaft
and press down.
Use a hex key wrench to install and tighten
the set screws on the side of the steering
hub.
Insert the 1/4-20 x 1/2” long bolt and
washer into the steering hub.
Tighten the bolt until snug. Do not over-
tighten
Install the cap plug to cover the bolt and
washer.
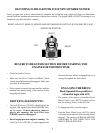
1. INSTALL STEERING WHEEL
•
•
•
•
•
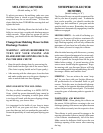
Insert the axle through the hub of the wheel
with the valve stem facing away from the
mower. (Be sure to place the supplied
spacers between the surface of the axle
weldment and the hub to prevent the tire
from rubbing the weldment.)
With the wheel in position, insert a cotter
pin in the hole on the end of the axle. Use
pliers to spread the ends of the cotter pin
to retain the wheel in position. Repeat this
process for the other side.
Important - Do not forget to spread the
ends of the cotter pins to keep wheel as-
sembly in place.
1. INSTALLING THE WHEELS