ENGLISH
GB GB
IMPORTANT
For the instructions relative to the engine and
the battery, please read the relevant instruction
handbooks.
Equipment which is marked with an asterisk (*)
comes as standard in certain models or countries.
Certain models do not have throttle control. The
engine’s speed is set for optimal function and min-
imal exhaust emissions.
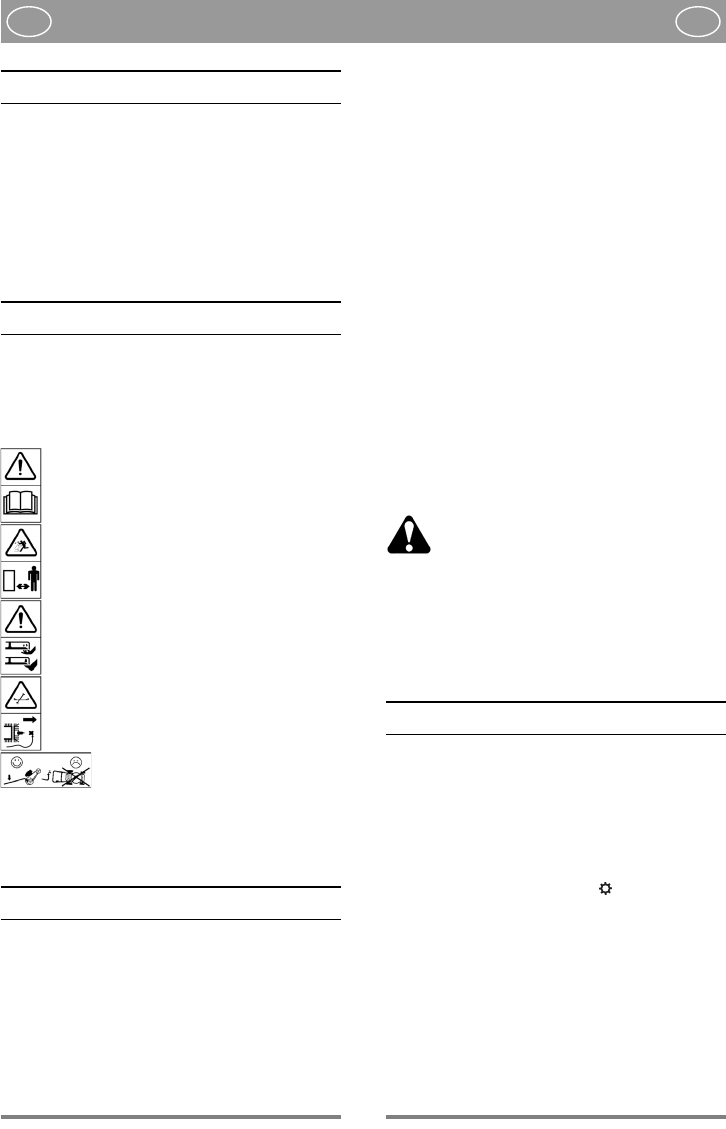
SYMBOLS
The following symbols can be found on the
machine to remind you of the care and attention
that are required during use.
The symbols mean:
Important: Read the instruction handbook
before using the
Warning! Keep onlookers away. Beware of
objects being flung out.
Warning! Keep hands and feet clear of the
cutting deck when the machine is running.
Warning! Before starting any repair work,
remove the spark plug cable from the spark
plug.
Warning! Always tilt the lawnmower
backwards when cleaning the
underside. Petrol and oil can run out
if the lawnmower is tilted in the other direction.
INSTALLATION
HANDLE/BUMPER (*)
Press in the end plugs in the openings on the han-
dle. Place the handle on the cover so that the holes
in the handle are aligned with the holes in the cover.
Thread through the carriage bolts from underneath
and secure with the locking nuts U. Press on the
nut caps V (fig 1).
HANDLE, LOWER PART
Fold back and screw tight the lower part of the
handle using the screws A (fig. 2).
HANDLE, UPPER PART
Fit the upper part of the handlebar (fig. 3). The
height of the handlebar above the ground can be
adjusted within certain limits since the lower part is
provided with slotted holes at the rear (fig. 4).
If necessary the upper part can be turned to one
side to facilitate mowing close up to walls (fig. 5).
CABLE HOLDER
Secure the cables in the cable holders (fig. 6):
D: Start/Stop cable + Throttle cable (*)
E: Clutch cable (*) + Electric cable (*)
BATTERY (*)
The electrolyte in the battery is toxic and
corrosive. It can cause serious corrosion
damage etc. Avoid all contact with skin,
eyes and clothing.
Before starting for the first time the battery should
be charged for 24 hours, see further information
under the heading MAINTENANCE, BATTERY.
Insert ignition key (*) into the ignition lock.
USING THE MOWER
STARTING THE ENGINE
1. Place the lawnmower on flat, firm ground. Do
not start in long grass.
2. Make sure the spark plug cable is connected to
the spark plug.
3. Set the clutch control M to (fig. 7).
4. Press in the Start/Stop loop G towards the han-
dle. NOTE! The Start/Stop loop G must be kept
pressed in to prevent the engine stopping (fig.
8).
5a Manual start: Grasp the starter handle and start
the engine by pulling briskly on the starter cord.
5b Electric start (K*): Start the engine by turning
the ignition key clockwise. Release the key as
soon as the engine starts. Always make short
33


