


11
ENGLISH
GB
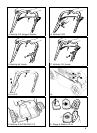
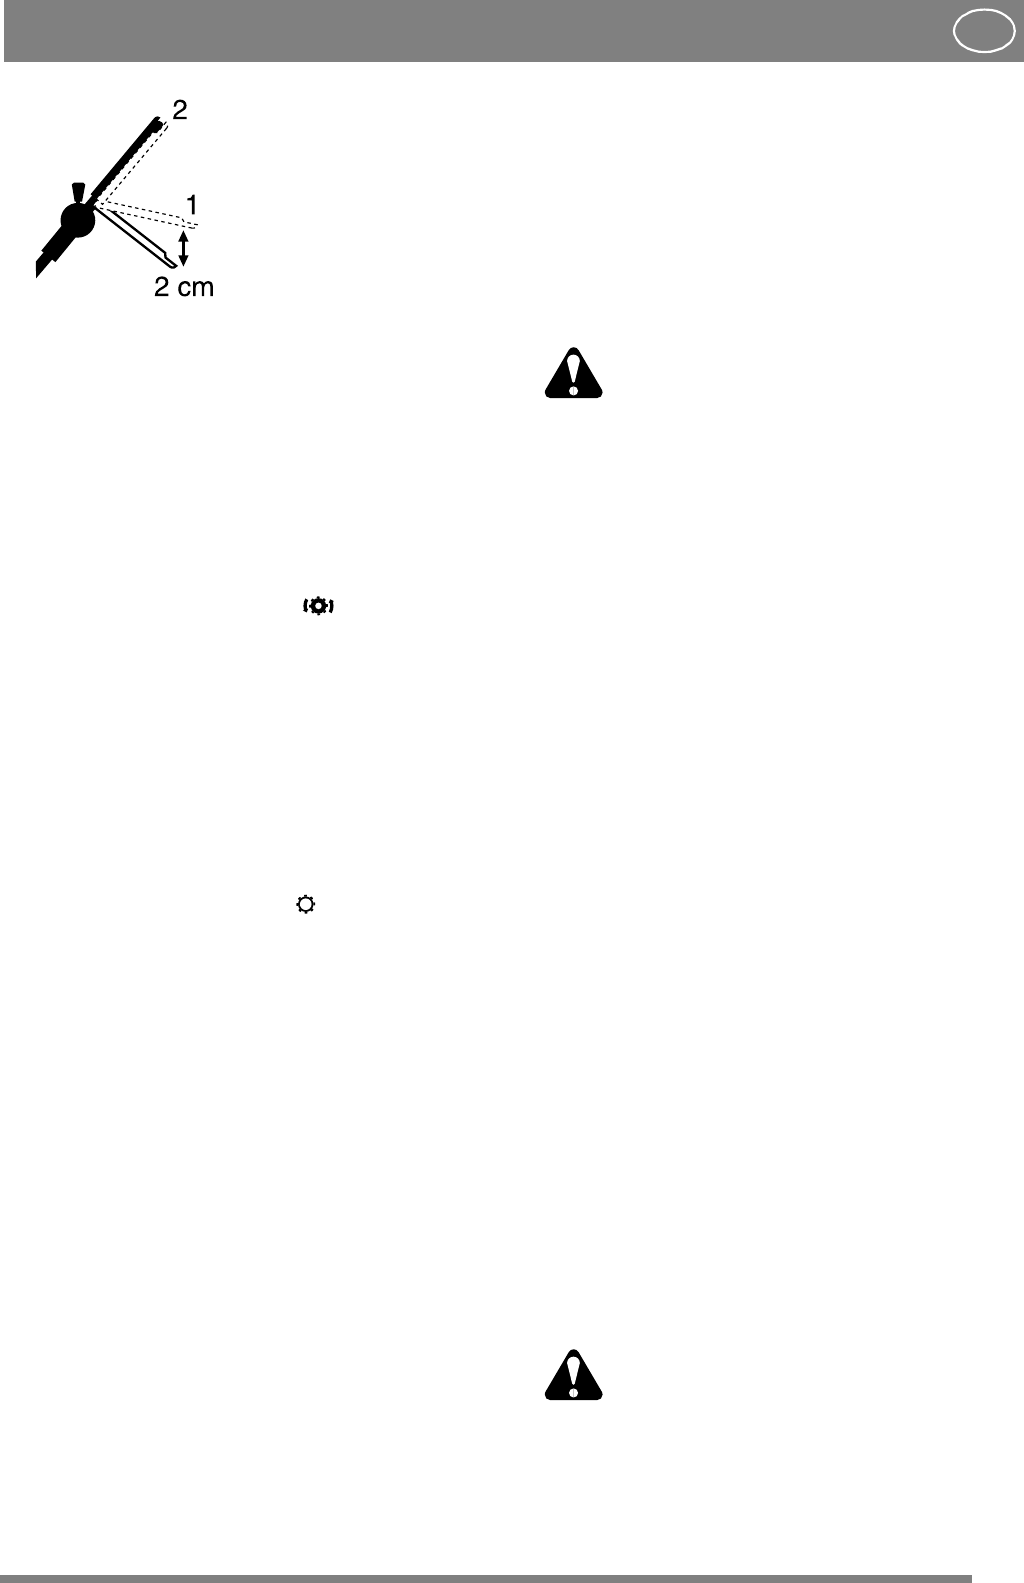
2. When the clutch loop is
pressed in approx. 2 cm
(position 1), there should
be some resistance when
moving the lawn mower.
With the clutch loop fully
pressed in (position 2, it
should not be possible to
move the mower. Unscrew
the nipple T until this posi-
tion is achieved.
ADJUSTING THE CLUTCH CABLE
(PRO 51S)
Control the clutch function (fig. 26):
1. Push the mower forwards and backwards with
disengaged transmission.
2. Set the clutch control to the position and
push the mover until the front wheels engage.
3. In this position the spring H should then be ex-
tended 6 mm from it's unloaded position to give
a sufficent lockforce in the transmission.
4. If the spring is not extended enough, adjust the
wire nipple I at the handlebar.
5. First loosen the lock nut S and then adjust the
nipple I.
6. Set the clutch control to the position and con-
trol that the transmission is disengaged by roll-
ing the mower to and fro.
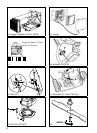
ADJUSTING DRIVE BELT
(Multiclip 51S, 51SE, PRO 51S)
Check the belt tension regularly. The drive belt is
correctly adjusted when the shoulder bolt K is cen-
tered in the front hole of the engine bracket
(fig. 27).
Incorrect belt tension can bring about abnormal vi-
brations in the steering (the belt is tensioned too
tightly) or the belt can start to slide (the belt is not
tensioned enough).
Adjust the drive belt like this: Stop the engine and
remove the ignition cable from the spark plug. Dis-
mantle the transmission casing. Loosen the screw
L Pull the transmission forwards so that the belt is
tightened and tighten the screw L. The drive belt
must be adjusted so that the shoulder bolt K cent-
ers in the front hole of the engine assembly ring.
SHOCK-ABSORBER
(PRO 48, PRO 51S)
The forward shock-absorber P (fig. 28) takes up a
greater load. Check the shock-absorber twice per
season. If the shock-absorber shows signs of dam-
age or wear it should be replaced.
CHANGING BLADES
Useprotectiveglovestopreventcuts
when changing blades/knifeblades.
Blunt and damaged blades tear off the grass and
spoil the look of the lawn after mowing.New, well
sharpened blades cut the grass cleanly, so that the
lawn looks green and fresh even after mowing.
Always check the blade after an impact. First dis-
connect the ignition cable. If the blade system has
been damaged the defective parts must be
changed. Always use genuine spare parts.
To replace the blade, slacken the screw (fig. 29).
Fit the new blade so that the stamped STIGA log-
otype is turned facing the blade attachment (and
not facing the grass). Refit the washer and screw.
Tighten the screw fully to a torque of 40 Nm.
When replacing the blade, the blade screw should
also be replaced.
The guarantee does not cover damage to the blade,
blade holder or engine caused by running into ob-
stacles.
When replacing the blade, the blade holder and
blade screw, always use genuine spare parts. Non-
genuine spare parts could lead to the risk of per-
sonal injury or damage, even if they fit the ma-
chine.
SHARPENING OF THE BLADES
Sharpening of the blades must be done by wet
method grinding, using a whetstone or a grind-
stone.
For the sake of safety, the blades should not be
sharpenedonanemerywheel.Averyhightemper-
ature could cause the blade to become brittle.
Once the blade has been sharpened, it
must then be balanced so as to avoid vi-
bration damage.