


ENGLISH
GB
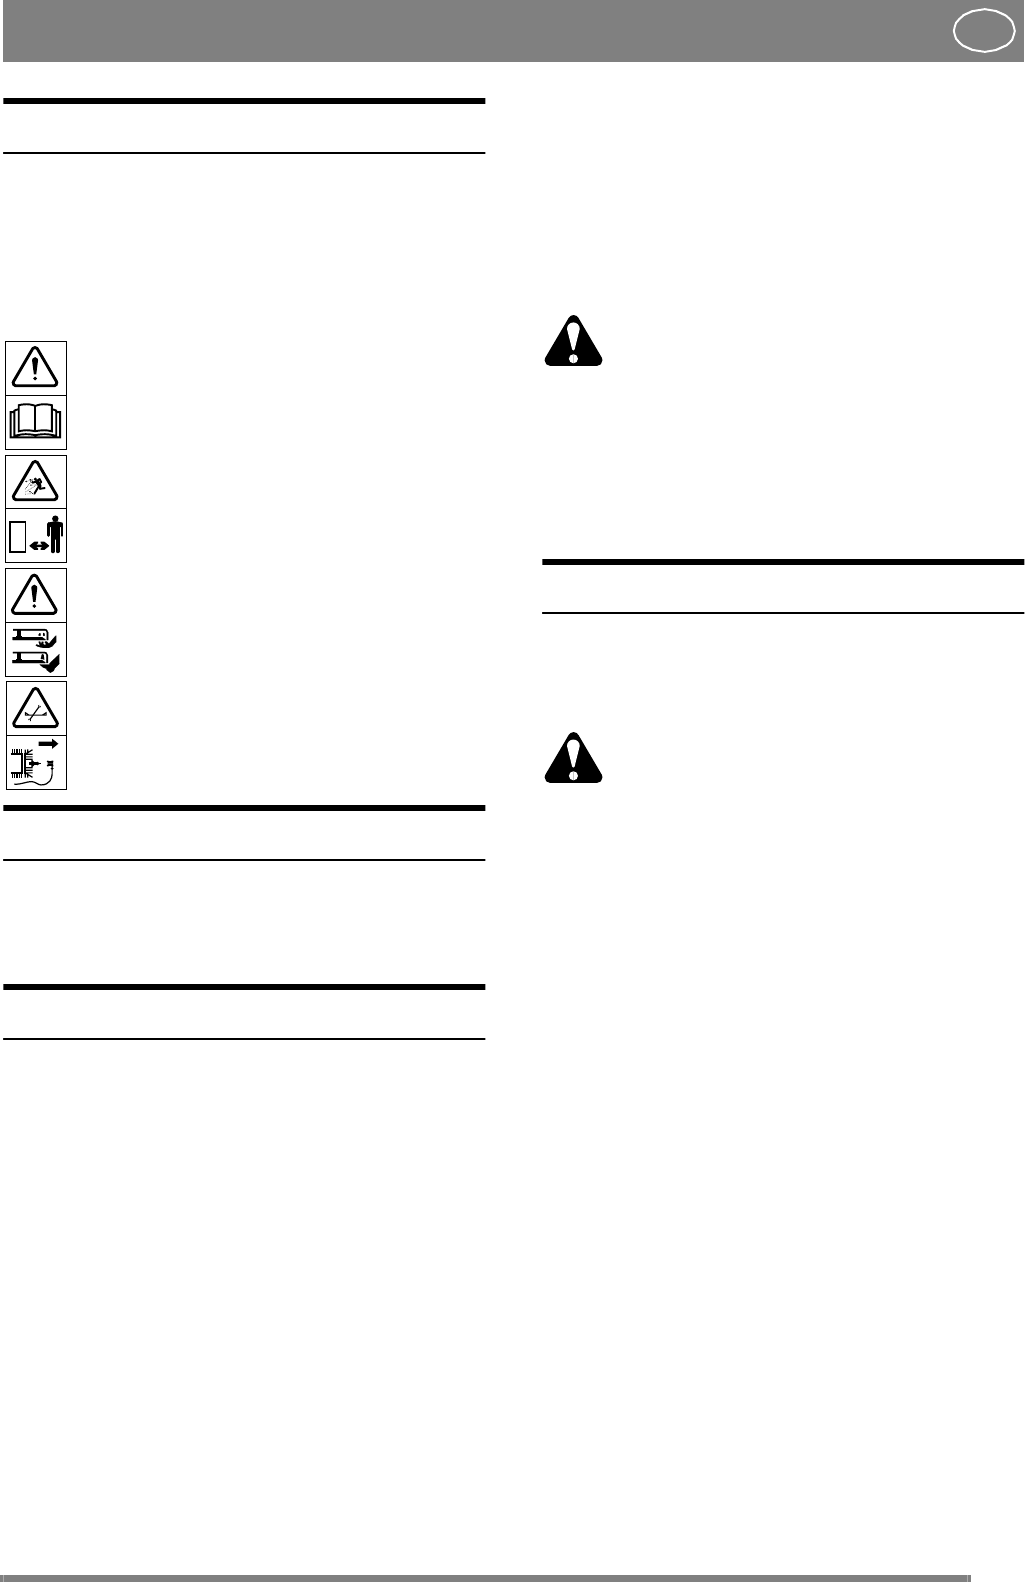
SYMBOLS
The following symbols are displayed on the ma-
chine in order to remind you about the safety pre-
cautions and attention necessary when using the
machine.
The symbols mean:
Warning! Read the Instruction Book and
Safety Manual before using the machine.
Warning! Keep spectators away. Beware
of objects being flung out.
Warning! Do not put hands or feet under
the cover of the machine when it is run-
ning.
Warning! Before starting any repair work,
remove the spark plug cable from the
spark plugs.
IMPORTANT
Certain models do not have a throttle. The motor
speed is set for optimal function and minimal ex-
haust emissions.
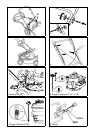
ASSEMBLING
HANDLEBAR
Lift the upper part of the handlebar and position it
behind the machine. Move the lower part of the
handlebar upwards and tighten the locking knobs
A (fig. 1).
Then fit the upper part of the handlebar. A securing
eye for the starting handle is fitted on the right-
hand side (fig. 2).
Storage position: Slacken the locking knobs on the
lower part of the handlebar and move it forwards.
Then slacken the locking knobs on the upper part
of the handlebar and move it backwards (fig. 3).
Note that you must check to make sure that the
wires do not fasten and break when the steering han-
dle is moved upwards or into the storage position.
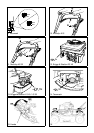
CONTROLS
Fit the wires and electric cable (only Multiclip 46
SE) in the cable retainer E (fig. 4). Secure the start-
er handle in the eyelet F on the right-hand side of
the steering handle.
BATTERY (Multiclip 46 SE)
Electrolyte in the battery is toxic and
corrosive. It can cause serious corrosion
damage etc. Avoid all contact with skin,
eyes and clothing.
Before starting the mower the first time, you
should charge the battery for 24 hours. Refer also
to the section titled 'MAINTENANCE, BAT-
TERY'.
USING THE MOWER
BEFORE STARTING
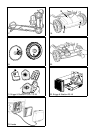
FILL THE CRANKCASE WITH OIL
The lawn mower is delivered without
any oil in the motor crankcase. The
crankcase must, therefore, be filled with
oil before the motor is started the first
time.
1. Remove the oil dipstick (fig. 6,7,8,9).
2. Fill the engine's crankcase with 0.6 litres of
good quality oil (service class SE, SF or SG)
Use SAE 30 or SAE 10W-30 oil.
3. Fill until the oil reaches the “FULL/MAX”
mark on the dip stick. Do not fill with too much
oil.
CHECKING THE OIL LEVEL
Check before using the machine that the oil level is
between “FULL/MAX” and “ADD/MIN” on the
dipstick.
Briggs & Stratton, Honda: Remove and dry the
dipstick (fig. 6,7,8). Slide it down completely and
tighten it. Unscrew and pull it up again. Read-off.
If the oil level is low, fill with oil up to the “FULL/
MAX” mark.
Tecumseh: Clean the area round the oil plug, then
remove the plug (fig. 9). If the oil is not level with
the edge of the hole, carefully pour in clean oil. Re-
place the oil plug.