


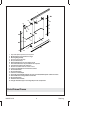
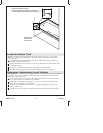
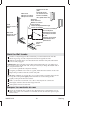
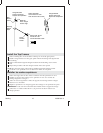
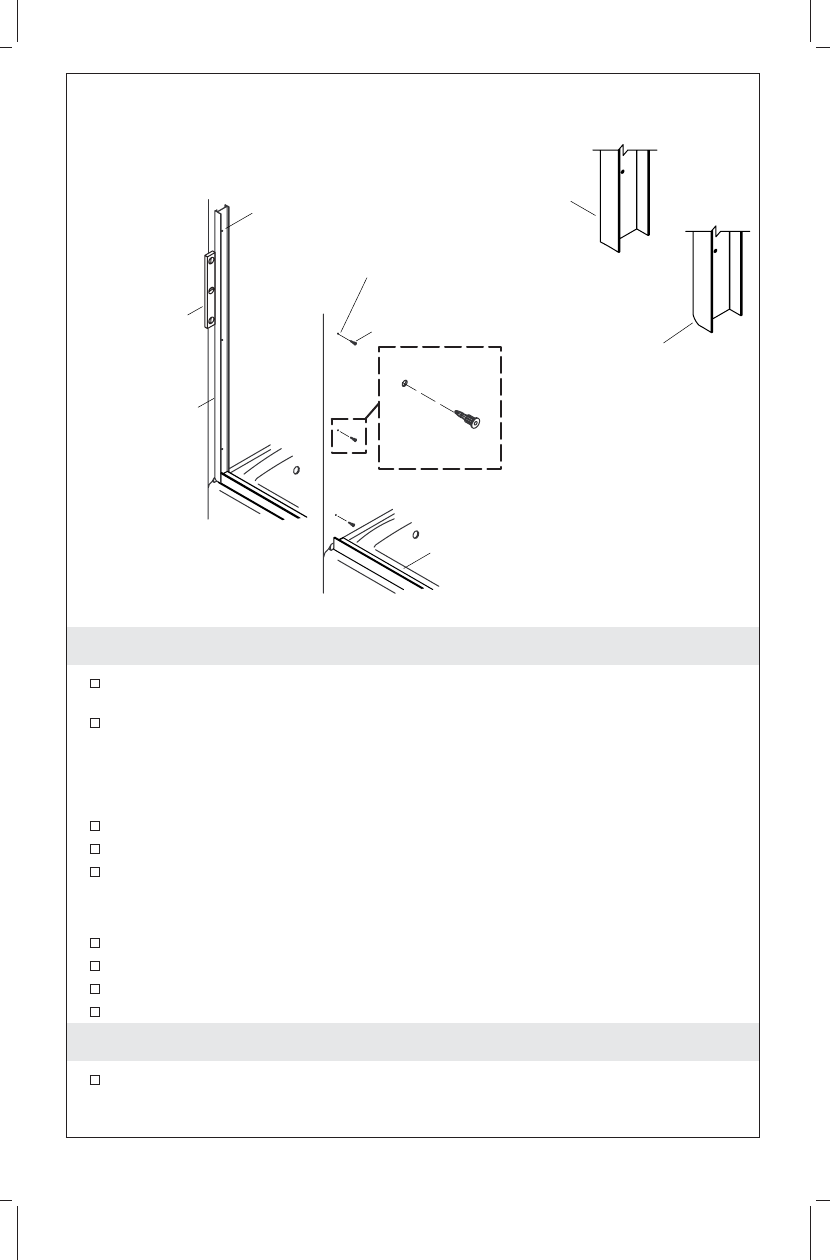
Mark the Wall Jambs
Position a wall jamb against the wall directly over the bottom track with the
shorter leg facing out. The wall jamb should sit flat against the wall.
Slide the wall jamb down over the bottom track until the wall jamb and bottom
track are fully engaged.
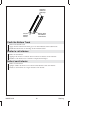
IMPORTANT! The wall jamb must sit flat on the bottom ledge. If your ledge has a
curve in the corners at the side wall, it may be necessary to shape the bottom end of
the wall jamb with a file.
Use a level to plumb the wall jamb vertically.
Using the pre-drilled screw holes as a guide, mark the hole locations on the wall.
Repeat the procedures with the second wall jamb.
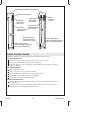
NOTE: When installing on ceramic tile, use a center punch to nick the surface of the
glaze. Tap the center punch lightly with a hammer to avoid cracking the tile.
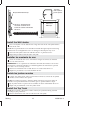
Lightly center punch the hole locations.
Drill a 5/16″ hole at each mark. Use a tile or masonry bit for ceramic tile.
Thoroughly clean the shower floor ledge and wall.
Insert plastic anchors in each hole.
Marquer les montants du mur
Placer un montant du mur contre le mur directement sur le rail inférieur avec le
pied le plus court vers l’extérieur. Le montant du mur devrait bien reposer à plat
contre le mur.
Level
Niveau à bulle
Nivel
Wall Jamb
Montant du mur
Jamba mural
Threshold
Seuil
Umbral
Square end of wall
jamb
Extrémité carrée
du montant du mur
Extremo cuadrado
de la jamba mural
Contoured (rounded)
end of wall jamb
Extrémité contournée
(arrondie) du montant
du mur
Extremo contorneado
(redondeado) de la
jamba mural
Mark holes.
Marquer les orifices.
Marque los orificios.
Drill holes.
Percer des trous.
Taladre los orificios.
Insert anchors.
Insérer les dispositifs d'ancrage
Inserte los anclajes.
1067873-2-A 10 Sterling