


9
Section 3 - MAINTENANCE
3.1 INTRODUCTION
To retain the quality of the mower, use genuine
SNAPPER replacement parts only. Contact a local
SNAPPER dealer for parts and service assistance.
For the correct part or information for a particular
mower, always mention model and serial number.
3.2 SERVICE - AFTER FIRST 5 HOURS
3.2.1. CHANGE ENGINE OIL
WARNING
DO NOT attempt any adjustments, maintenance or
service with the engine or blade running. STOP
blade. STOP engine. Remove spark plug wire from
spark plug and secure wire away from spark plug.
Engine and components can be extremely hot. Avoid
burns by allowing engine and components sufficient
time to cool. Wear heavy leather gloves when
handling or working around cutting blades. Blades
are extremely sharp and can cause severe injury.
1. Disconnect spark plug wire and secure end away
from plug. The items needed to perform oil change
are: cloth rags, (1) 3/8” drive ratchet with a short
extension and (1) shallow pan.
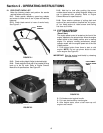
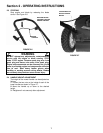
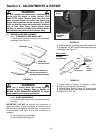
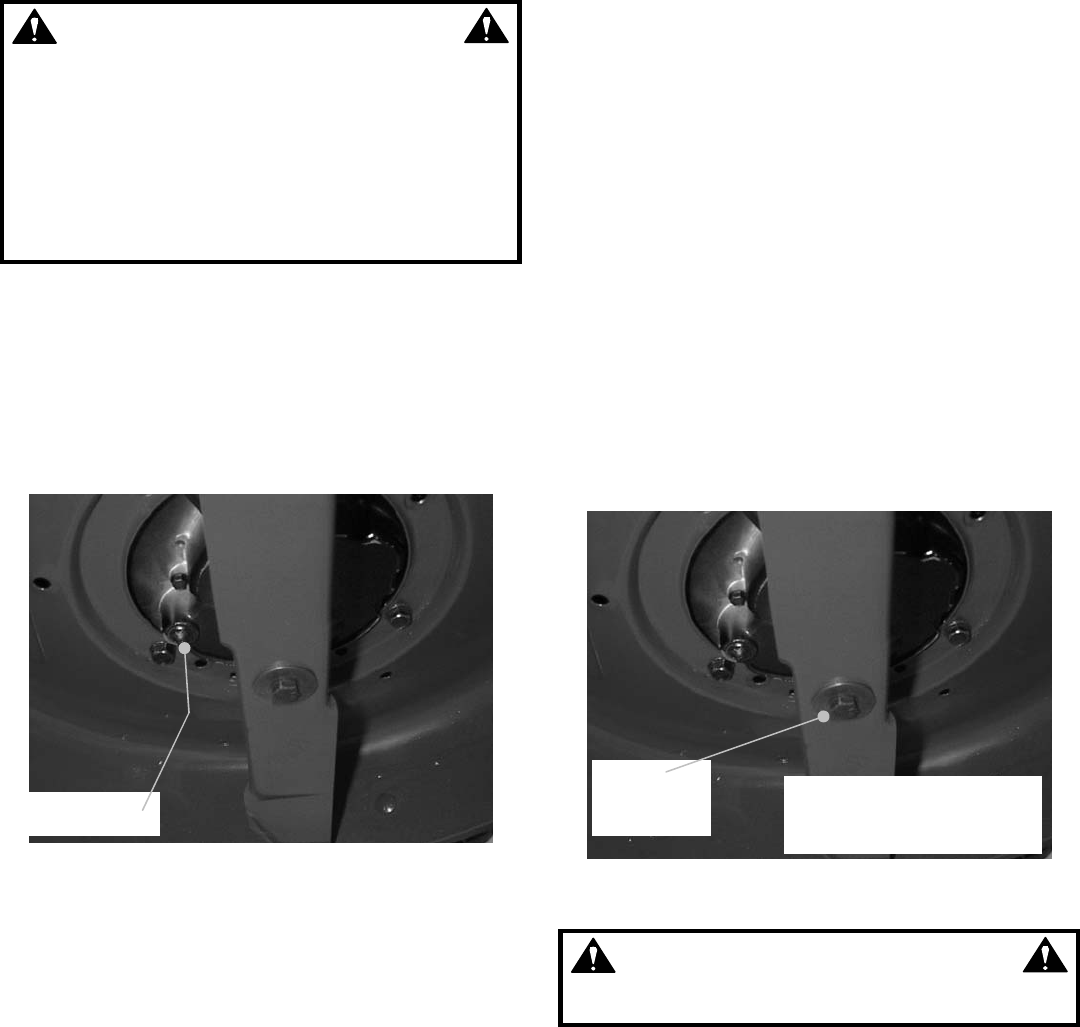
2. Tilt mower up on its rear wheels for access to
the oil drain plug located underneath the mower
deck. Do not tilt mower with spark plug or
carburetor down. See Figure 3.1.
FIGURE 3.1
3. Place shallow pan underneath the approximate
center of the oil drain plug.
4. Loosen with ratchet and short extension, but do
not remove oil drain plug. Loosen plug until you can
turn it with your fingers.
5. Lower the mower down and place the piece of
wood under left rear wheel. Reach under mower
and remove drain plug and allow oil to drain out
completely in pan. Some oil may spill onto hands,
immediately wipe hands clean with cloth rags.
6. Tilt mower back up and replace drain plug.
Tighten securely but do not over tighten.
7. Fill engine with oil as specified in Engine
Owner’s Manual. Thereafter, change oil after each
25 hours of use.
8. Check air cleaner and perform air filter
maintenance as specified in the Engine Owner’s
Manual.
IMPORTANT: DO NOT tip machine with carburetor or
spark plug down, oil from crank case will saturate the air
filter and cause the engine to be hard to start or not start
at all. If contamination does occur, the air filter will have to
be replaced.
3.2.2 CHECK MOWER BLADE
1. Disconnect spark plug wire and secure end away
from plug.
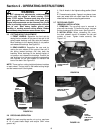
2. Tilt mower up on its rear wheels for access to
the blade cap screw. Do not tilt mower with spark
plug or carburetor down. See Figure 3.2.
3. Check torque of blade retaining cap screw.
Recommended torque should be 30 to 40 ft. lbs.
See Figure 3.2.
4. Check blade for sharpness, wear and damage. See
Section on Blade Wear Limits.
FIGURE 3.2
WARNING
To avoid spilling fuel, empty engine gas tank before
tilting mower.
BLADE
RETAINING
SCREW
CHECK TORQUE OF BLADE
RETAINING SCREW.TORQUE
TO 30 TO 40 FT. LBS.
DRAIN PLUG