


2
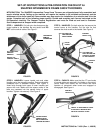
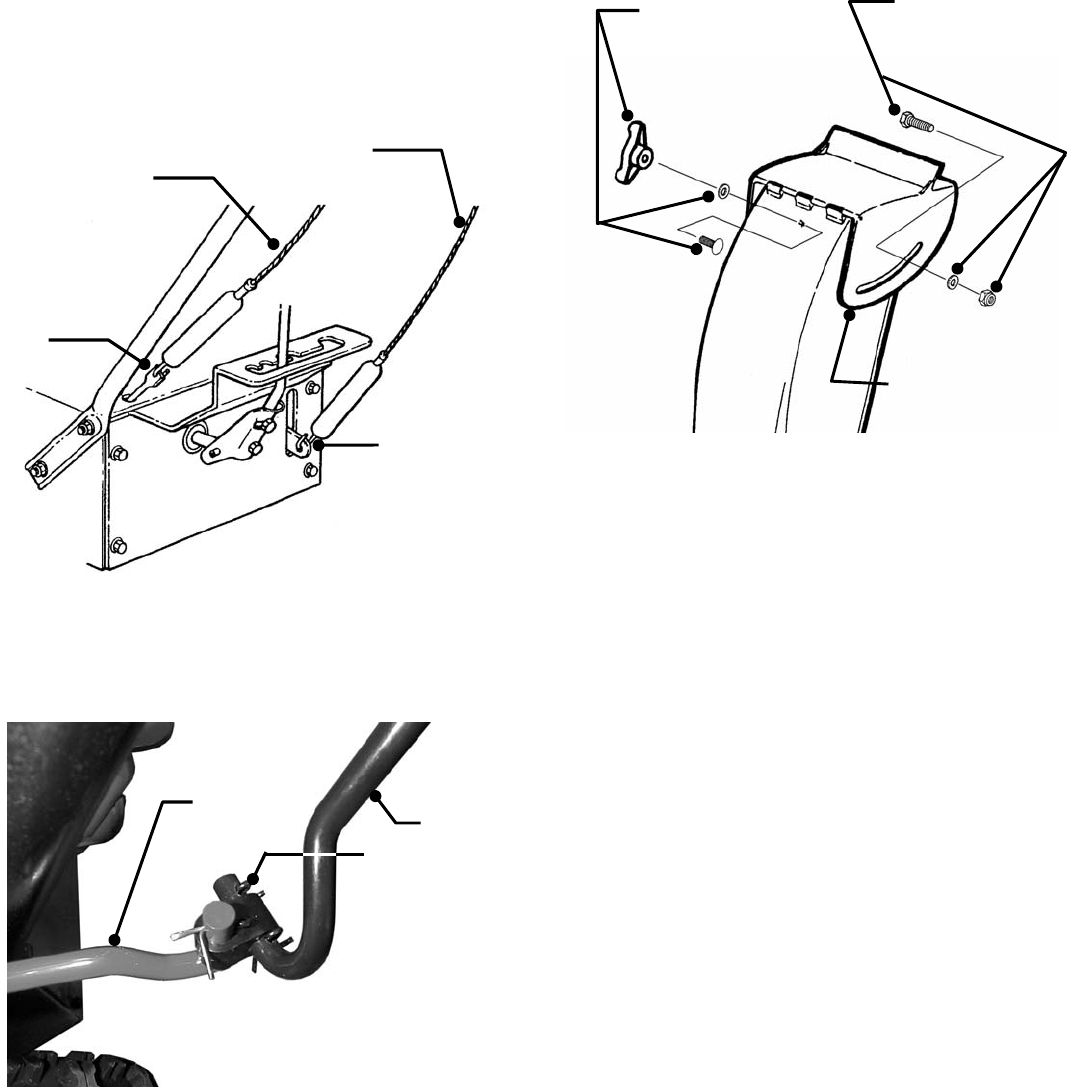
STEP 5: CABLES: Make sure that the cables are
connected to the traction clutch rod and blower clutch
bracket. IMPORTANT: Cables should have some slack
and should not be under tension. See Figure 5.
FIGURE 5
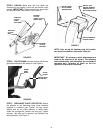
STEP 6: CHUTE CRANK: Connect chute crank to worm
gear shaft and secure with cotter pin. See Figure 6.
FIGURE 6
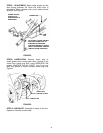
STEP 7: DISCHARGE CHUTE DEFLECTOR: Secure
the deflector to the discharge chute using hardware
supplied in hardware bag. Tighten the cap screw,
washer and nut but allow deflector to rotate freely.
Install the carriage bolt, washer and wing nut. Tighten
securely. Use wing nut to securely lock deflector into
desired position. See Figure 7.
FIGURE 7
NOTE: After set-up the hardware bag will contain:
two shear bolts and two nuts and a cotter pin.
IMPORTANT: All necessary initial adjustments are
made to the machine at the factory. The following
cable adjustments and lubrication are provided for
reference only. Complete all items on the Pre-
Operation Checklist as instructed.
BLOWER
CLUTCH
CABLE
(RIGHT SIDE)
TRACTION
CLUTCH
CABLE
(LEFT SIDE)
TRACTION
CLUTCH
ROD
BLOWER
CLUTCH
BRACKET
CHUTE
CRANK
SECURE WITH
COTTER PIN
WORM
GEAR
SHAFT
INSTALL WING
NUT, WASHER
AND WING NUT
DEFLECTOR MUST
ROTATE FREELY
INSTALL CAP
SCREW, WASHER
AND NUT BUT DO
NOT OVER TIGHTEN