


Snapper 2400 PSI Pressure Washer
5
IMPORTANT: Read entire owner’s manual before you
attempt to assemble or operate your new pressure washer.
REMOVE PRESSURE
WASHER FROM
CARTON
• Remove the parts bag included with pressure washer.
• Slice two corners at the end of carton from top to
bottom so the panel can be folded down flat, then
remove all packing material.
• Remove pressure washer from carton.
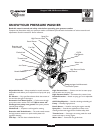
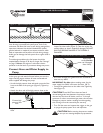
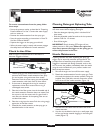
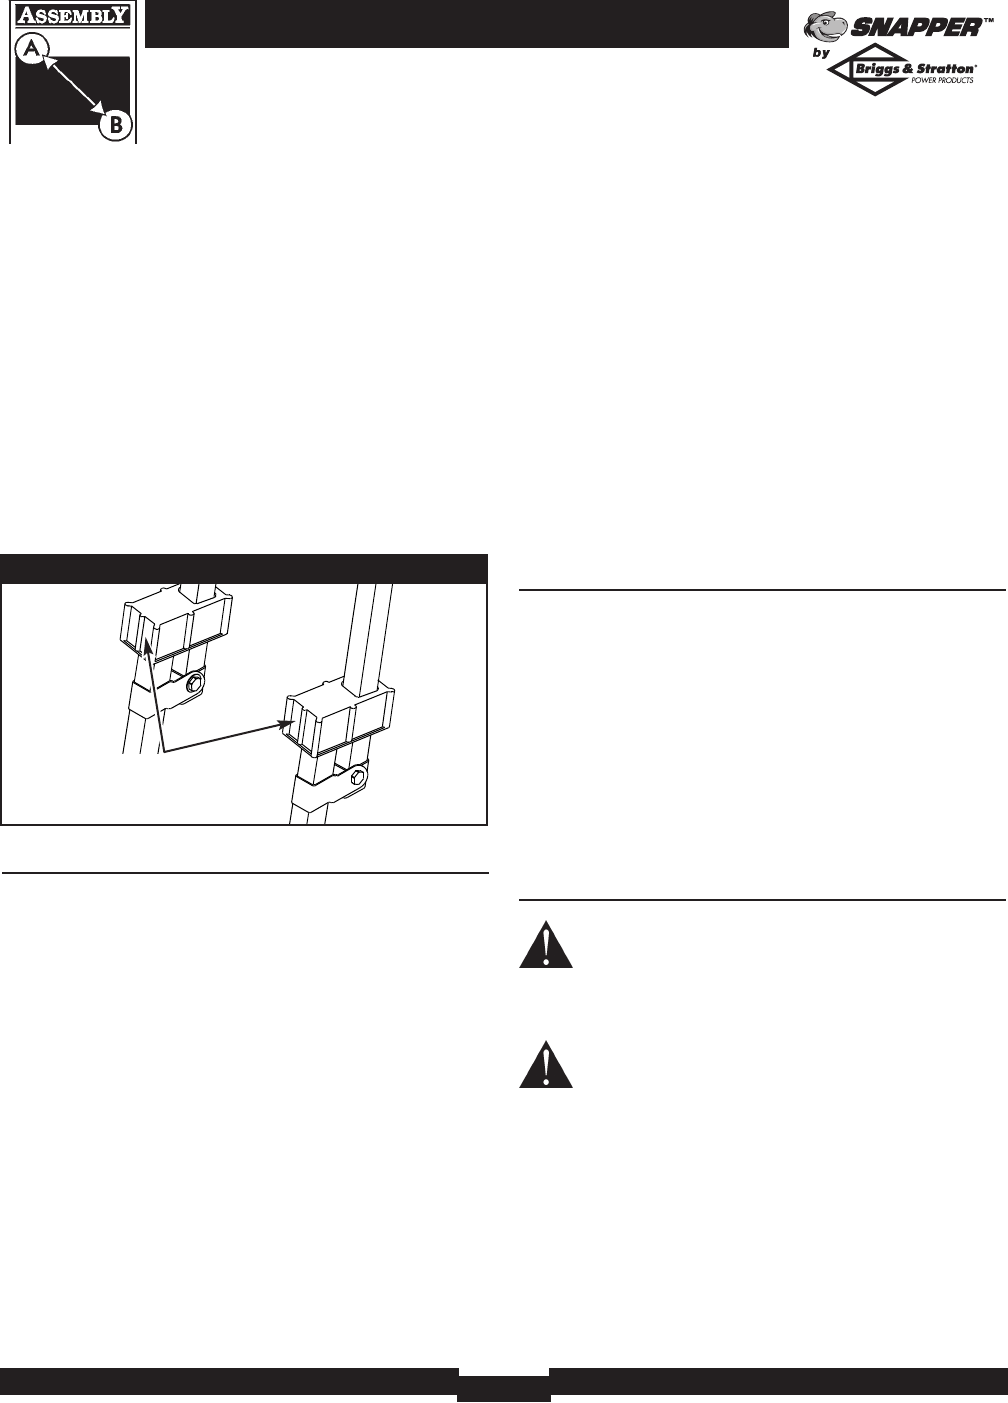
• Raise guide handle, secure in place (Figure 1).
Carton Contents
Check all contents. If any parts are missing or damaged,
contact the local Snapper service center.
• Main unit
• Engine Oil
• Safety Goggles
• High Pressure Hose
• Spray Gun
• Nozzle Extension
• Extension with Turbo Nozzle
• Parts bag (which includes items listed below)
Owner’s manual
Engine Manual
Nozzle Cleaning Kit
O-Ring Maintenance Kit
Owner's Registration Card
PREPARING PRESSURE
WASHER FOR USE
To prepare your pressure washer for operation, you
will need to perform these tasks:
• Fill out and send in registration card.
• Add oil to the engine crankcase.
• Add fuel to the fuel tank.
• Connect the high pressure hose to the spray gun and the
pump.
• Connect the water supply to the pump.
• Attach nozzle extension to spray gun.
Add Engine Oil
IMPORTANT: Any attempt to crank or start the engine
before it has been properly serviced with the
recommended oil may result in an engine failure.
• Place pressure washer on a level surface.
• Refer to engine owners manual to add recommended oil
to engine.
NOTE: Check Oil Often During Engine Break–in.
NOTE: The pump is pre-lubricated and sealed, requiring
no additional lubrication for the life of the pump.
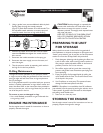
Add Gasoline
WARNING! Never fill fuel tank indoors. Never
fill fuel tank when engine is running or hot.Allow unit
to cool for two minutes before refueling. Do Not
light a cigarette or smoke when filling the fuel tank.
WARNING! Do Not overfill the fuel tank.
Always allow room for fuel expansion.
• Use regular UNLEADED gasoline with the pressure
washer engine. Do Not use premium gasoline. Do Not
mix oil with gasoline.
• Clean area around fuel fill cap, remove cap.
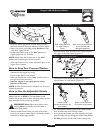
• Slowly add "UNLEADED" regular gasoline to fuel tank.
Use a funnel to prevent spillage. Slowly fill tank to about
1.5" below the bottom of the filler neck (Figure 2).
• Install fuel cap and wipe up any spilled gasoline.
Lift the handle to upright
position and slide the
locking caps into place
Figure 1 - Secure Handle